
Frontend User Dashboard
Building & Configuring the CubeWP User Dashboard
| Platform | WordPress + Elementor + CubeWP |
| Feature | Frontend User Dashboard |
| Tools | CubeWP User Dashboard Builder + Elementor Shortcode |
| Scope | Dashboard tab creation, content types, page setup, and shortcode integration |
1. Overview
This guide explains how to build and configure the Frontend User Dashboard using the ListingPro Thema and CubeWP plugin in WordPress. The dashboard is a frontend interface accessible to logged-in users, displaying personalized content organized across multiple tabs. Each tab shows specific content types such as announcements, events, appointments, coupons, leads, reviews, inbox messages, and user listings.
2. Accessing the Dashboard Builder
2.1 Navigating to the Dashboard Builder
- Log in to the WordPress backend (admin panel).
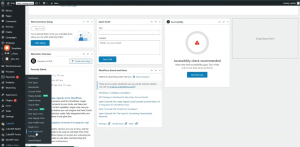
- In the left menu, navigate to CubeWP.
- Click on the User Dashboard.
3. Configuring Dashboard Tabs
3.1 Understanding the Tab System
The frontend user dashboard is organized using a tab-based navigation system. Each tab represents a distinct content category visible to the user on the frontend. Tabs are configured individually in the dashboard builder.
3.2 Adding a New Tab
For each tab you want to add to the dashboard, perform the following steps:
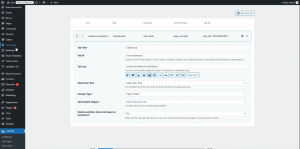
- Click Add New in the User Dashboard configuration screen.
- Enter a Tab Name (e.g., Dashboard, Announcements, Events, Appointments, Coupons, Inbox).
- Set a unique Tab ID string — this identifier is used internally for referencing the tab.
- Select an Icon for the tab from the icon selector (e.g., a calendar icon for Events).
- Configure the User Role setting to control which users see this tab. If no role is selected, the tab is displayed to all users by default.
- Select the Content Type for the tab — either Page Content or Post Types.
3.3 Content Type Options
Page Content
Select this option when you want to display the content of a specific WordPress page inside the tab:
- Choose Page Content as the content type.
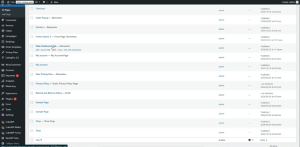
- In the page selector, choose the page you want to display (e.g., a page named Main Dashboard).
- That page’s content will render inside this tab on the frontend.
Post Types
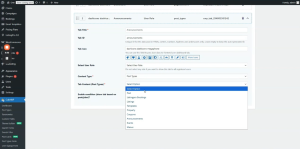
Select this option when the tab should display a list of posts from a specific post type. Available post types include:
- Announcements – Displays official announcements made by the admin.
- Events – Displays event listings assigned to the user.
- Appointments – Displays booking records (e.g., ListingPro Booking post type).
- Coupons – Displays coupon posts associated with the user.
- Leads – Displays leads received through the CubeWP form on single listing pages.
- Reviews – Displays user-submitted reviews from single listing pages.
- Listings (My Listings) – Displays all listings belonging to the logged-in user.
ℹ️ Note: When selecting Post Types, choose the appropriate post type from the available list (e.g., select announcements for the Announcements tab, or ListingPro Booking for the Appointments tab).
3.4 Plan-Based Content (Conditional Display)
Certain tabs support a plan-based display condition. When this feature is enabled:
- The tab content is only shown to users who have an active plan.
- If a user has not subscribed to a plan or added a listing through a plan, the content will not appear.
- To disable plan-based display: locate the plan-based setting for the tab, set it to No, and save.
ℹ️ Note: If announcements are not showing for a user, check whether the plan-based condition is enabled. If this user (or admin) has not added a listing through a plan, the announcement will be hidden. Setting the option to No makes the content visible to all users regardless of plan status.
3.5 Enabling the Conditional Setting
The conditional setting allows you to apply display rules to a tab based on the user’s active plan. This is useful for gating premium content behind subscription plans. To enable it:
- Find the Conditional option within the tab configuration.
- Toggle it to Enabled.
- Configure the plan conditions as required by your business logic.
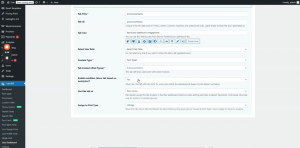
3.6 Example Tab Configuration
The following table shows a recommended tab setup for a typical listing directory dashboard:
| Tab Name | Tab ID / Icon | Content Type | Notes |
| Dashboard | main / dashboard icon | Page Content | Displays stats graph |
| Announcements | announcements icon | Post Types → Announcements | Can be plan-based |
| Events | calendar icon | Post Types → Events | Shows user events |
| Appointments | booking icon | Post Types → ListingPro Booking | No booking = blank tab |
| Coupons | coupon icon | Post Types → Coupons | Displays coupon ads |
| Inbox | inbox icon | Post Types → Messages | Tracks all messages |
| Leads | leads icon | Post Types → Leads | From CubeWP form submissions |
| Reviews | star icon | Post Types → Reviews | User-submitted reviews |
| My Listings | listing icon | Post Types → Listings | All listings by this user |
4. Saving the Dashboard and Copying the Shortcode
- After configuring all tabs, click Save in the dashboard builder.
- Once saved, the system generates a unique shortcode for this dashboard configuration.
- Copy the generated shortcode to your clipboard — you will paste it into a WordPress page.
5. Creating the Dashboard Page
5.1 Adding a New Page
- In the WordPress Dashboard, go to Pages and click Add New.
- Give the page a descriptive name (e.g., User Dashboard).
- Publish or save the page as a draft.
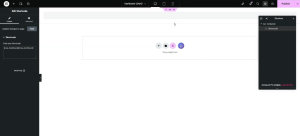
5.2 Editing the Page with Elementor
- After saving, click Edit with Elementor to open the page editor.
- In the Page settings, set the Page Layout to Elementor Canvas — this provides a clean, header-free layout ideal for dashboards. Alternatively, select Full Width if preferred.
- Add a new Container element to the page.
- Set the container’s padding and margin — 30px is recommended as the default spacing.
- Inside the container, add a Shortcode widget.
- Paste the dashboard shortcode copied from the User Dashboard builder into the shortcode field.
- Click the Publish button in Elementor to save and deploy the page.
ℹ️ Note: The dashboard page is now active. Navigate to this page on the frontend while logged in as a user to verify that all configured tabs appear and display their content correctly.
6. Main Dashboard Tab: Content and Graph Widget
6.1 Dashboard Stats Overview
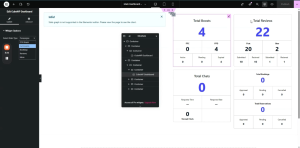
The main Dashboard tab typically displays a summary of the user’s activity. The recommended layout includes:
- A stats section on the right side showing: Total Listings, Total Reviews, Total Chats, Total Bookings.
- A graph/chart widget on the left side displaying historical data trends.
6.2 Using the CubeWP Dashboard Widget
The graph element is provided by the CubeWP Frontend Pro plugin and uses a widget called CubeWP Dashboard. To use it:
- In Elementor, add a two-column container to the main Dashboard page.
- In the right column, add the stats/counter elements of boosts, reviews, bookings and Chats for listings using the CubeWP Dashboard widget.
- In the left column, add the CubeWP Dashboard widget from the Elementor widget library to show the graph.
- Configure the widget’s post type to match your primary post type (e.g., Listings).
7. Boosted Listings and Campaign Display
If a site admin or a specific author has boosted a listing, the active boost campaign for that listing will appear in the user’s dashboard. This is displayed automatically when boost data is associated with the user’s listings.
8. User Profile Form
The dashboard may include a User Profile tab or section where users can update their personal information. This is implemented by:
- Creating a dedicated Profile page that contains the user profile form.
- Adding that page as a tab in the dashboard builder using the Page Content content type.
- The form fields displayed include all mandatory user fields required for account updates (e.g., name, email, profile photo).
- Users must fill in required fields accurately for the system to update their account settings across the platform.
9. Verification and Testing
- Log in to the site frontend as a regular user (not admin).
- Navigate to the User Dashboard page.
- Verify that all configured tabs appear in the dashboard navigation.
- Click each tab to confirm the correct content is displayed.
- Test the Announcements tab — if plan-based, ensure only plan subscribers see it.
- Check the Events and Appointments tabs to confirm post data renders correctly.
- Test the Inbox and Leads tabs for incoming messages and form submissions.
- Verify the graph on the main Dashboard tab loads correctly.
ℹ️ Note: If any tab is missing from the frontend, refresh the browser. Tabs configured in the backend are synchronized to the frontend automatically after saving.
Here is the complete video tutorial