The following Payment Gateways are supported as of now:
- PayPal (Recurring Payment)
- Stripe with (Recurring Payment)
- 2Checkout
- Direct Payment/Wire Payment
For ADMIN: Enabling and Managing Gateways
PayPal Express
RECURRING PAYMENTS: YES
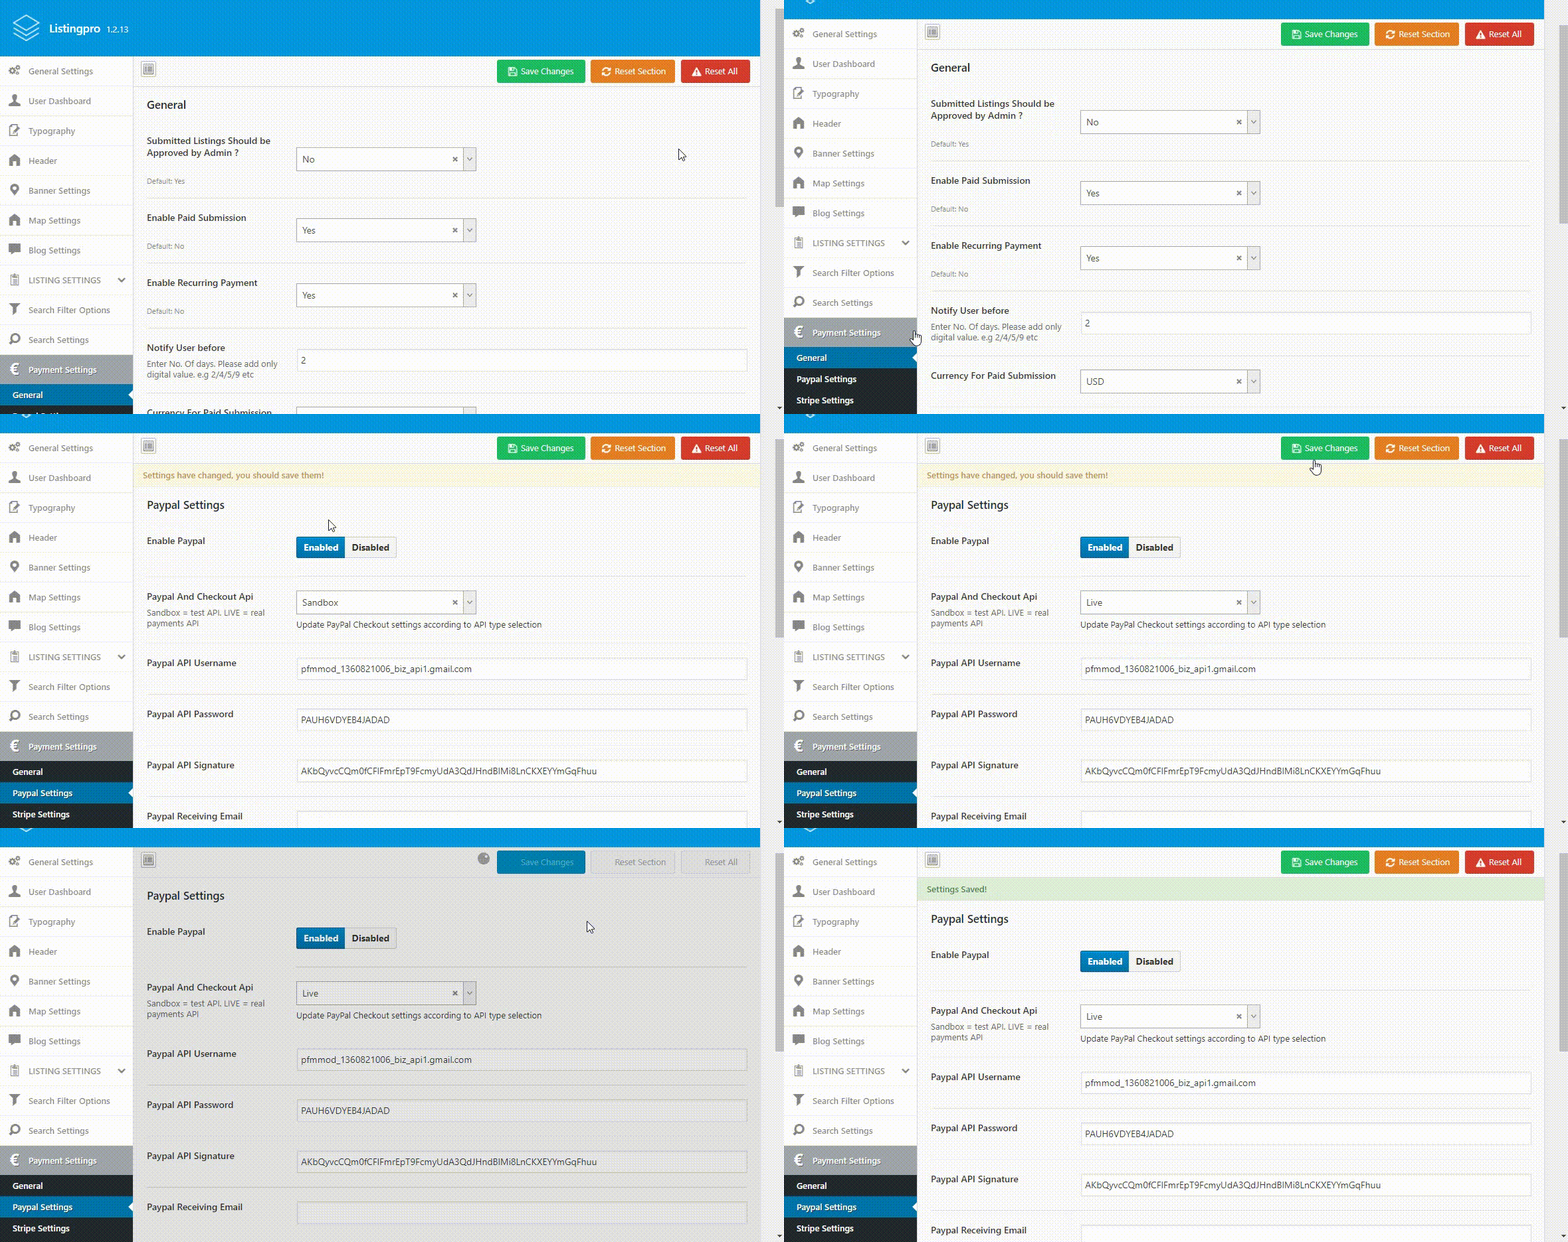
In this section, we will cover how to enable and manage PayPal from the backend.
Step 1: Go to Dashboard > Theme Options > Payment Settings > PayPal Settings
Step 2: In the PayPal settings page toggle the switch to Enable.
Step 3: Set the live mode from the Paypal And Checkout API option.
Step 4: Add your PayPal API Username, API Password, API Signature and Receiving Email.
For generating API keys please refer to the following article: Where to find the API Keys
Step 5: Click on the Save Changes button.

Stripe (Recurring Payment)
RECURRING PAYMENTS: YES
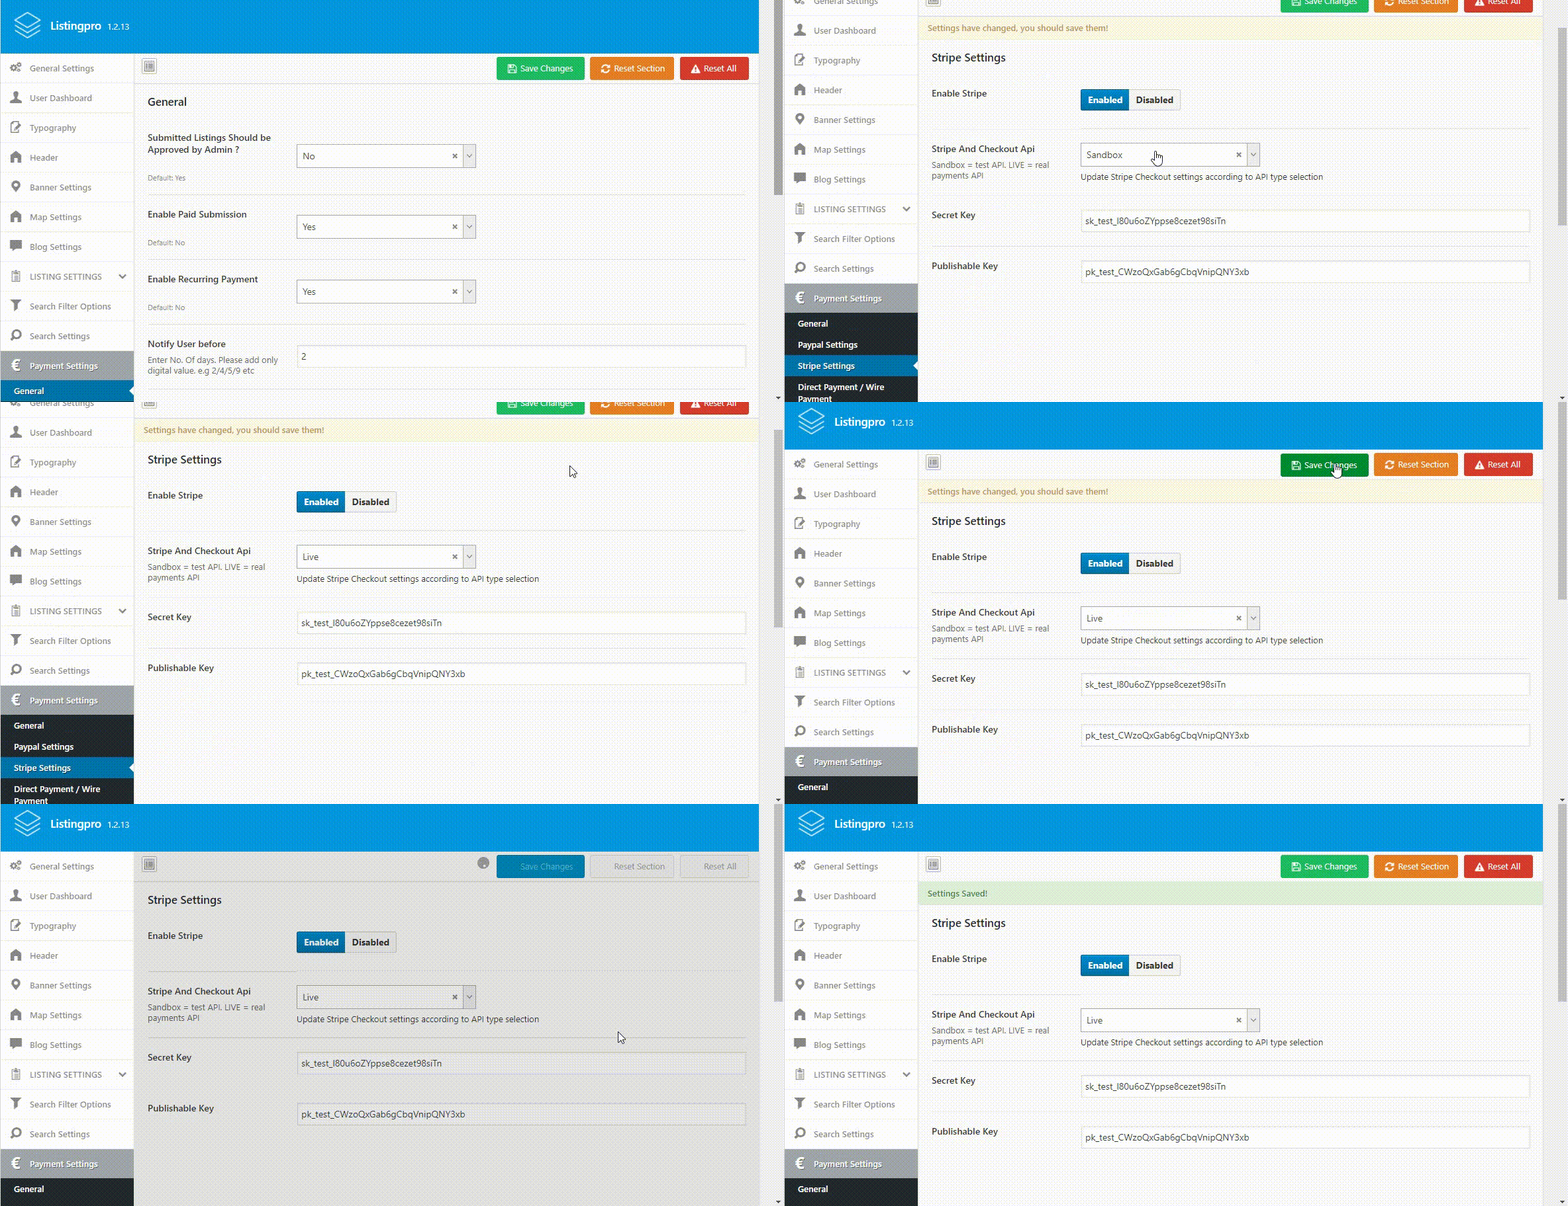
In this section, we will cover how to enable and manage Stripe from the backend.
Step 1: Go to Dashboard > Theme Options > Payment Settings > Stripe Settings
Step 2: In the Stripe settings page toggle the switch of Enable.
Step 3: Set the live mode from the Stripe And Checkout API option.
Step 4: Add your Stripe Secret Key and Publishable Key.
For generating API keys please refer to the following article: How to generate Stripe API Keys
Step 5: Click on the Save Changes button.

2Checkout
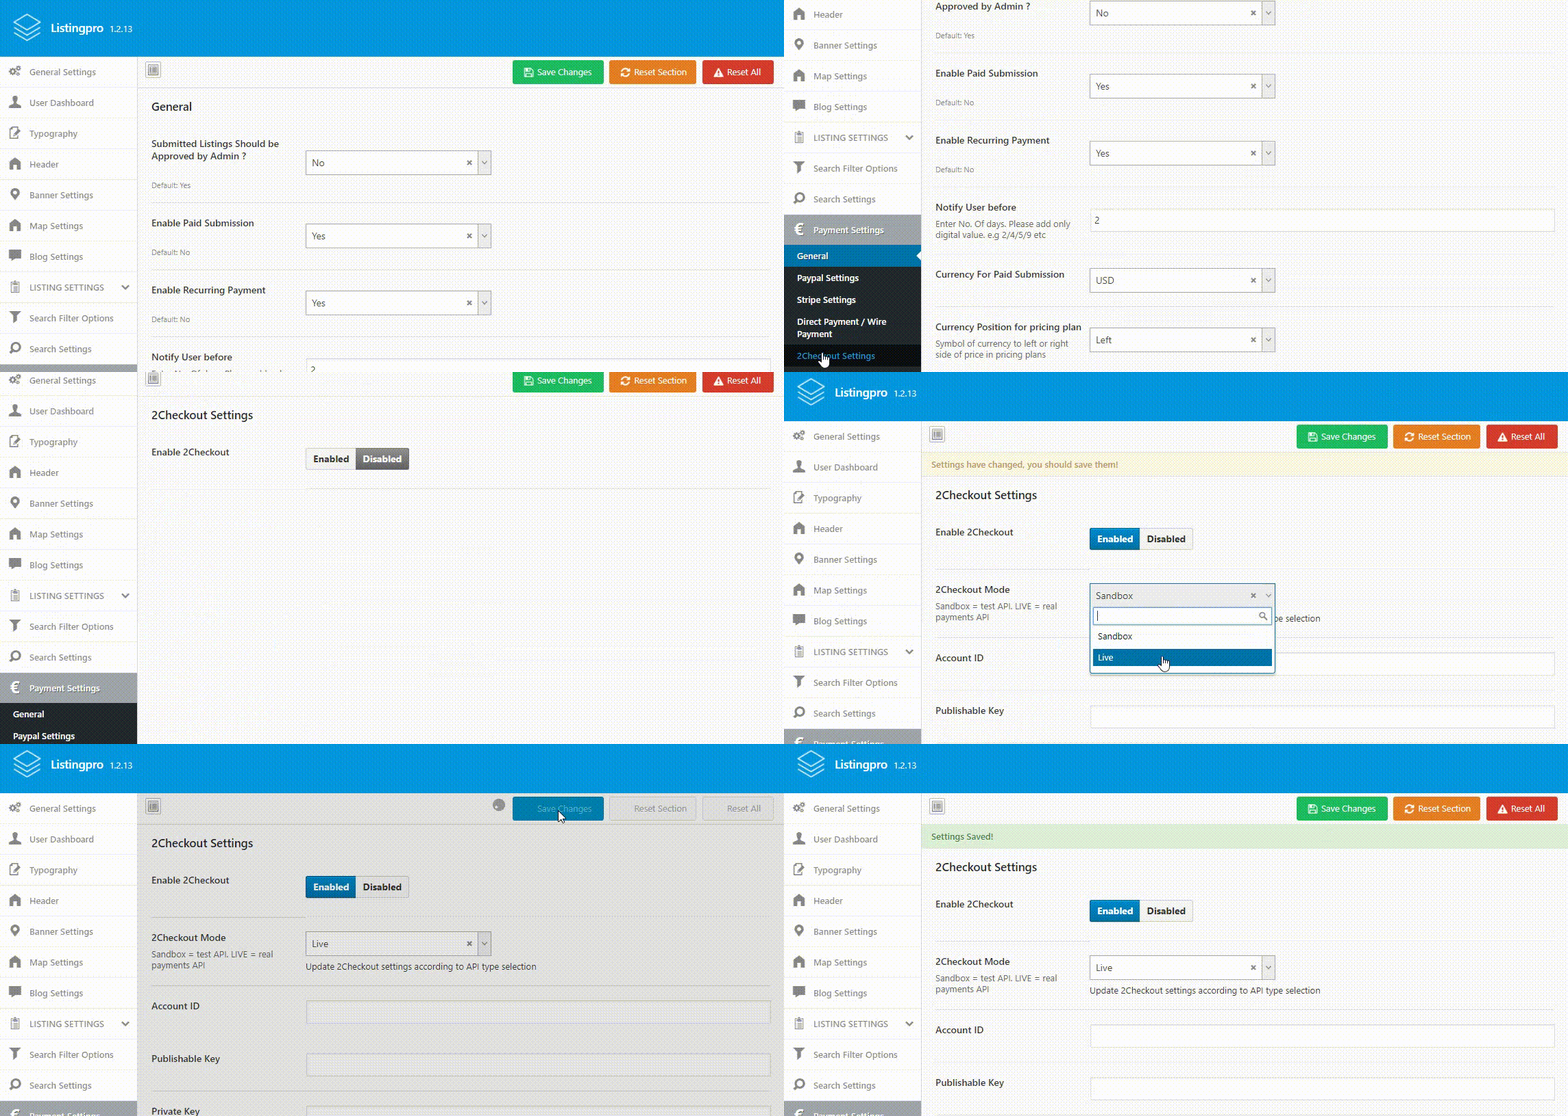
In this section, we will cover how to enable and manage 2checkout from the backend.
Step 1: Go to Dashboard > Theme Options > Payment Settings > 2checkout Settings
Step 2: In the 2checkout settings page toggle the switch of Enable.
Step 3: Set the live mode from the 2Checkout Mode option.
Step 4: Add your 2checkout Account ID, Publishable Key and Private Key.
For generating API keys please refer to the following article: Where to find the API Keys
Step 5: Click on the Save Changes button.

Direct Payment/Wire Payment
In this section, we will cover how to enable and manage Bank Wire Transfer from the backend.
Step 1: Go to Dashboard > Theme Options > Payment Settings > Direct Payment/Wire Payments
Step 2: In the Direct Payment/Wire Payment settings page toggle the switch of Enable.
Step 3: Enter Bank information inside of the Wire instructions for direct payment text box.
Step 4: Click on the Save Changes button.
