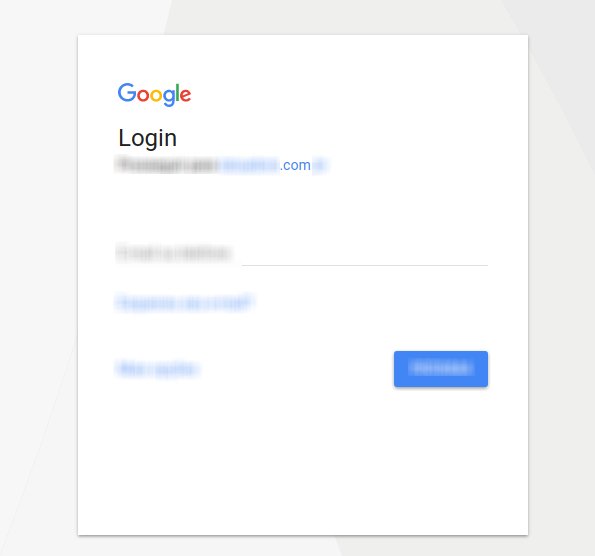
ListingPro is integrated with Nextend Social Login, which is a free WordPress plugin. Social login allows visitors and listing owners to login without having to enter username and password.
There are three social media platforms (Facebook, Twitter, and Google) that are integrated and ready to use for free in the ListingPro WordPress Directory Theme.
In order to find these settings, simply go to WordPress Dashboard > Settings > and find the respective name Nextend to configure the platforms you want to enable the registration and login.
Follow the step by step instructions on how to configure your Social Media Login APIs:
- How to configure Facebook Login Correctly?
- How to configure Twitter Login Correctly?
- How to configure Google Login Correctly?
Nextend Connect Plugin, you can create an easy and customizable way to interact with your users while signing up an account on your Website.
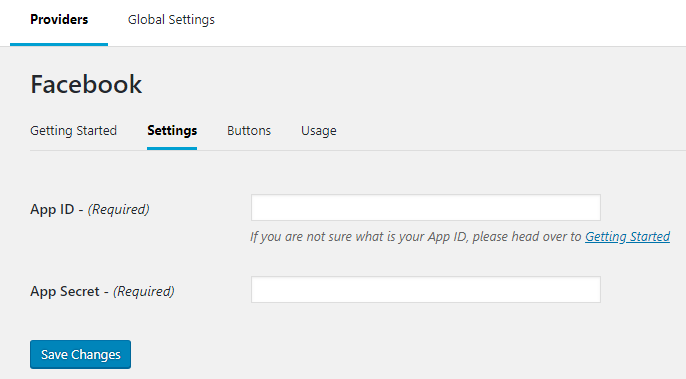
Each Social Media Application will be divided into 3 different plugins which allow you to insert APIs Keys, Secret Keys and IDs referring to the Social Media defined for users registration.
To find The Next Connect, go to your WordPress Dashboard > Settings and you’ll notice 3 separated sections to configure the Social Login Buttons.
Nextend FB Connect
We’ve seen that some users somehow get lost while setting up the configuration to properly work with Social Media Logins.
So, before we get started, remember that for this step you have to be fully working with SSL. If you haven’t configured it yet, it’s recommended to conclude this step and then follow the steps below.
First Let’s start with the Facebook Login
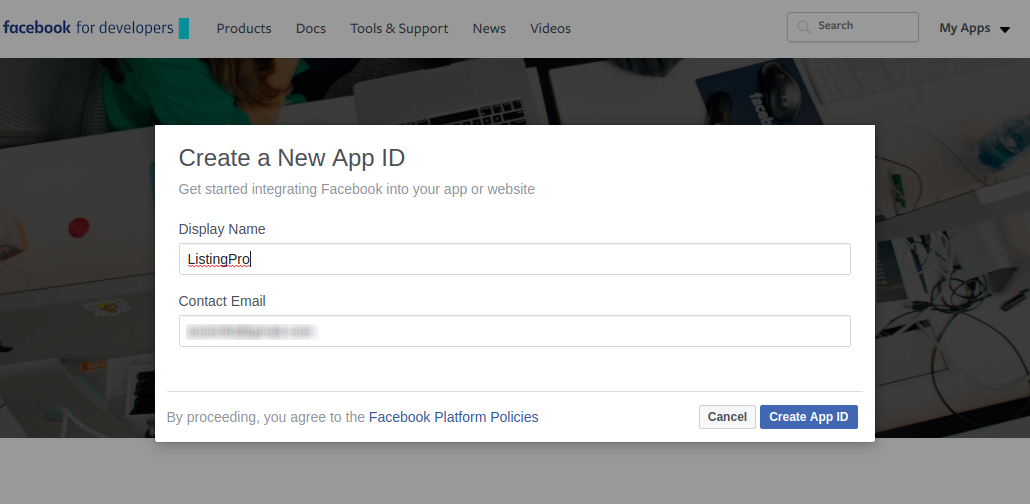
Let’s click on the Create App ID
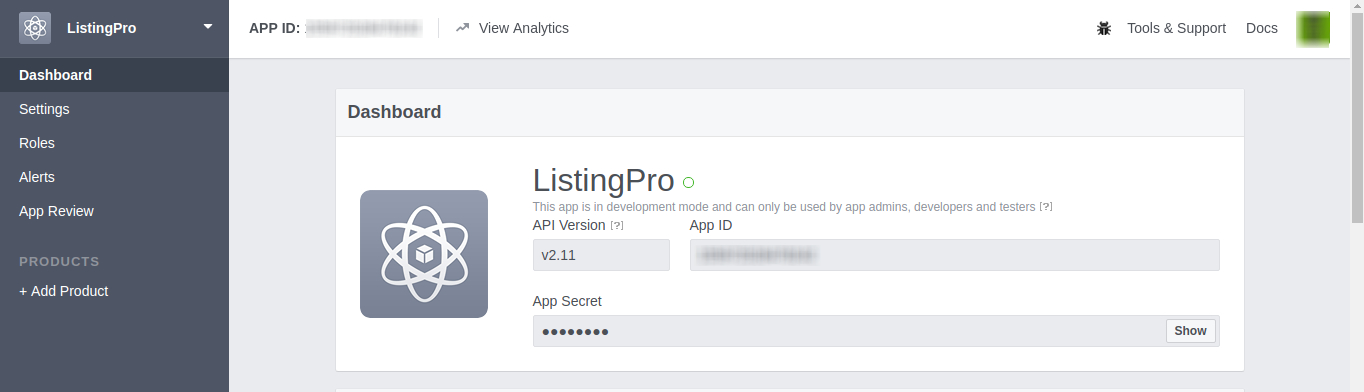
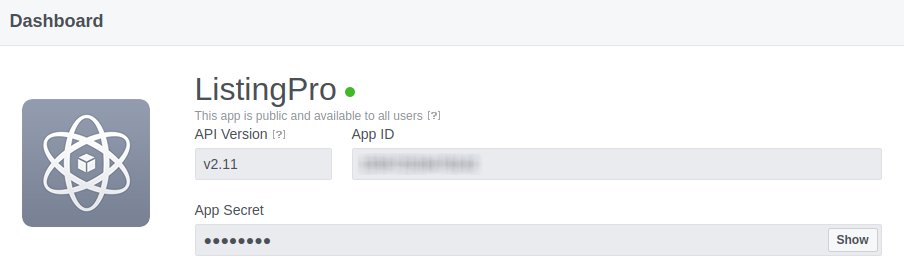
Now on our Dashboard, simply copy the APP ID and APP Secret and paste it into the Nextend Facebook
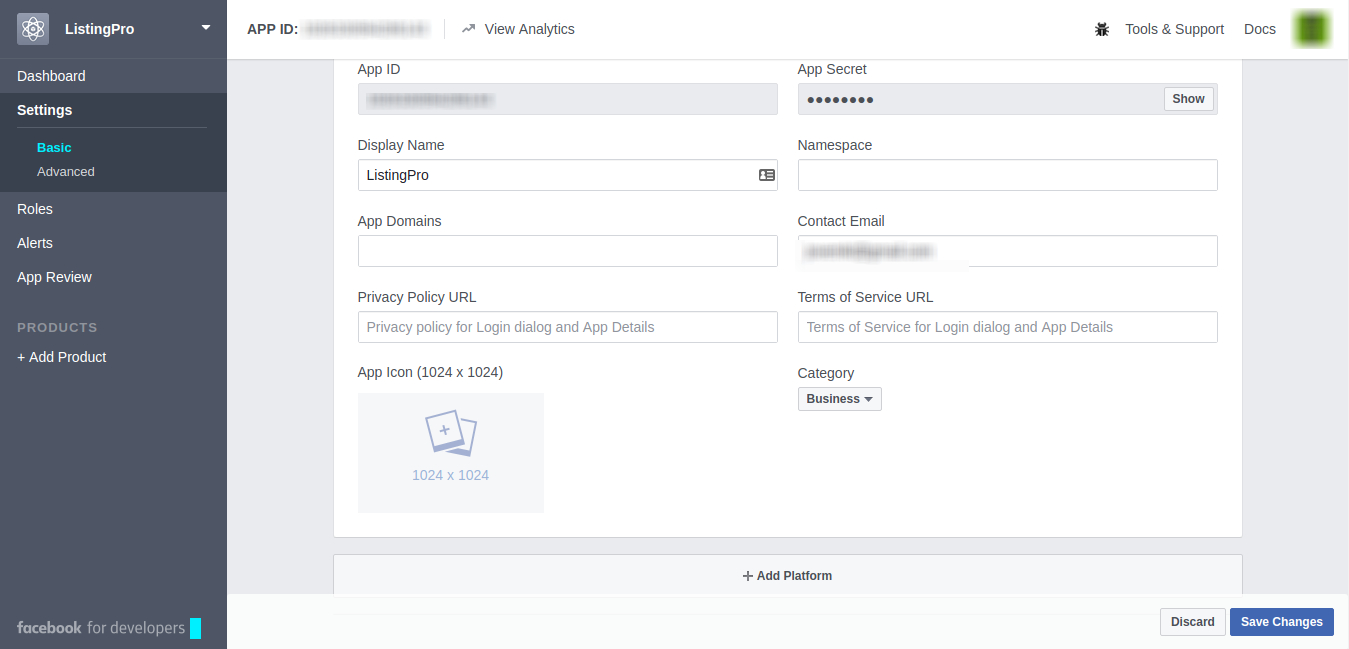
Now, in the Settings > Basic we have a few more options that could be interesting to include in our APP, in case if you already have your Privacy Policy URL and Terms of Service URL, include them. Also, you can customize your APP and add an Icon and choose the Category.
For now, Let’s only add the Category that best represents our Website
After setting your Category, scroll down the page and click on the + Add Platform
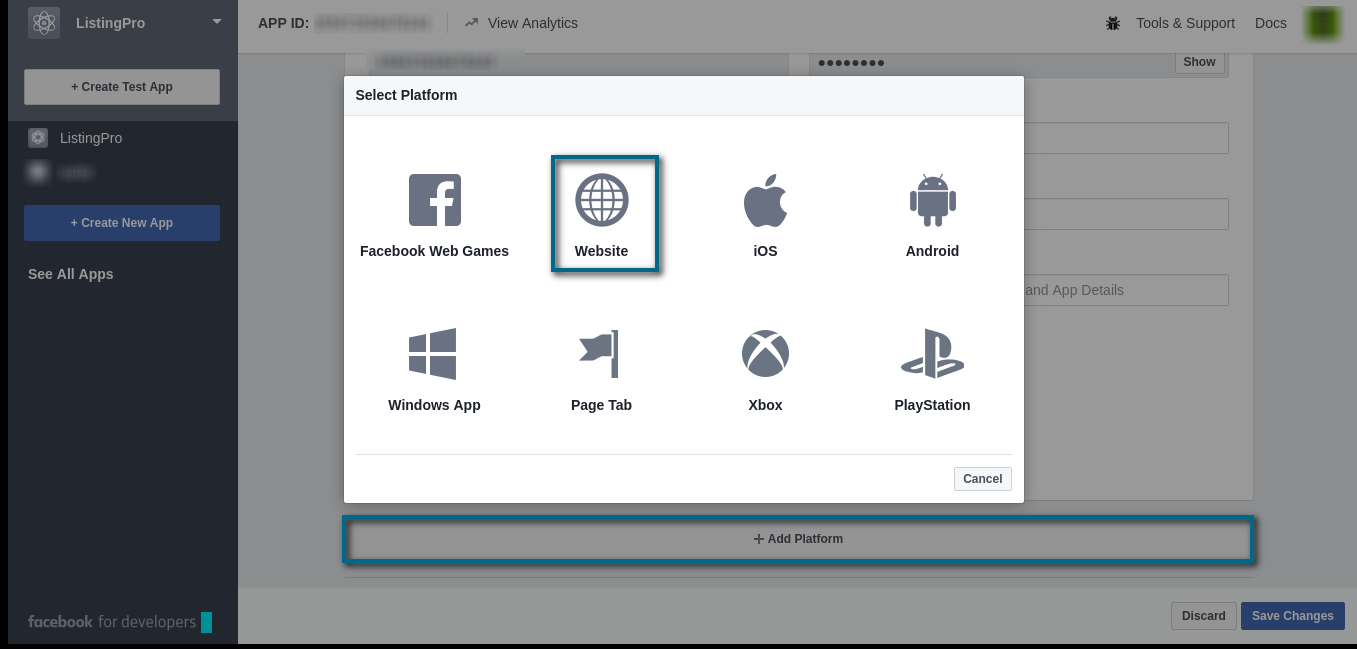
At the + Add Platform choose Website and insert the full URL of your site (including HTTP or HTTPS and insert the / in the final of your URL) Click on Save Changes.
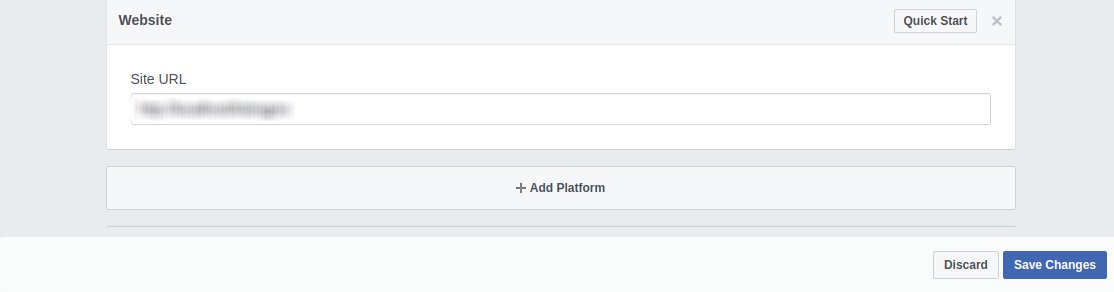
Now, insert the same URL into your APP Domains and Save Changes.
Now, go to your App Review and make it Public. and Save the Changes.
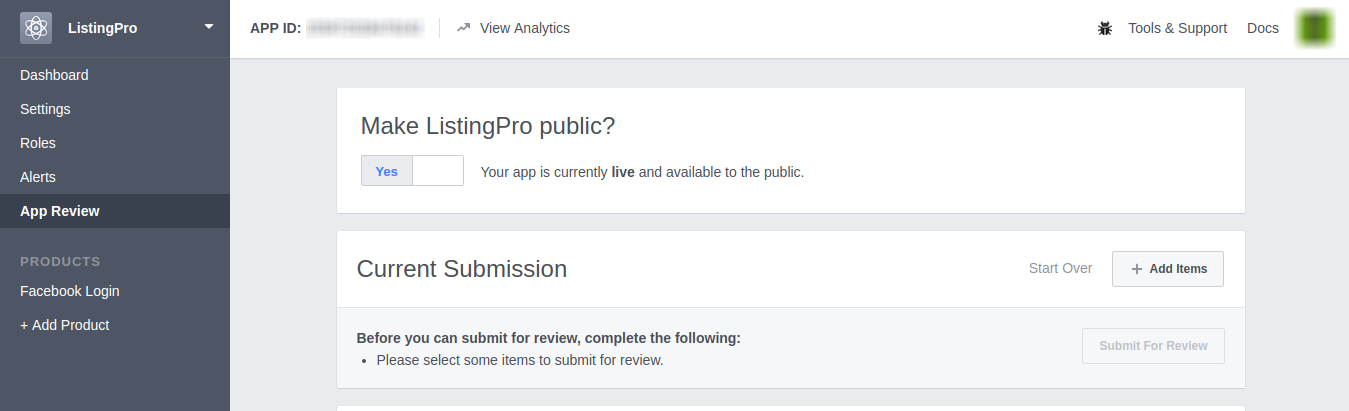
Your APP will now have a green circle on the Dashboard.
Now, one of the most important thing to make your Facebook Login really work in your Signup Homepage, we should go to + Add Product and include the Facebook Login.
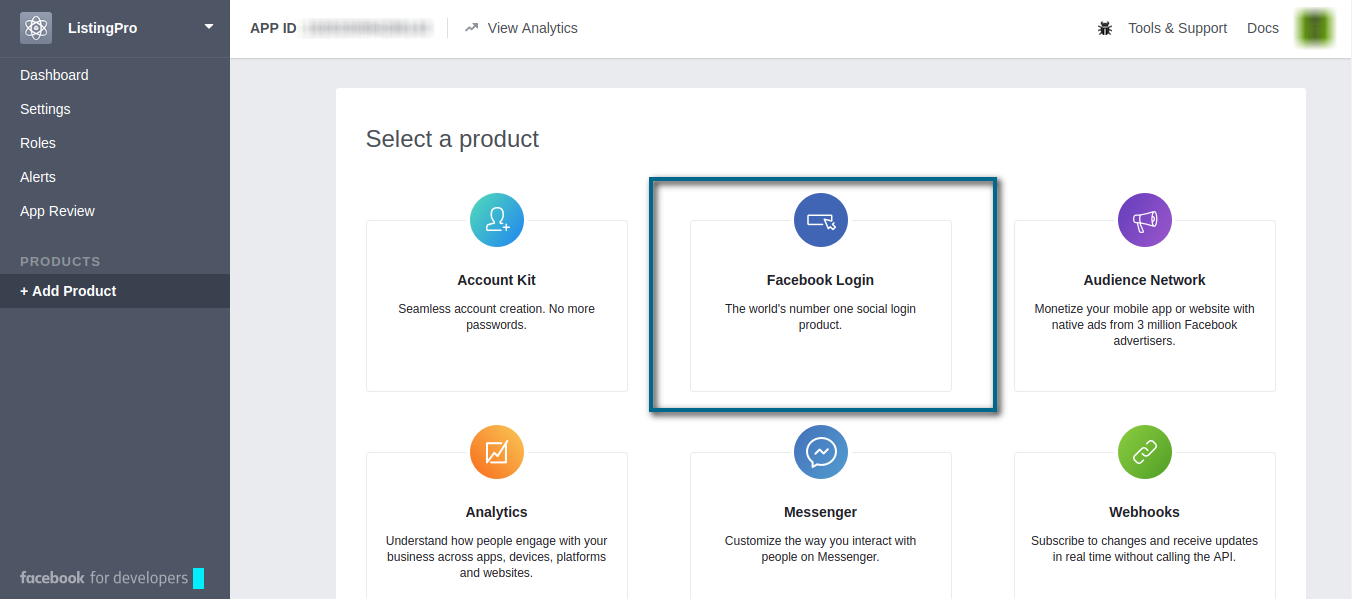
After clicking on the Facebook Login, select the Web option.
Check if your Website URL inserted at the beginning is correct, and go to the Settings of your Facebook Login.
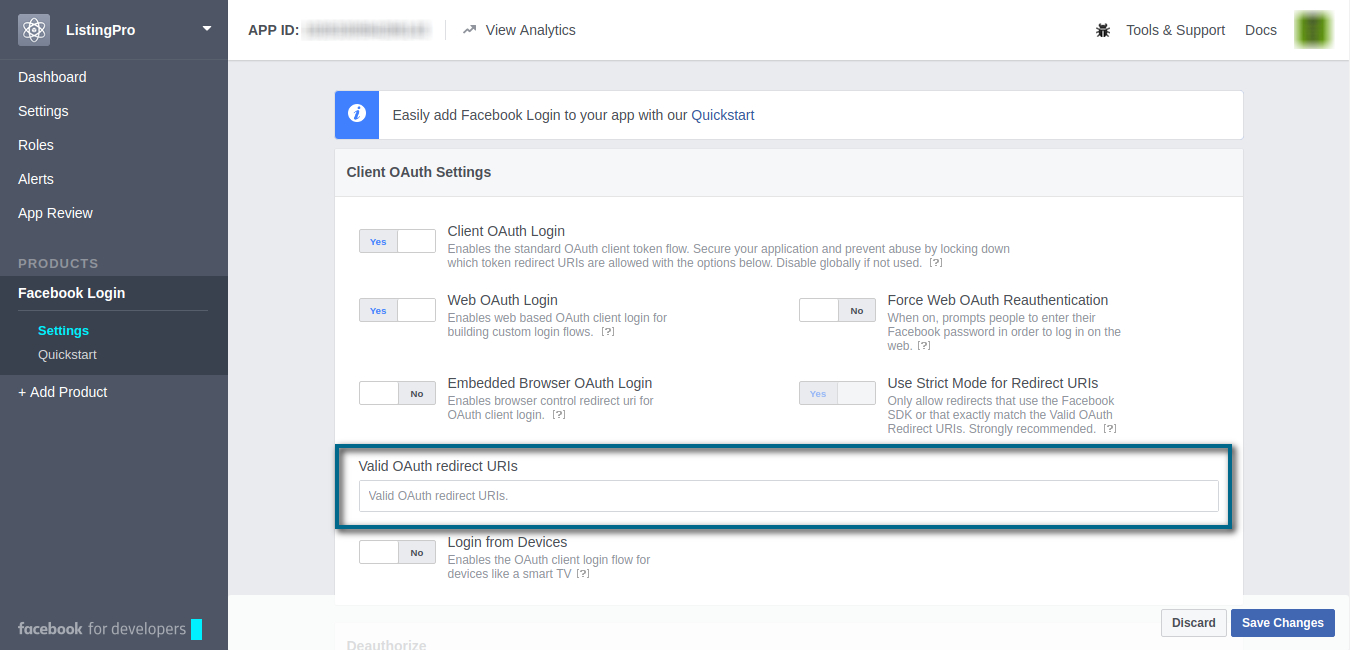
Here, we’re going to add the button address to our Signup. Go to your Website’s Homepage, and copy the link address of your Facebook Button. The link should look like this: https://your-website/wp-login.php?loginFacebook=1
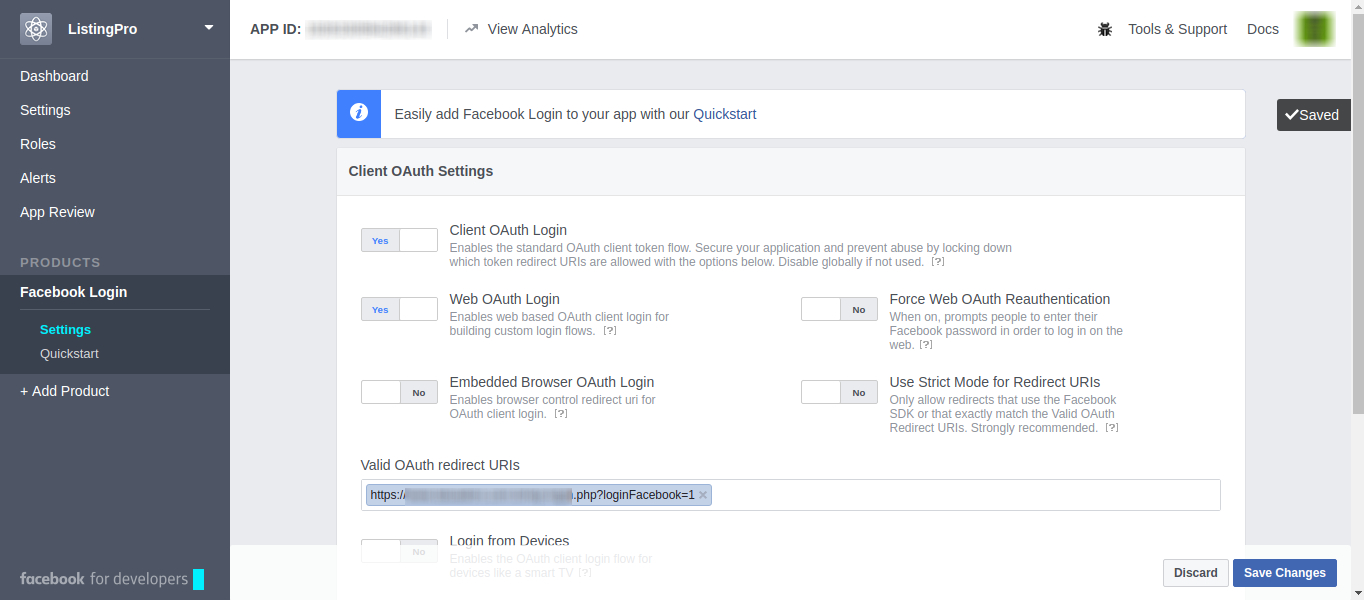
Add this link to validate the OAuth redirect URIs. After that, we’re ready to use our Facebook Login.
Our application is all configured and working.
Nextend Twitter Connect
We’ve seen that some users somehow get lost while setting up the configuration to properly work with Social Media Logins.
So, before we get started, remember that for this step you have to be fully working with SSL. If you haven’t configured it yet, it’s recommended to conclude this step and then follow the steps below.
First Let’s start with the Twitter Login
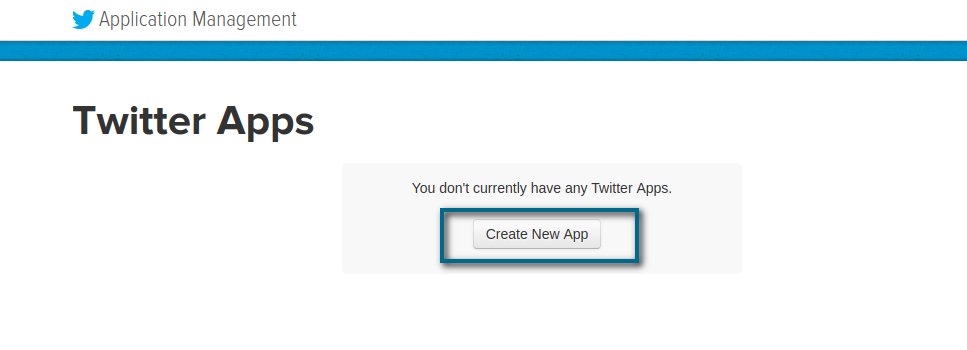
Let’s now create our Twitter App.
We’ll have a few settings to insert our Website details. For the Oauth Callback section, don’t forget to include your Button Address Link. The link should look like this: https://your-website/wp-login.php?loginTwitter=1 and you can find it going to your Website Homepage in the Singup popup. Copy the Link Address of your Button.
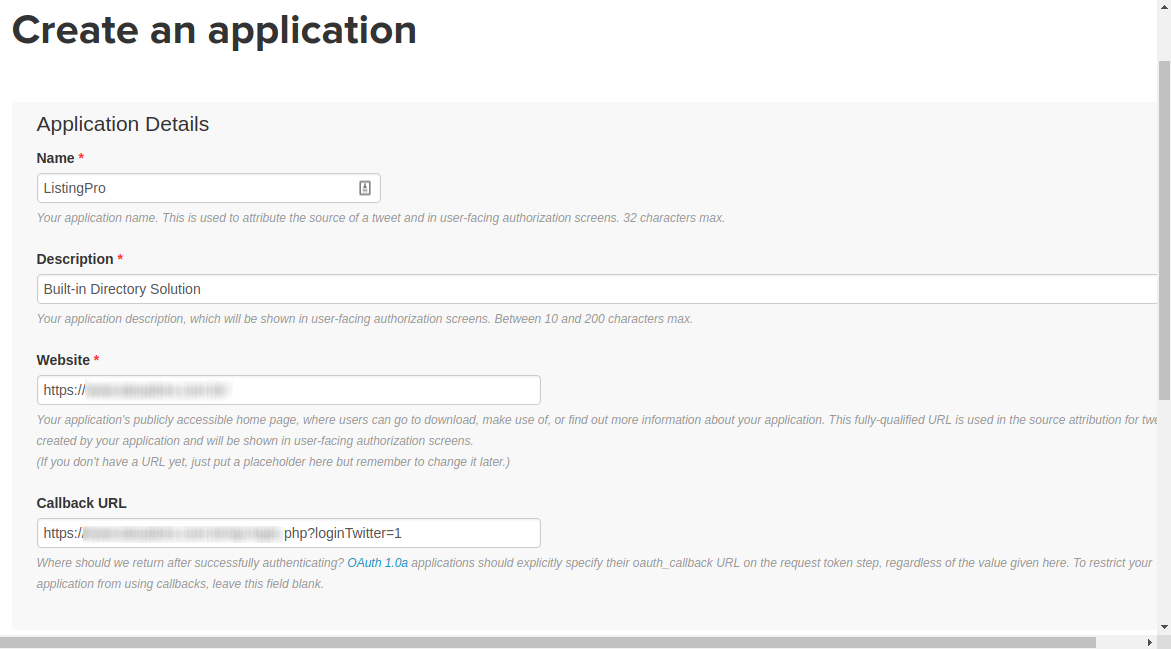
After creating your Application name, Description, and added your Website URL and the Callback URL, accept the Developer Agreement, and click on the Button to create your Twitter Application.
We’ll be redirected to our Application Panel, and here let’s click on Keys and Access Tokens
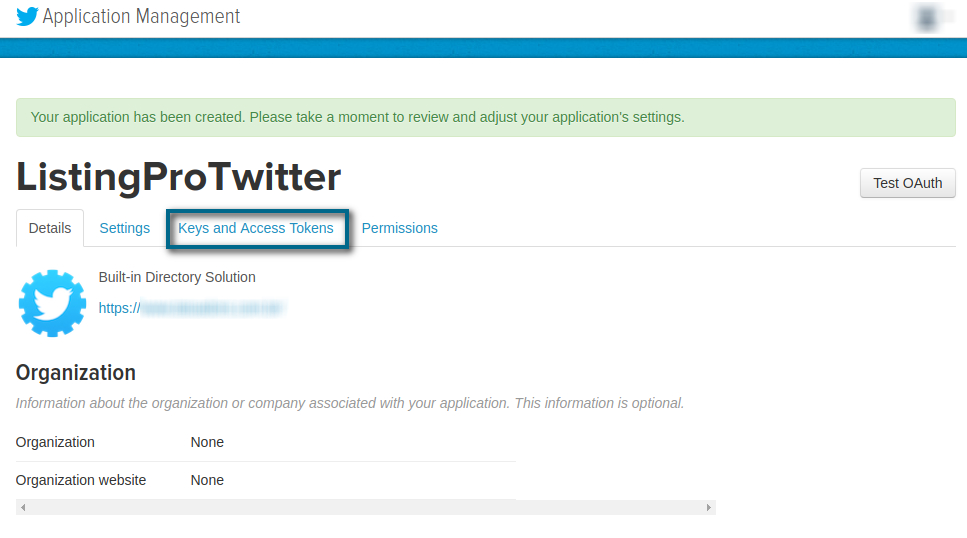
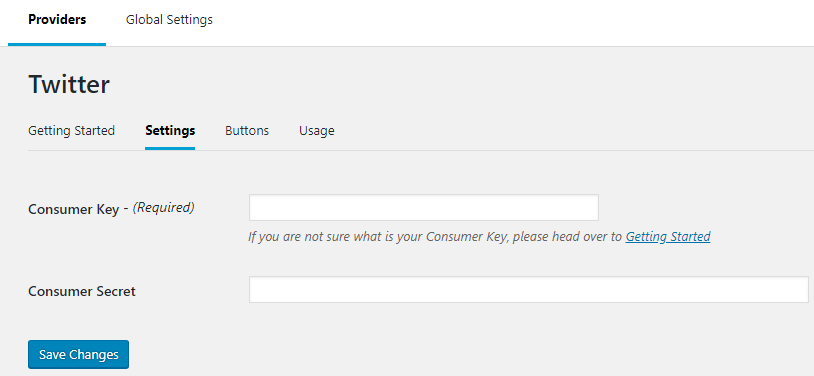
Copy and Paste your Consumer Key and your Consumer Secret into your Nextend Twitter.

Go to your Nextend Twitter Plugin and paste the codes for the Consumer Key and Consumer Secret.
Now, let’s see if our Twitter Login is working as expected. Let’s go to our Website Homepage and try to Signup using our Twitter Button.

Nextend Google Connect
We’ve seen that some users somehow get lost while setting up the configuration to properly work with Social Media Logins.
So, before we get started, remember that for this step you have to be fully working with SSL. If you haven’t configured it yet, it’s recommended to conclude this step and then follow the steps below.
First Let’s start with the Google Login
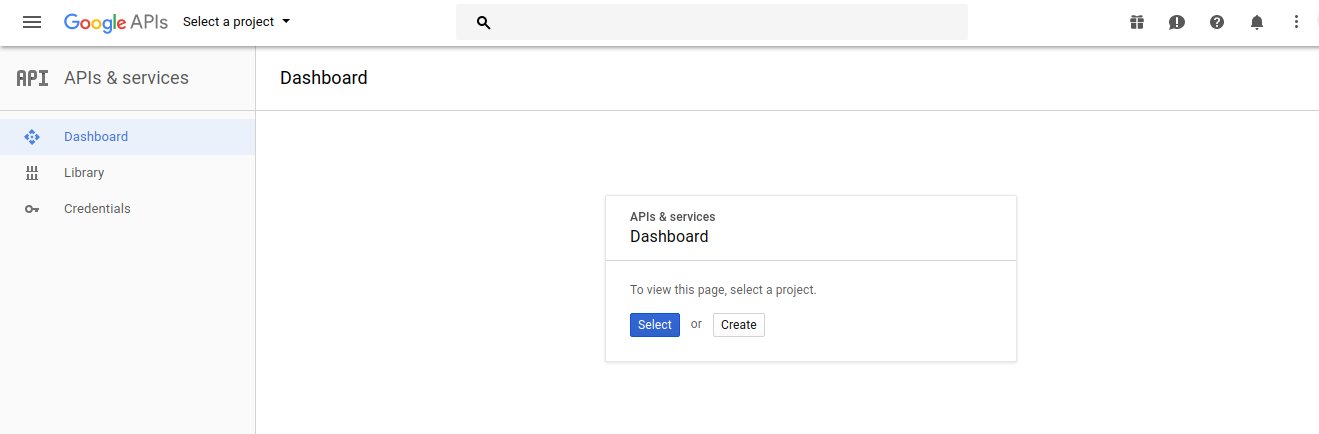
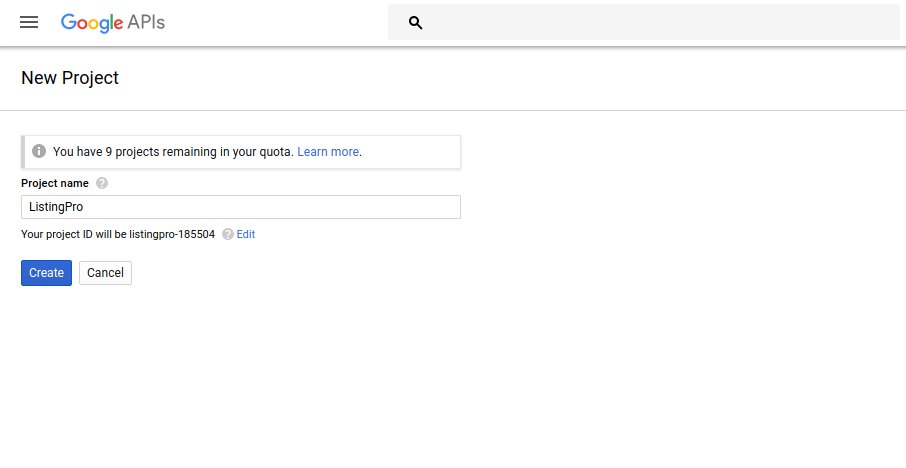
Let’s then create a New Project to configure our Google+ Button. First, Go to your Google APIs Dashboard and Start a Project
Then, Let’s give a name to our project, simply to be easier to identify in case you’ve added more projects to your GoogleAPIs
After having defined your Project name, you’ll be redirected to your new Project Dashboard with some more options… Let’s enable the API and Services right above.
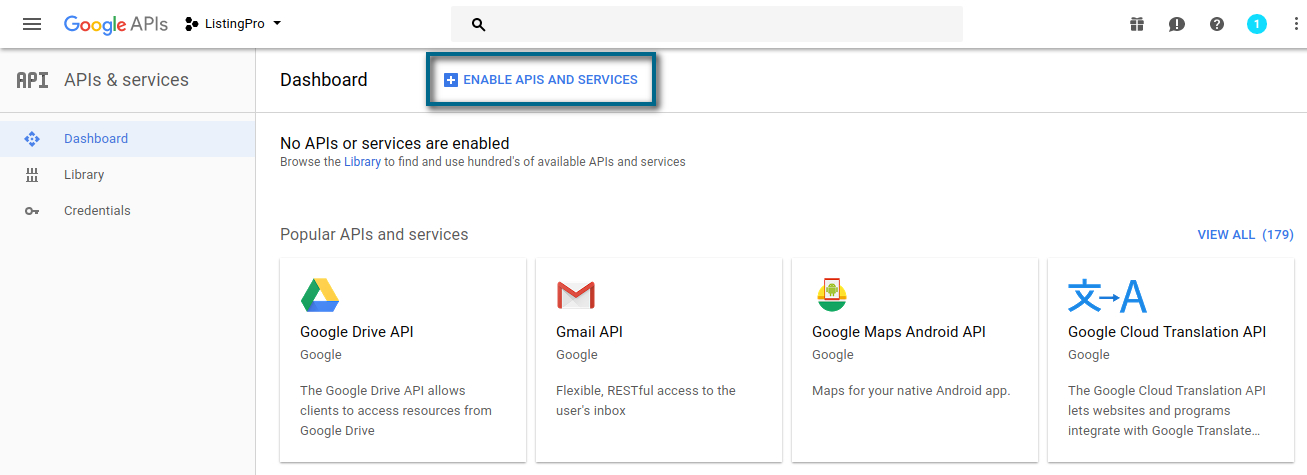
Now, let’s find the Social Login to our Google+ and enable it.
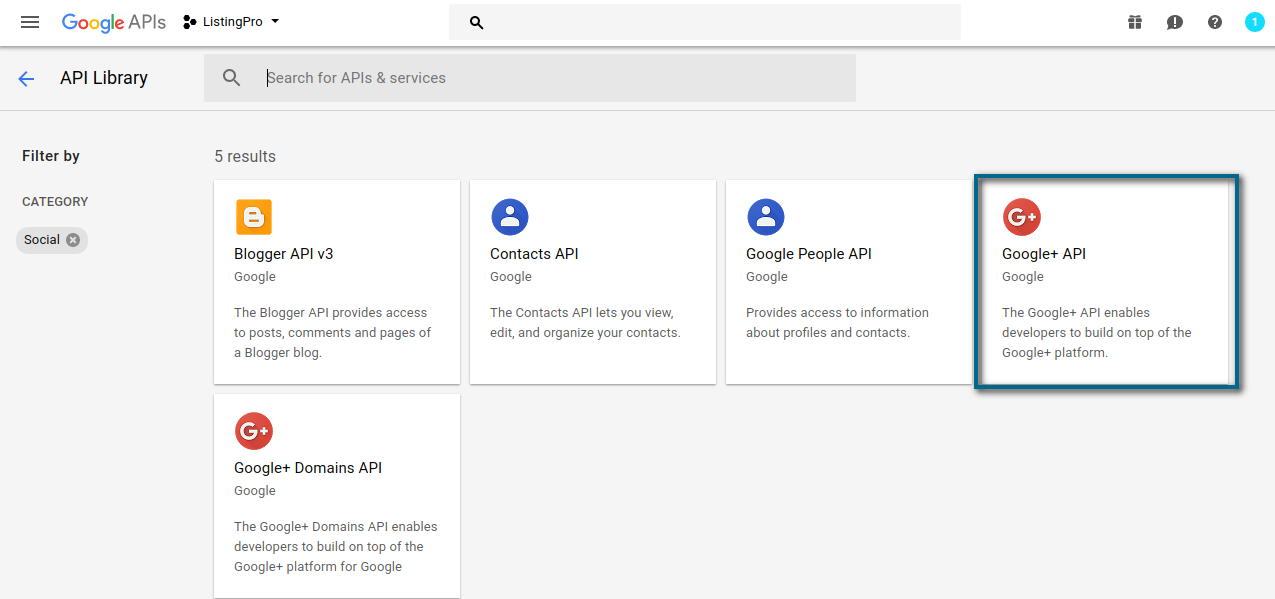
Click on the Enable Button
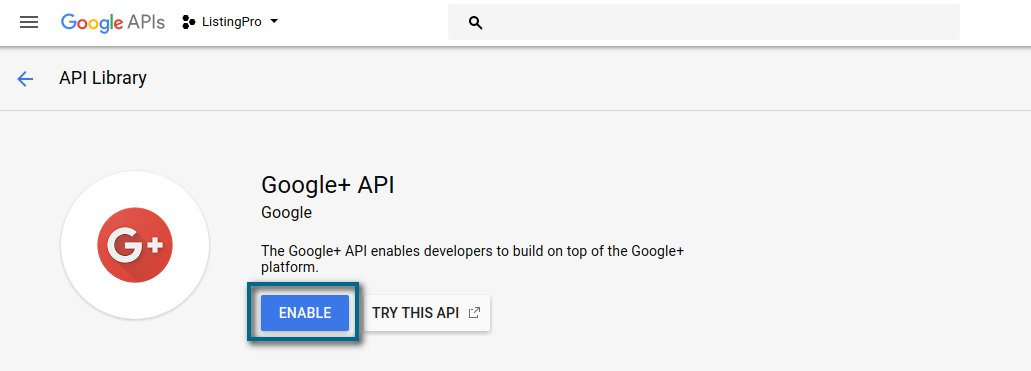
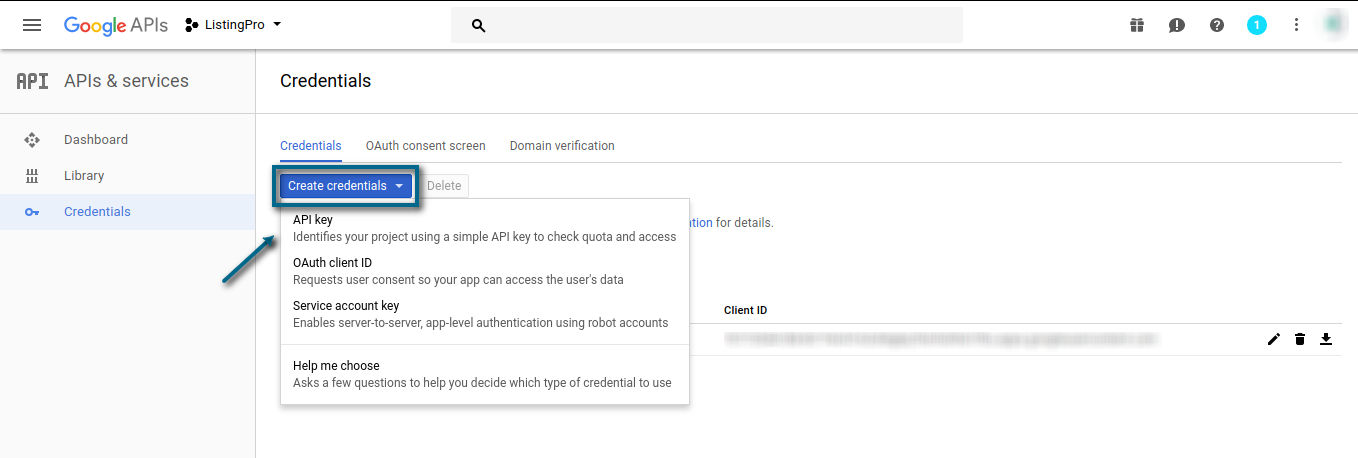
Now that we have enabled our Google+ API, we’ll have to create the credential to add to our Nextend Google
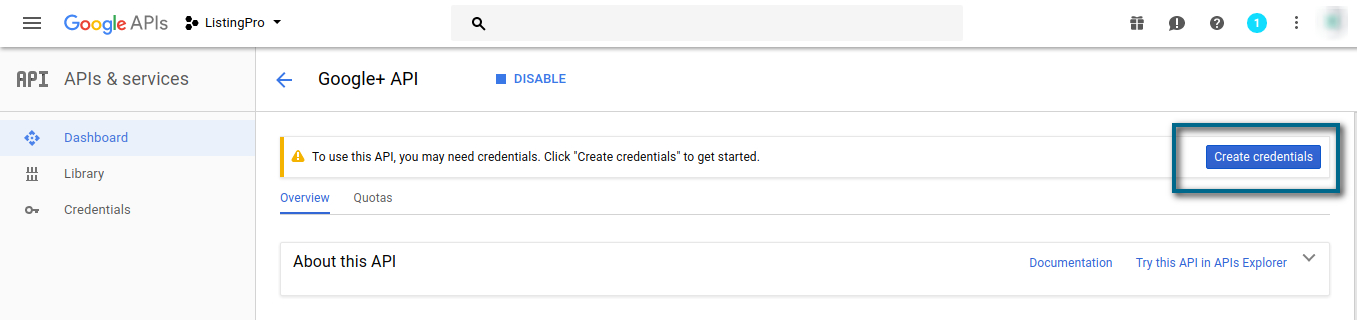
Set the API as followed below…
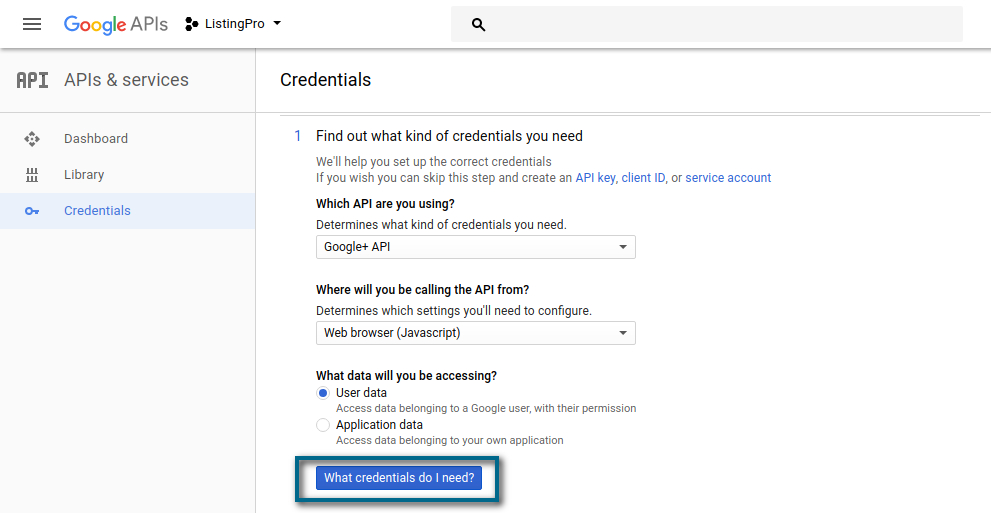
Click on the What credentials do I need?
Now, it’s time to define your API name, add your Website URL, and copy the link address of your Google+ Button on your Signup Homepage.
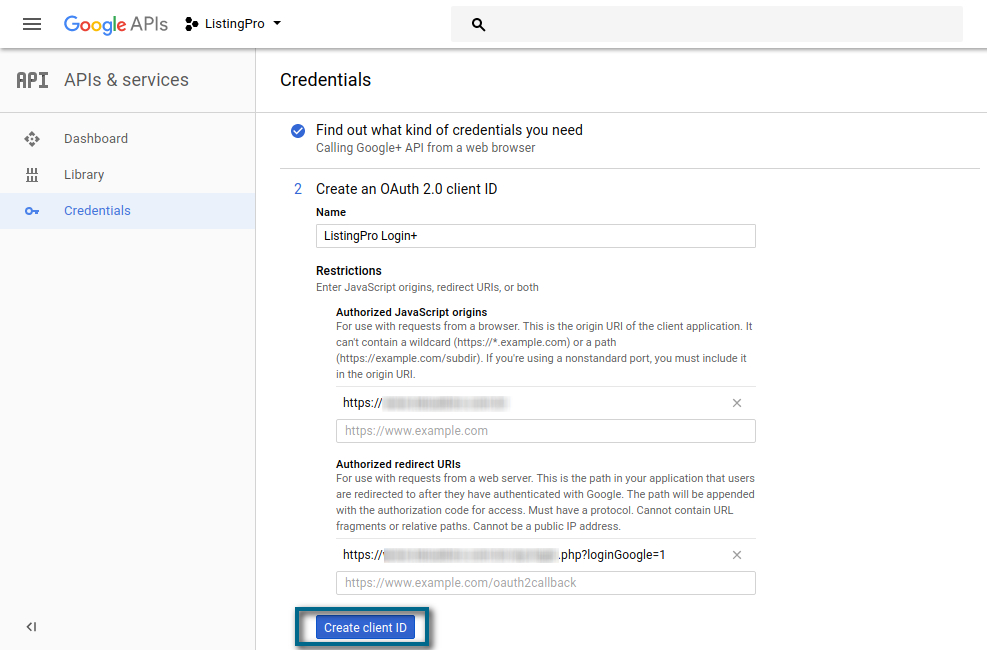
After adding these credentials, simply click to Create your client ID
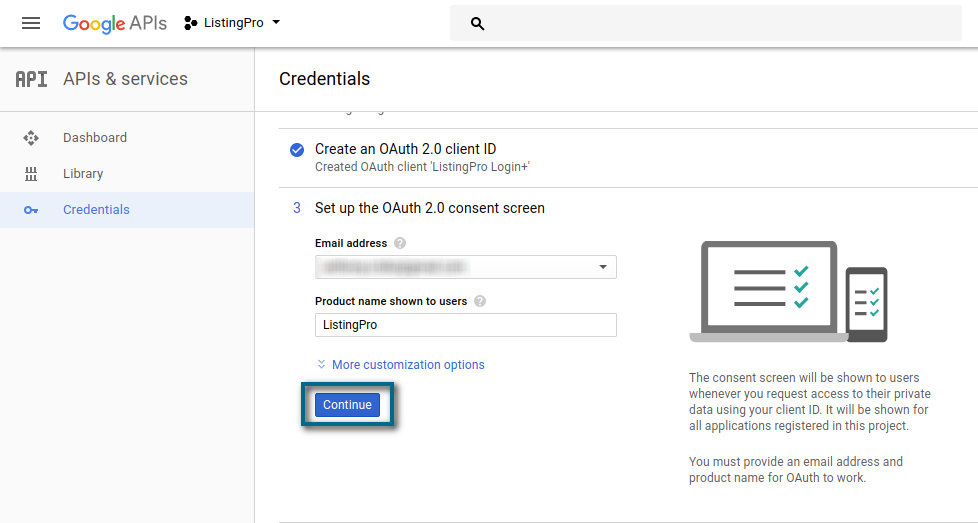
Add your Product name that will be shown to your users and click on Continue.
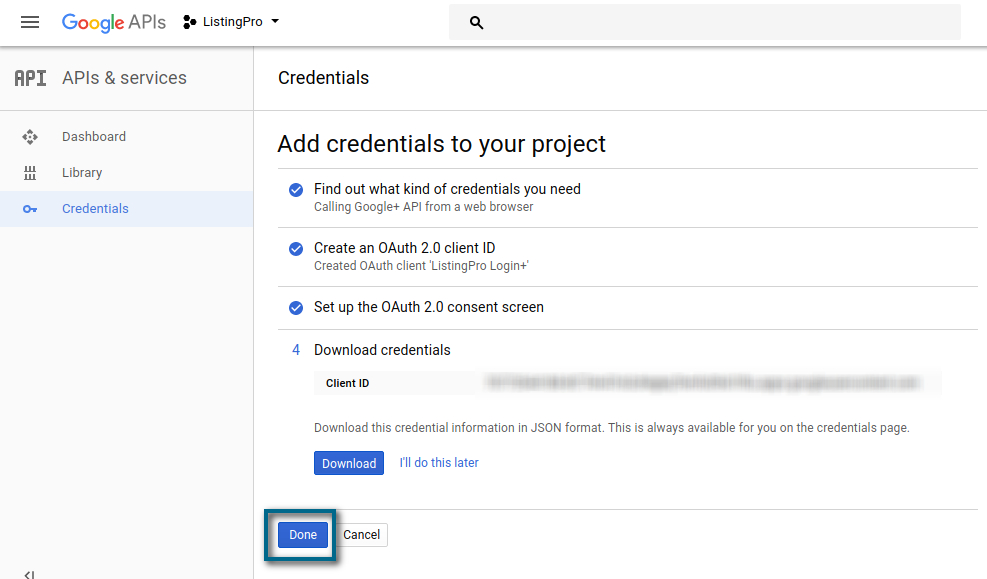
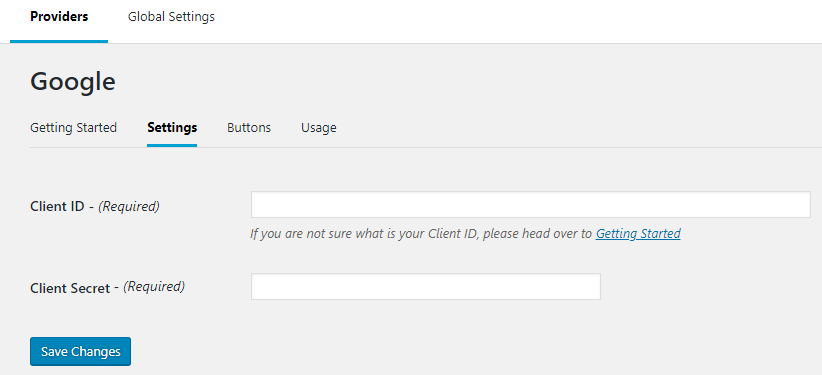
Now, you can copy your Client ID and paste it into your Nextend Google. Click on the Done Button.
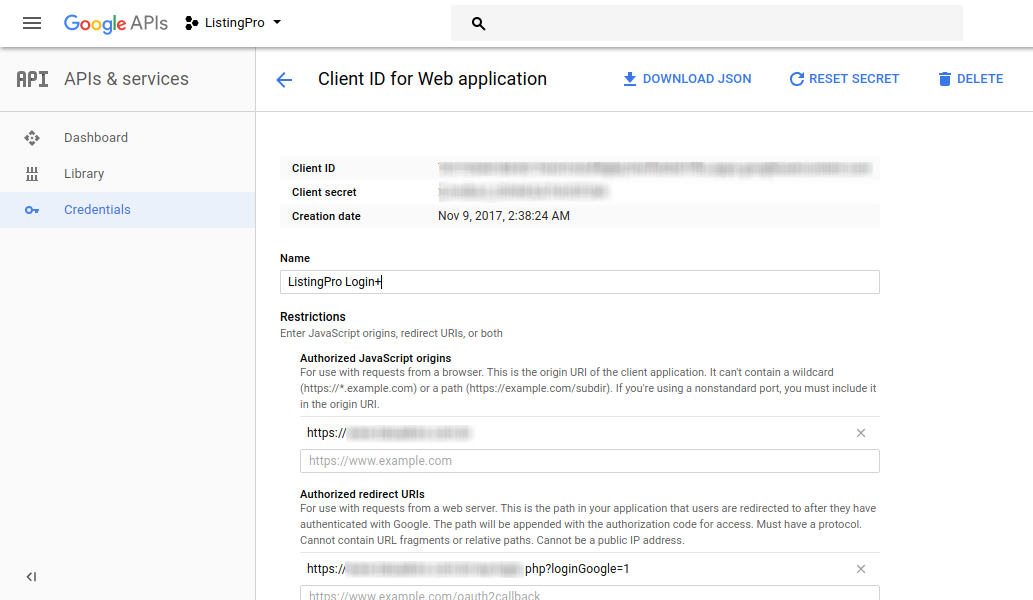
You’ll be redirected to your Credential Panel, where you’ll be able to manage more settings in your application.
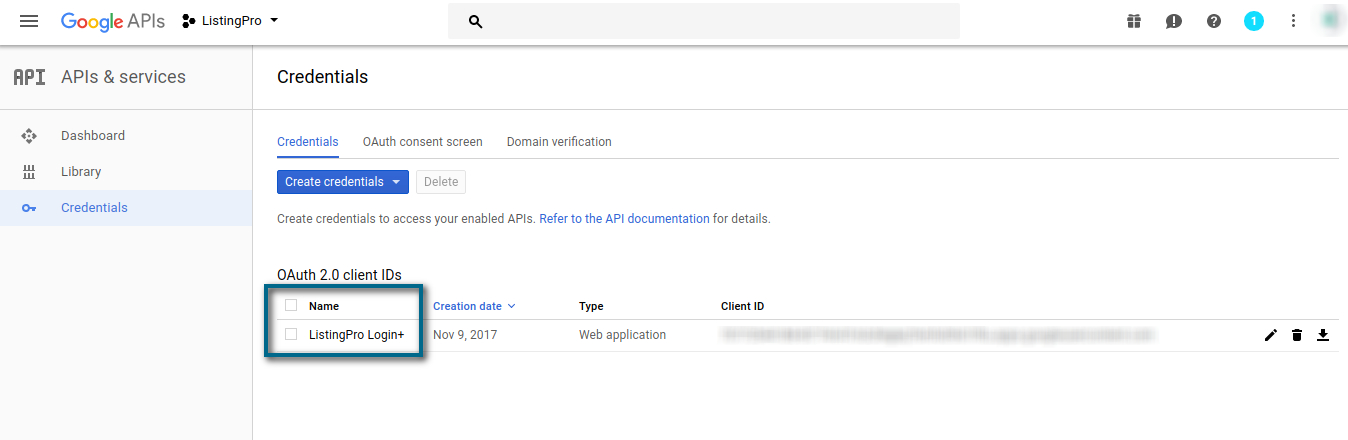
Find your Client ID and click on its name…
You’ll get a full detail of your application, and here we’ll copy the Client Secret and add it to our Nextend Google
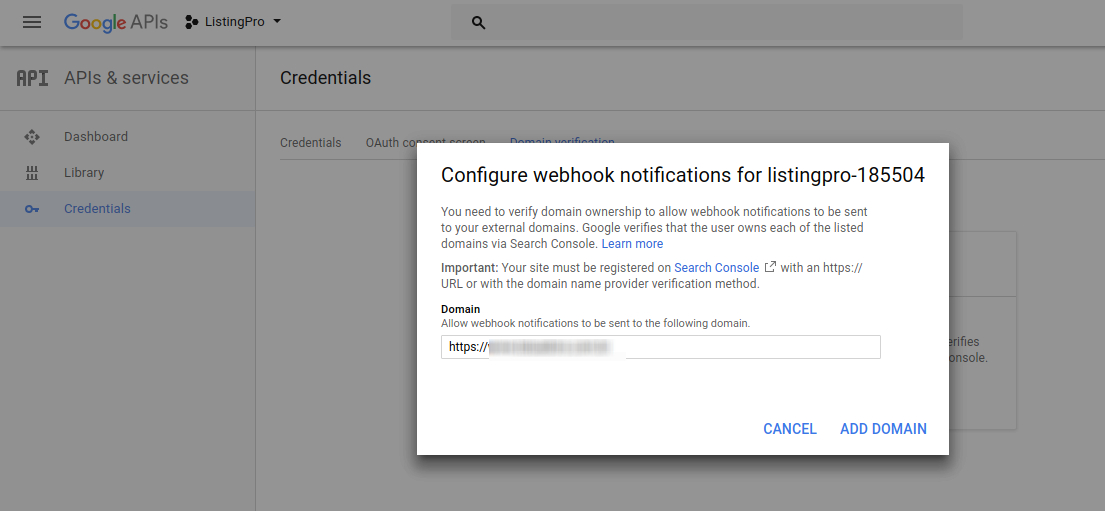
Go back to your Credential Panel and let’s verify our Domain in our application.
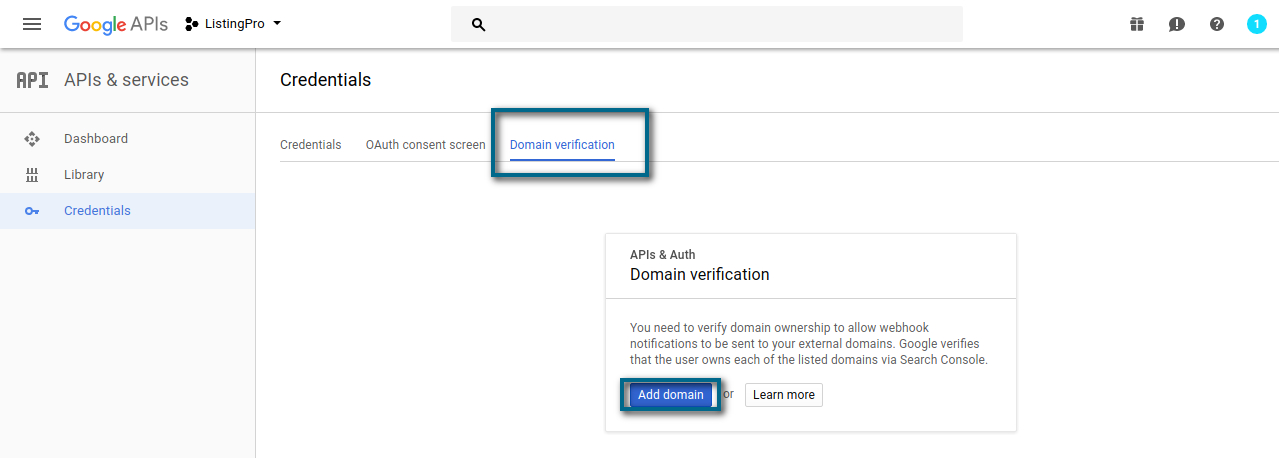
Insert the URL of your Website to verify your Domain.
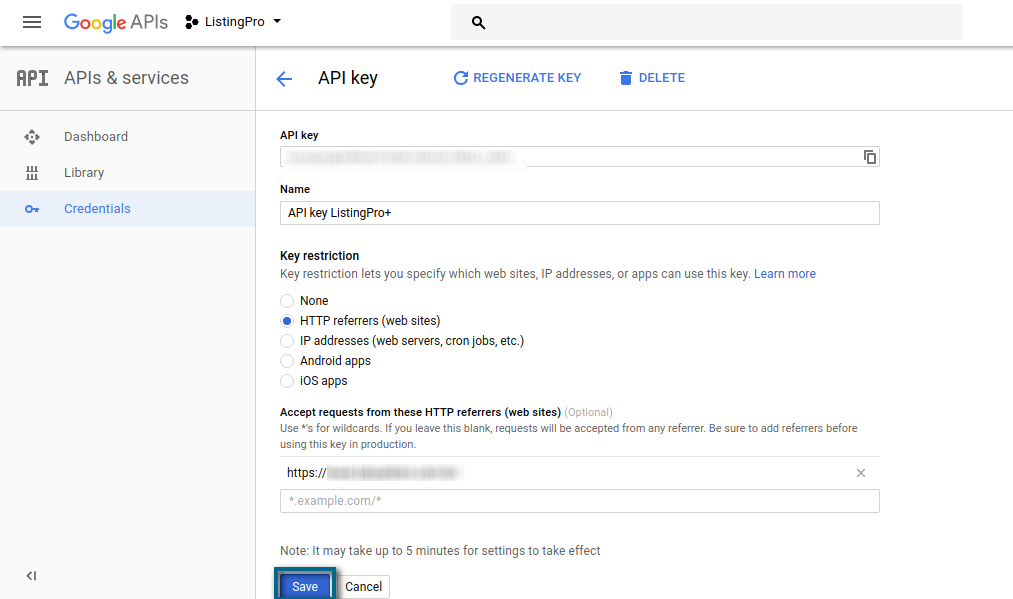
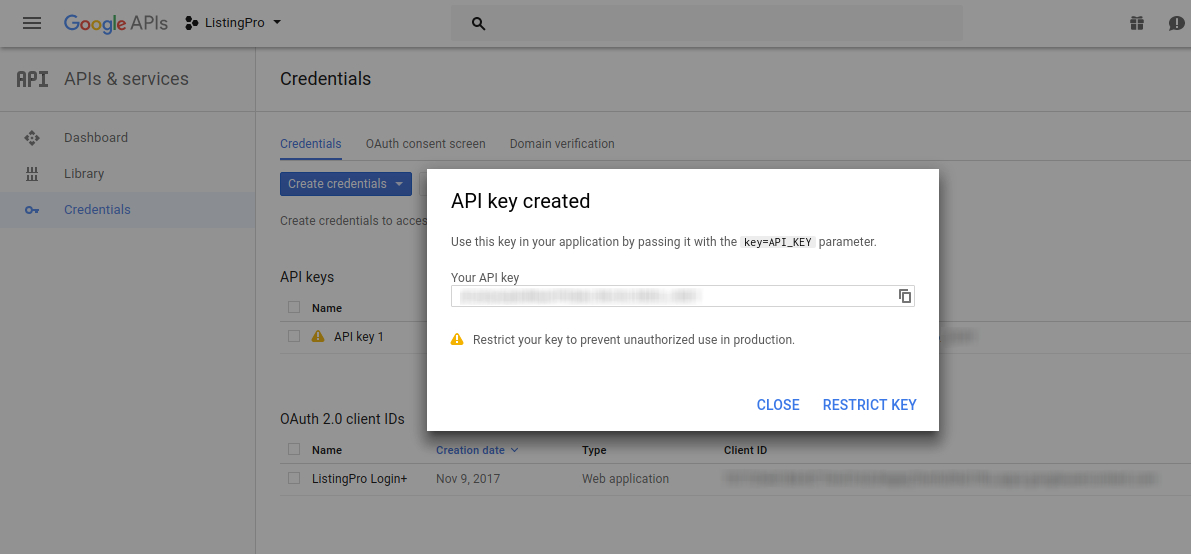
After having done this, Let’s back to our Credential Panel and set our API Key.
Copy your API Key and paste it into your Nextend Google, and also, it’s recommended to restrict the key.
Follow the example below to restrict your API Key. After that, you can click on Save Button.
Now, let’s test our Google+ Login in our Website Homepage Signup and see if everything works as expected.