PART 1: EDIT CHILD THEME FUNCTIONS.PHP
STEP 1: FTP into your site. (Example via cPanel or FileZilla)
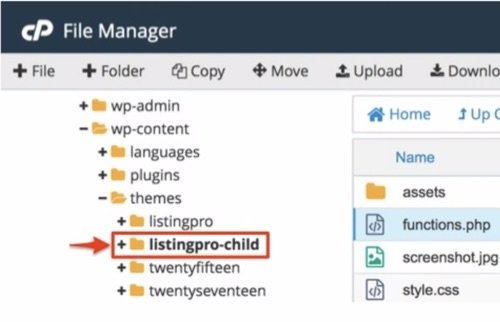
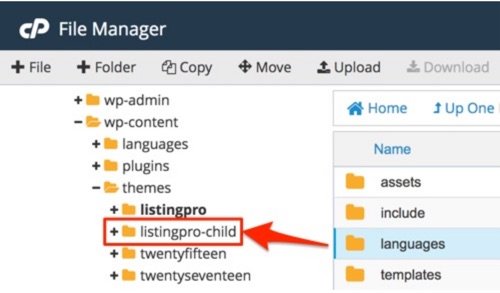
STEP 2: Go to wp-content/themes/listingpro-child/
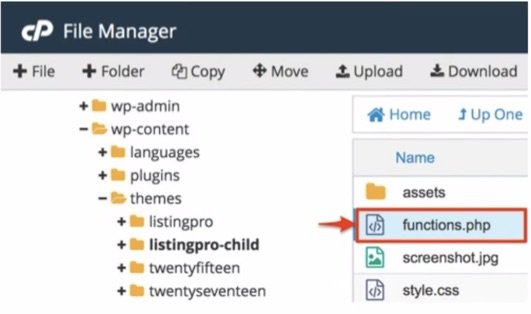
STEP 3: Download and Edit functions.php
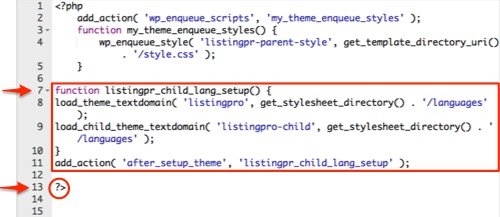
STEP 4: Copy the code below.
function listingpr_child_lang_setup() {
 load_theme_textdomain( 'listingpro', get_stylesheet_directory() . '/languages' );
 load_child_theme_textdomain( 'listingpro-child', get_stylesheet_directory() . '/languages' );
 }
 add_action( 'after_setup_theme', 'listingpr_child_lang_setup' );
STEP 5: Paste the code into the functions.php as shown below:
STEP 6: Save the functions.php changes to the server.
PART 2: MOVE LANGUAGES FOLDER TO CHILD THEME
Move languages folder from wp-content/themes/listingpro/ …
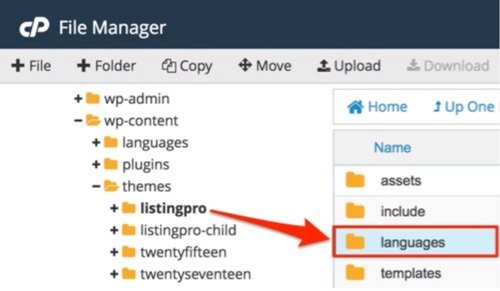
… To Child ListingPro theme wp-content/themes/listingpro-child/
The following step is ONLY FOR USERS who have updated to the latest version of ListingPro after moving the translation to the child theme.
If you have to translate strings included in the latest release of ListingPro, you must repeat these steps in PART 3 after every update.
PART 3: REPLACE OLD .POT FILE AFTER UPDATE
STEP 1: Copy the .pot file from ListingPro Parent theme (Language Folder), /wp-content/themes/listingpro/languages
STEP 2: Paste the .pot file to ListingPro Child theme (Language Folder), /wp-content/themes/listingpro-child/languages.
STEP 3: Go to WP Admin > Loco Translate > Themes > ListingPro Child
STEP 4: Select the language translation file.
STEP 5: Click Sync
STEP 6: Click Save