How to Setup PayFast
Part 1 – Downloading File
Follow the steps below once you have already purchased PayFast from ListingProWP.com/plugins
STEP 1: On ListingProWP official website, go to My Account
STEP 2: Under My Account select the View Details and Downloads.

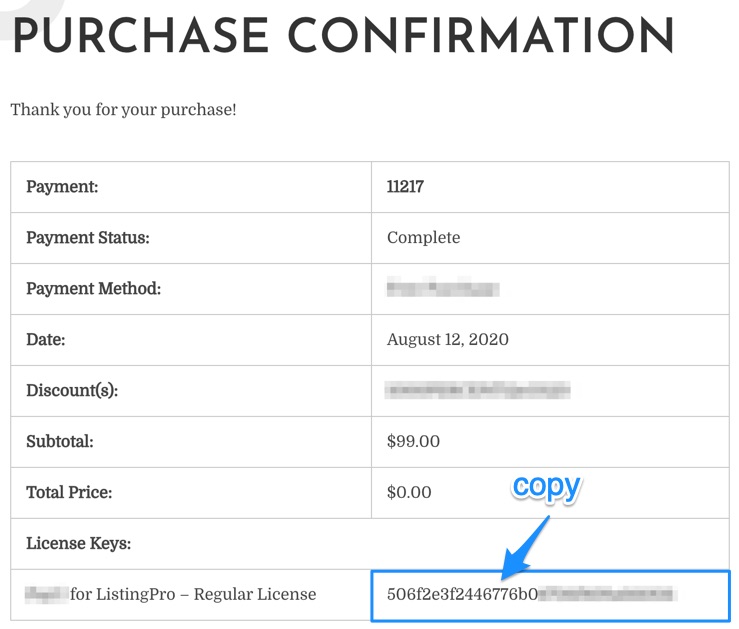
STEP 3: On the Purchase Confirmation page, scroll down towards the end.
STEP 4: Under Products click the file name to start downloading the plugin file.

Part 2 – Installing File
STEP 1: First unzip the download file, example: unzipme-payfast-xx.zip
STEP 2: Go to WordPress admin > Plugins
STEP 3: Click Add New, and then select Upload Plugin
STEP 4: Click Choose File and select the file from the local machine.
STEP 5: Click Install Now and then Activate Plugin
Part 3 – License Activation
STEP 1: When a notification bar shows on the top, click Activate

STEP 2: Go to the Purchase Confirmation page as explained above in Part-1 Step 3.
STEP 3: Copy the license key.

STEP 4: Paste the license key.

STEP 5: Click Activate
Part 4 – Configuring Payment
GENERAL SETTINGS
STEP 1: Go to Theme Options > Payments > General
STEP 2: Enable Paid Submission by selecting YES
STEP 3: Under Currency for Paid Submission select your currency: ZAR (Only currency supported by PayFast)
PAYFAST SETTINGS
STEP 1: Go to Theme Options > Payments > PayFast
STEP 2: Enable PayFast by selecting Enabled
STEP 3: Under API TYPE select Live or Sandbox
STEP 4: Enter PayFast Merchant ID
STEP 5: Enter PayFast Merchant Key
STEP 6: Enter PayFast Passphrase
ENABLE RECURRING
Theme Options Settings
STEP 1: Go to Theme Options > Payments > General
STEP 2: Enable Recurring Payment by selecting YES
Pricing Plan Settings
STEP 1: Go to WordPress admin > Pricing Plans
STEP 2: Add or Edit a Plan (Not Free)
STEP 3: Enable Payfast Recurring Payment and select a Duration

STEP 4: Click Publish or Update to save the settings
Part 5 – Testing
STEP 1: From front-end click Add Listing
STEP 2: Select a paid pricing plan.
STEP 3: Fill in the listing submission form.
STEP 4: Click Save & Preview
STEP 5: Click Pay & Publish

STEP 5: Click Pay & Publish
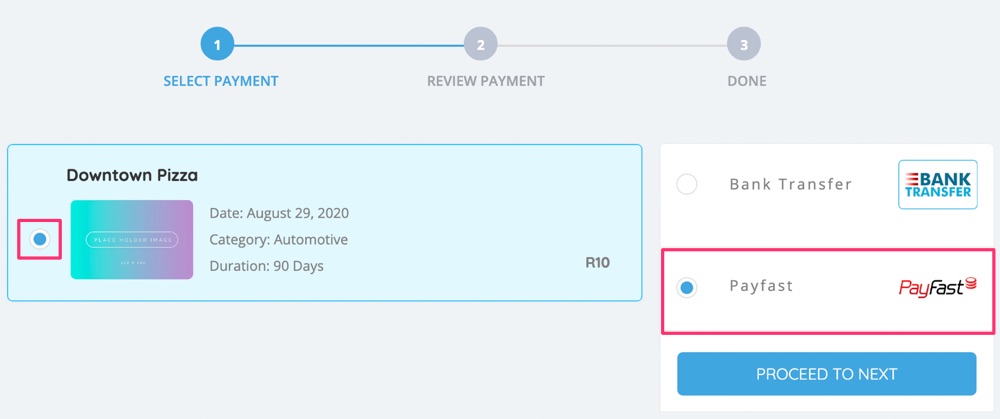
STEP 6: Select the listing and the PayFast and click Proceed to Next

STEP 7: Review the payment summary and click Proceed to Next again
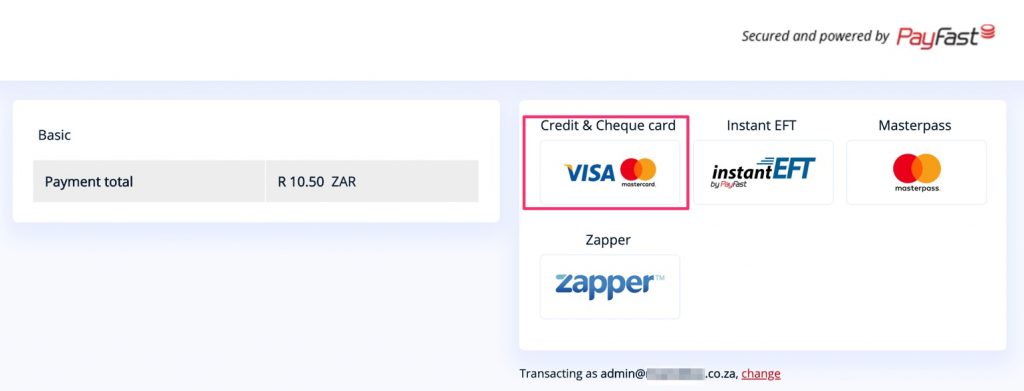
STEP 8: It will redirect you to a secure PayFast checkout page, select VISA or other option

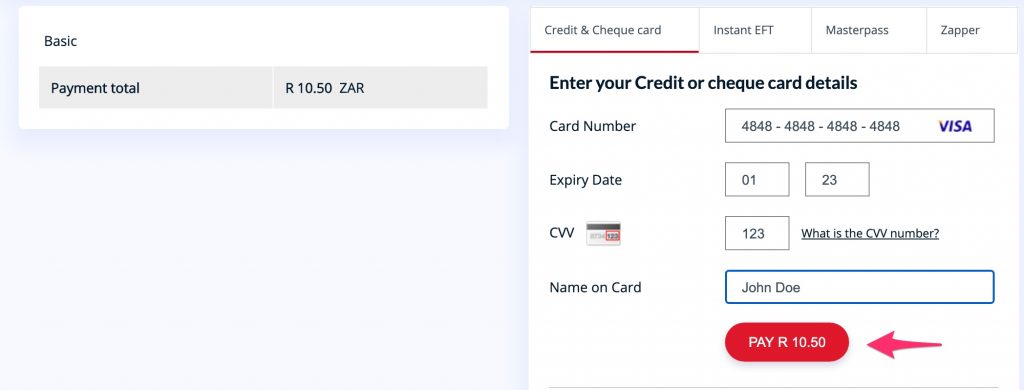
STEP 8: Enter the payment details and click pay.

Frequently Ask Questions
What currencies are supported by PayFast?
PayFast only works with ZAR.
Does PayFast support recurring (subscription) feature?
Yes
