
We’ve seen that some users somehow get lost while setting up the configuration to properly work with Social Media Logins.
So, before we get started, remember that for this step you have to be fully working with SSL. If you haven’t configured it yet, it’s recommended to conclude this step and then follow the steps below.
First Let’s start with the Facebook Login

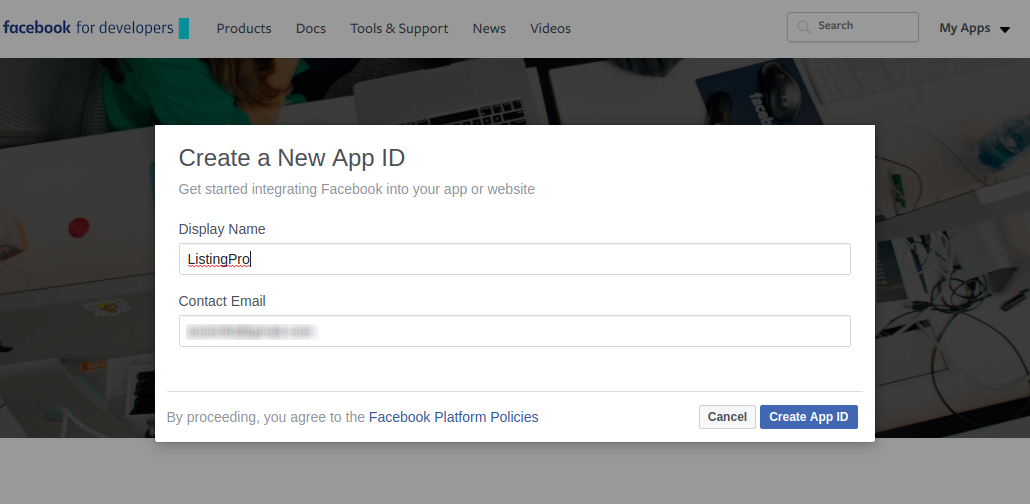
Let’s click on the Create App ID

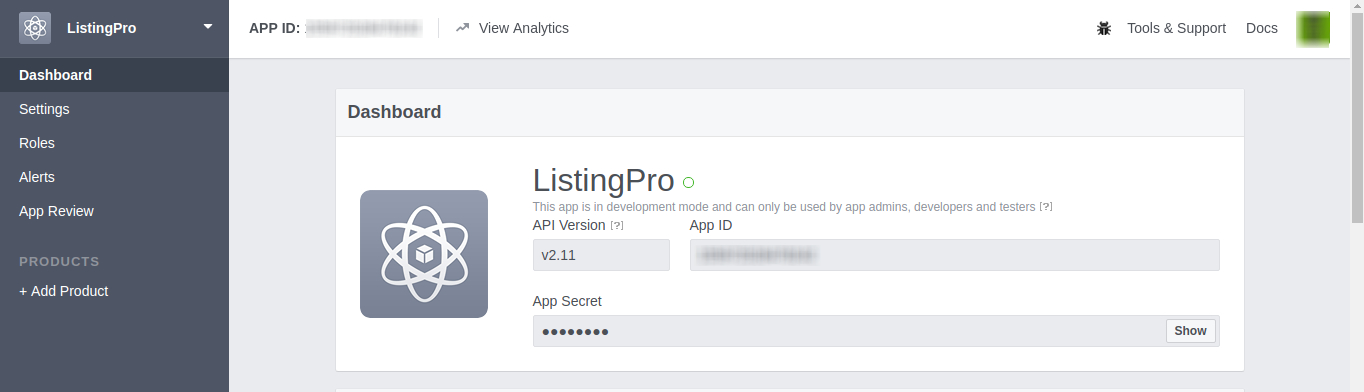
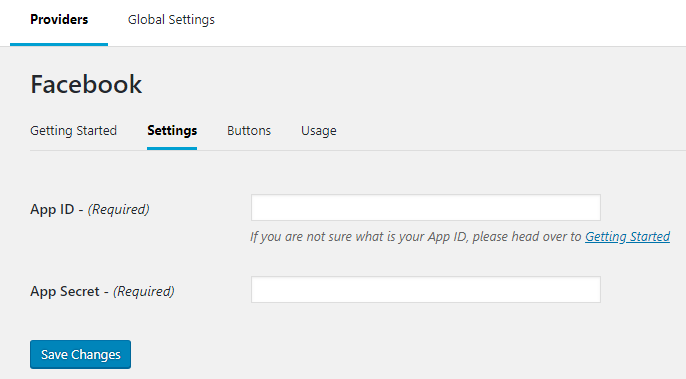
Now on our Dashboard, simply copy the APP ID and APP Secret and paste it into the Nextend Facebook
Now, in the Settings > Basic we have a few more options that could be interesting to include in our APP, in case if you already have your Privacy Policy URL and Terms of Service URL, include them. Also, you can customize your APP and add an Icon and choose the Category.
For now, Let’s only add the Category that best represents our Website

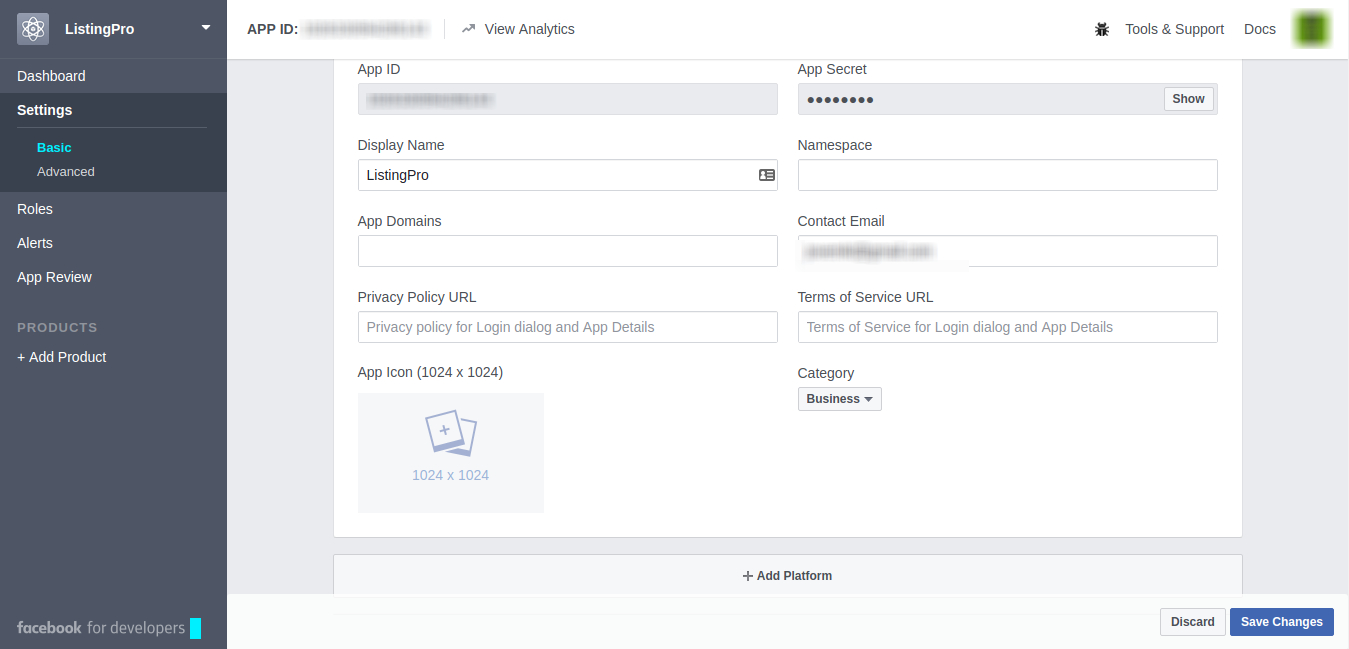
After setting your Category, scroll down the page and click on the + Add Platform
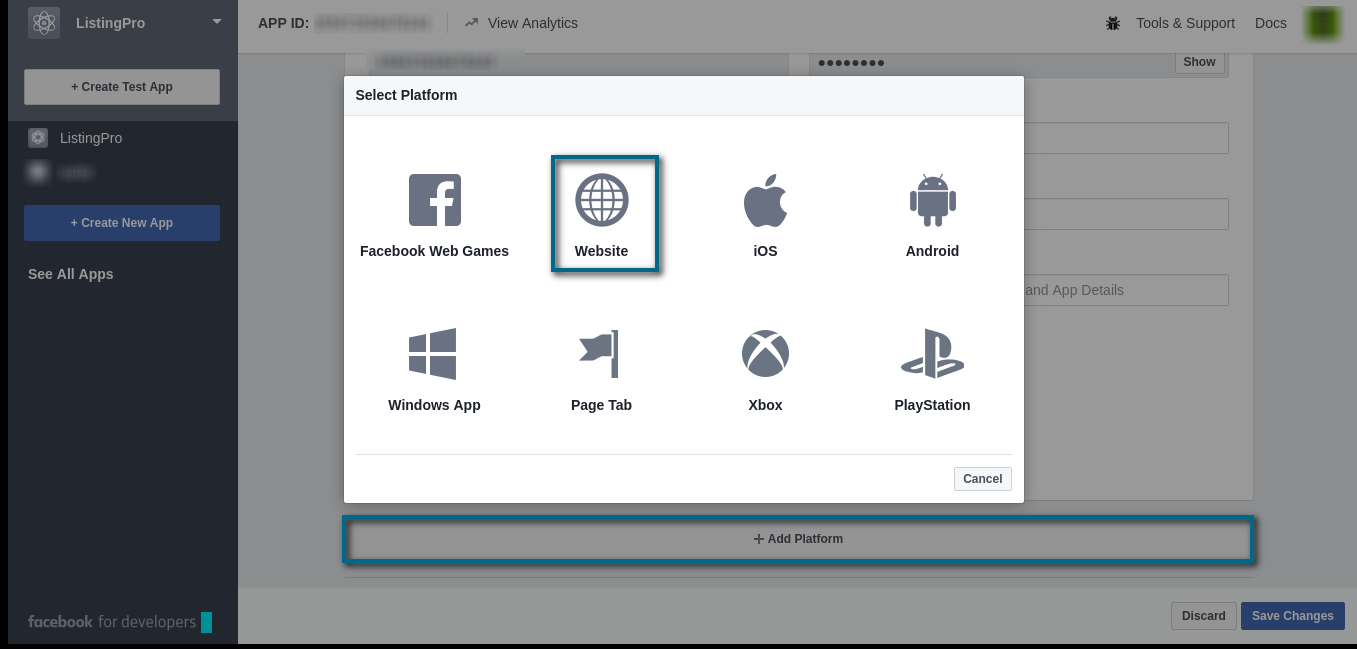
 At the + Add Platform choose Website and insert the full URL of your site (including HTTP or HTTPS and insert the / in the final of your URL) Click on Save Changes.

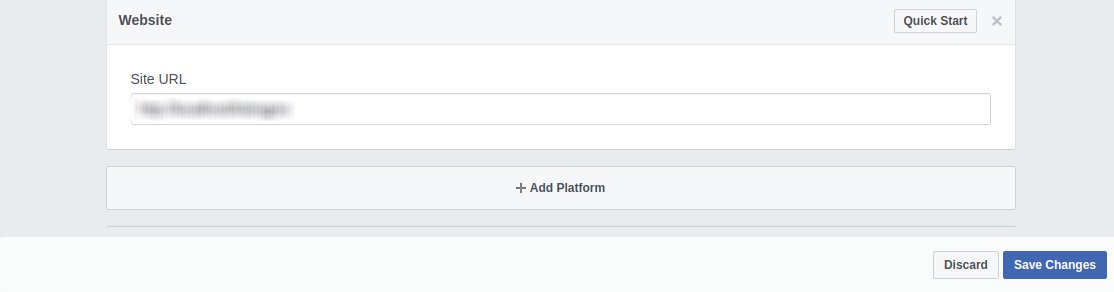
Now, insert the same URL into your APP Domains and Save Changes.

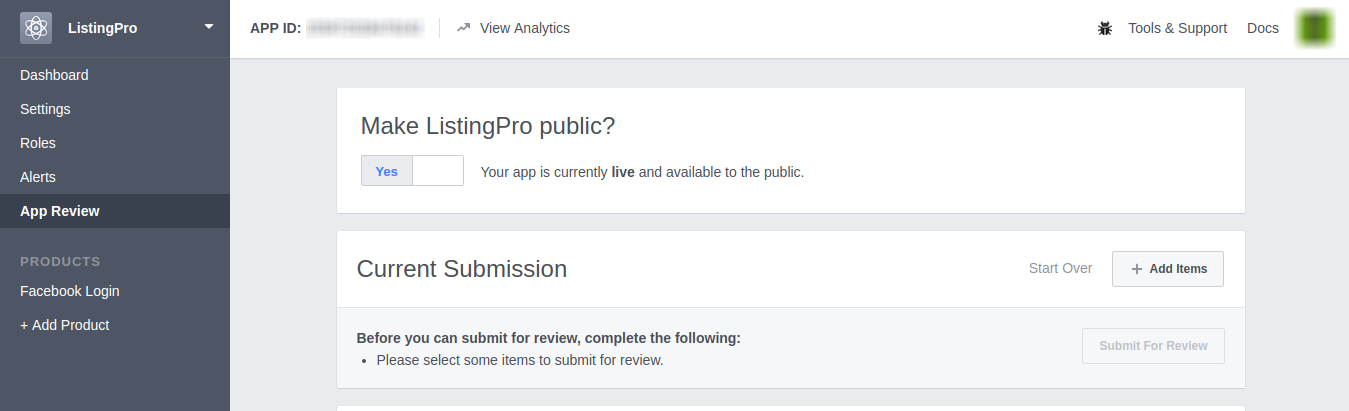
Now, go to your App Review and make it Public. and Save the Changes.

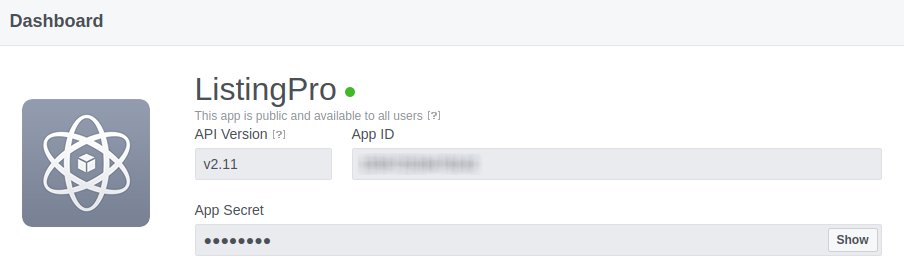
Your APP will now have a green circle on the Dashboard.

Now, one of the most important thing to make your Facebook Login really work in your Signup Homepage, we should go to + Add Product and include the Facebook Login.

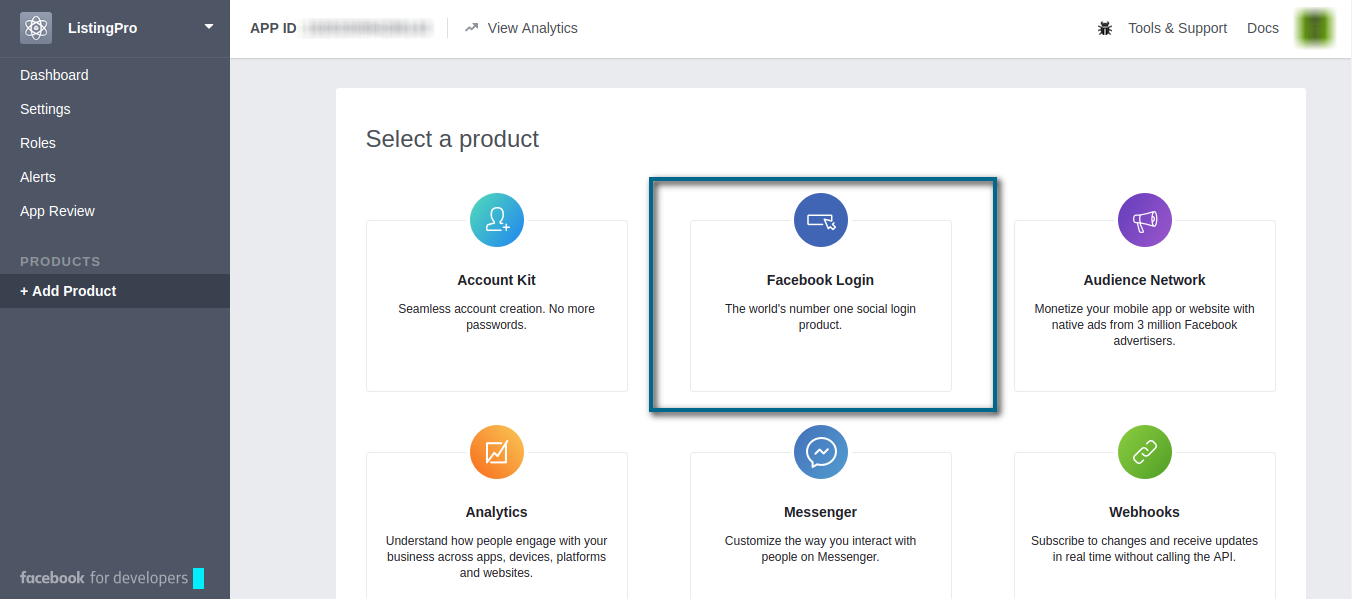
After clicking on the Facebook Login, select the Web option.

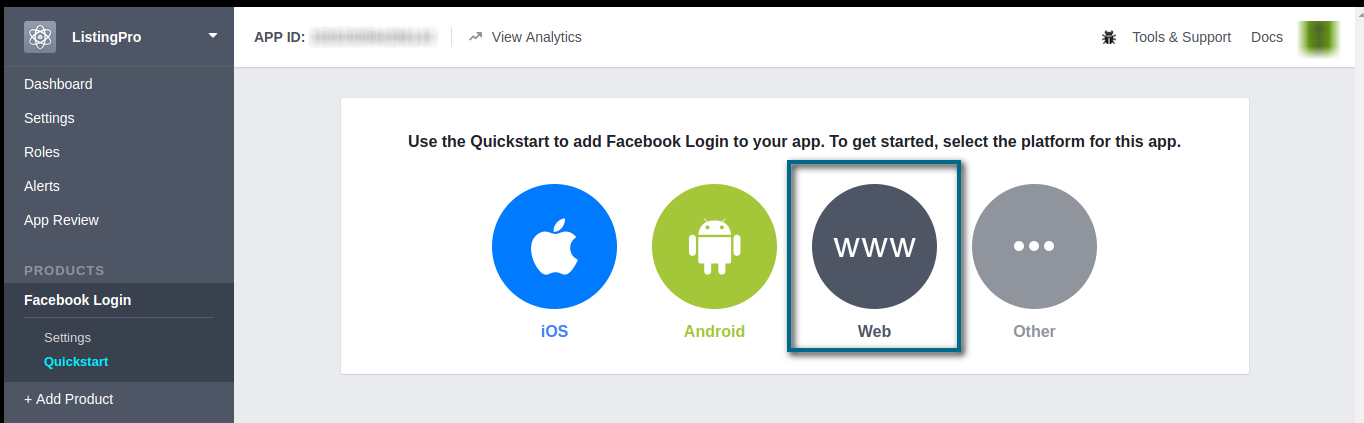
Check if your Website URL inserted at the beginning is correct, and go to the Settings of your Facebook Login.

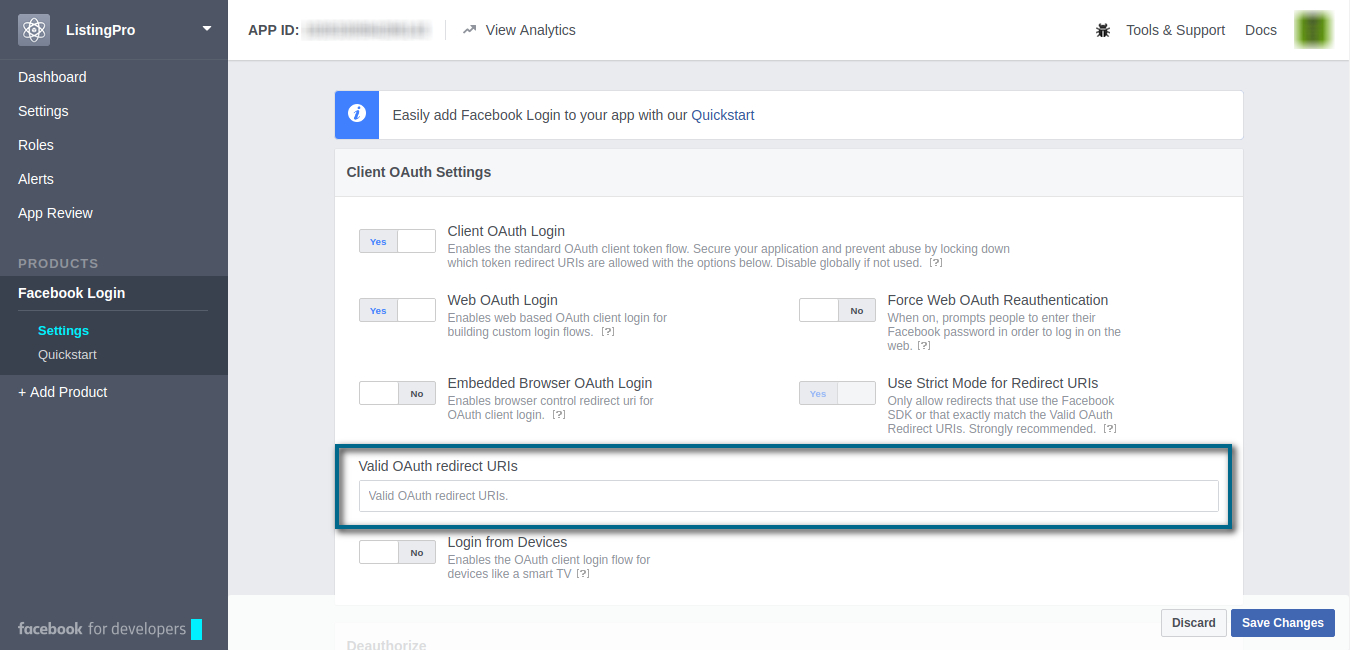
Here, we’re going to add the button address to our Signup. Go to your Website’s Homepage, and copy the link address of your Facebook Button. The link should look like this: https://your-website/wp-login.php?loginFacebook=1

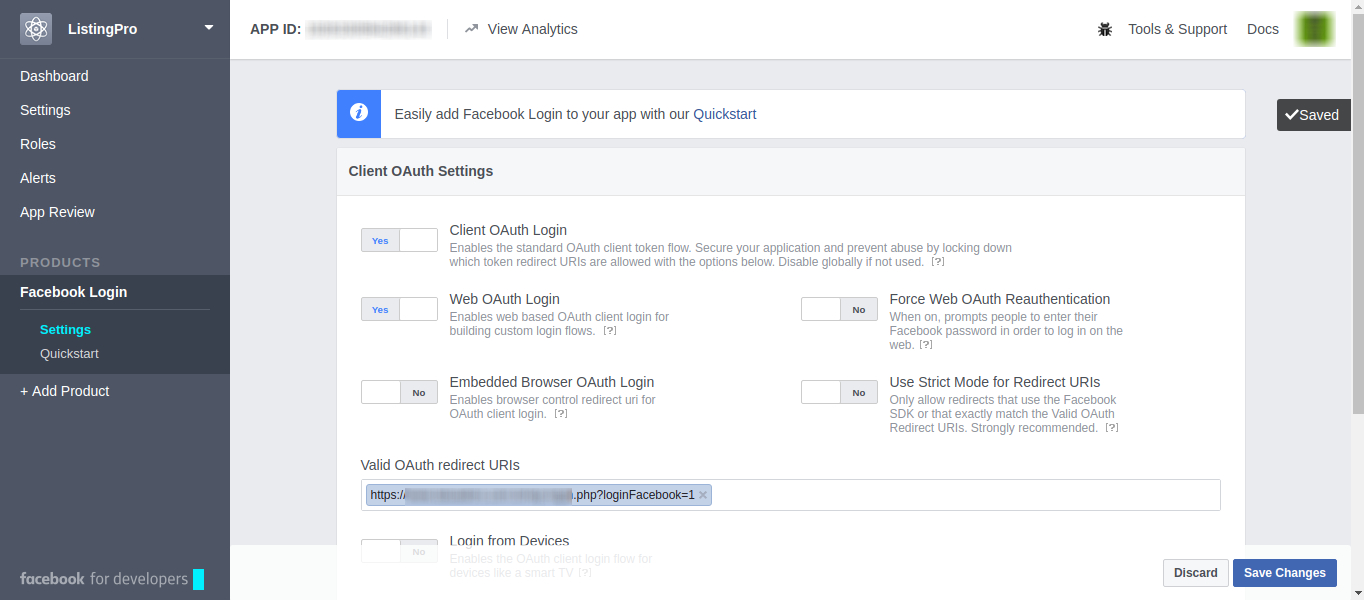
Add this link to validate the OAuth redirect URIs. After that, we’re ready to use our Facebook Login.

Our application is all configured and working.

ATTENTION