IMPORTANT! Google Maps API pricing model changes starting June 11, 2018. As per Google, free credit of $200 per month will be given to everyone. For more information,
click here.
This article covers the following key points:
Recent Google Maps API Changes by Google
Creating a Google Maps API key
Enabling required API key functions
Recent Google Maps API Changes by Google
Recently, Google Maps have introduced some API changes that will affect from June 11, 2018. In this announcement, Google has included a new pay-as-you-go pricing plan will go into effect for Maps, Routes, and Places along with some usage limitations and billing terms in order to user Google Maps API.
Key Changes:
1. To get and use Google Maps API you will need to create a billing account along with credit card.
2. When you enable billing, you get $200 free usage every month for Maps, Routes, or Places.
3. Free Monthly usage limit is crapped to $200 credit. If your API call usage exceeds over $200 free credit then you will be charged for the additional calls.
4. You only pay for what you use. You can review rates and access your spending any time in your Google Cloud Platform Console, where you can also set daily quotas to protect against unexpected increases. You can also set billing alerts to receive email notifications when charges reach a preset threshold determined by you.
Other rates and limits found here.
Action Required for Existing users:
The only thing required from existing users is to add a credit card to their Google Console account if they haven’t done so already.
Creating a Google Maps API Key
STEP 1: Go to Get API Key page.
STEP 2: Click Get Started
STEP 3: Select the Maps, Routes and Places checkboxes and press continue.
STEP 4: Click on +Create a new project and give a new project name (Example: ListingPro).
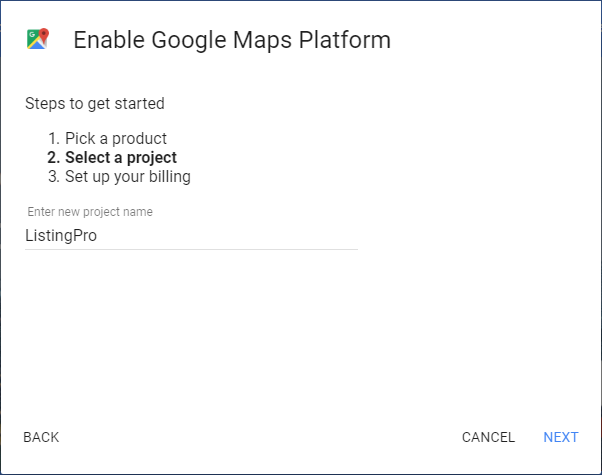
STEP 5: Click NEXT
STEP 6: Select Create Billing Account
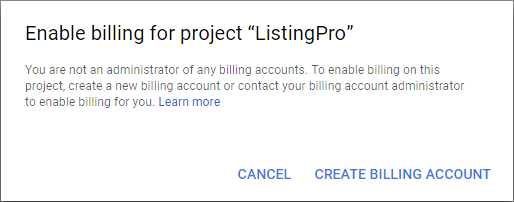
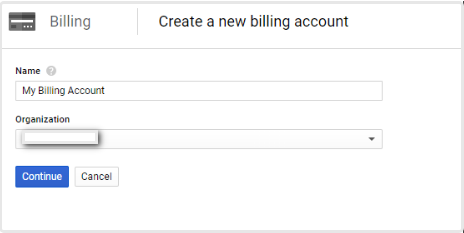
STEP 7: Enter a name for your Billing Account and your Organization name.
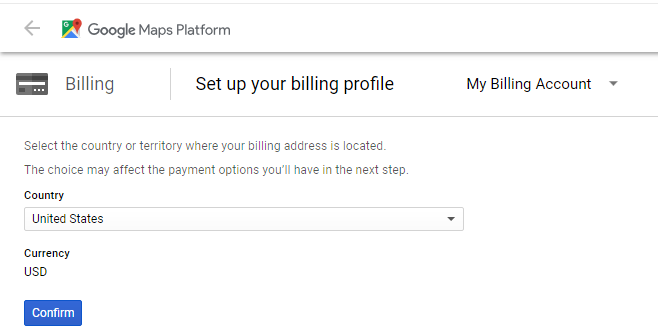
STEP 8: Select your country and click Continue.
STEP 9: Now enter all required billing information and set up your billing profile.
Once your billing has been set up, you can move onto creating your API Key.
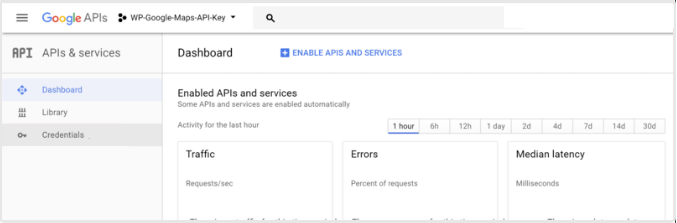
STEP 10: Click on Click Credentials.
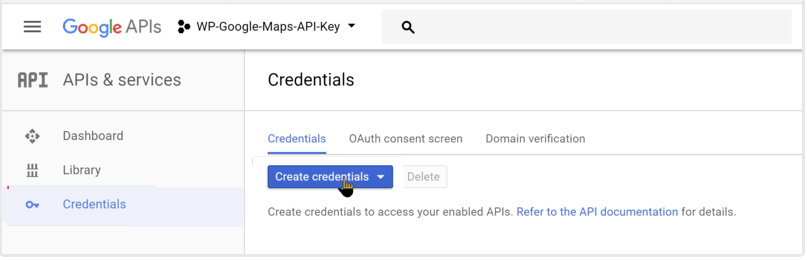
STEP 11: Click on the Create Credentials button on the Credentials window
STEP 12: Click on API Key when next pop-up appears.
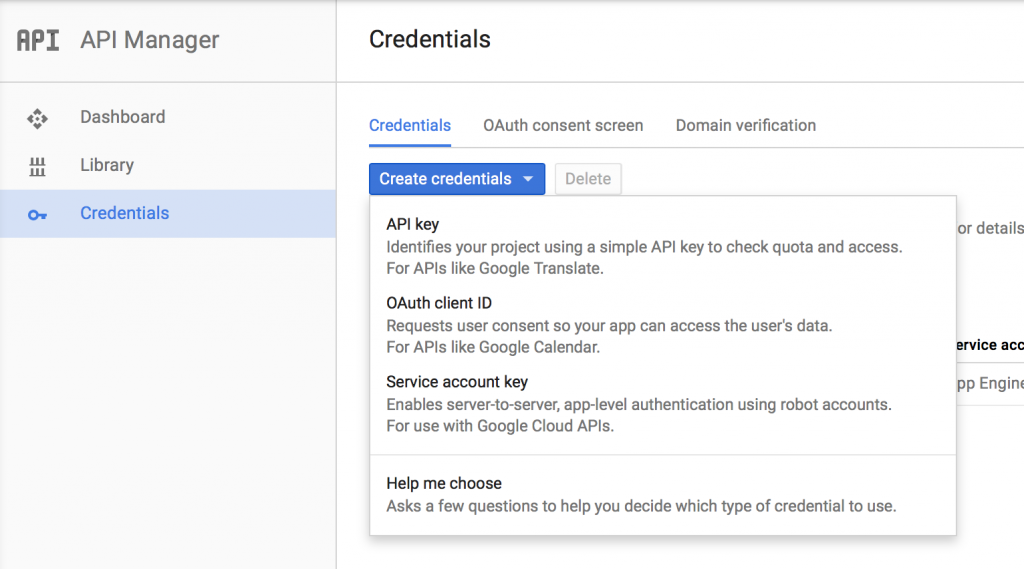
STEP 13: Copy YOUR API KEY.
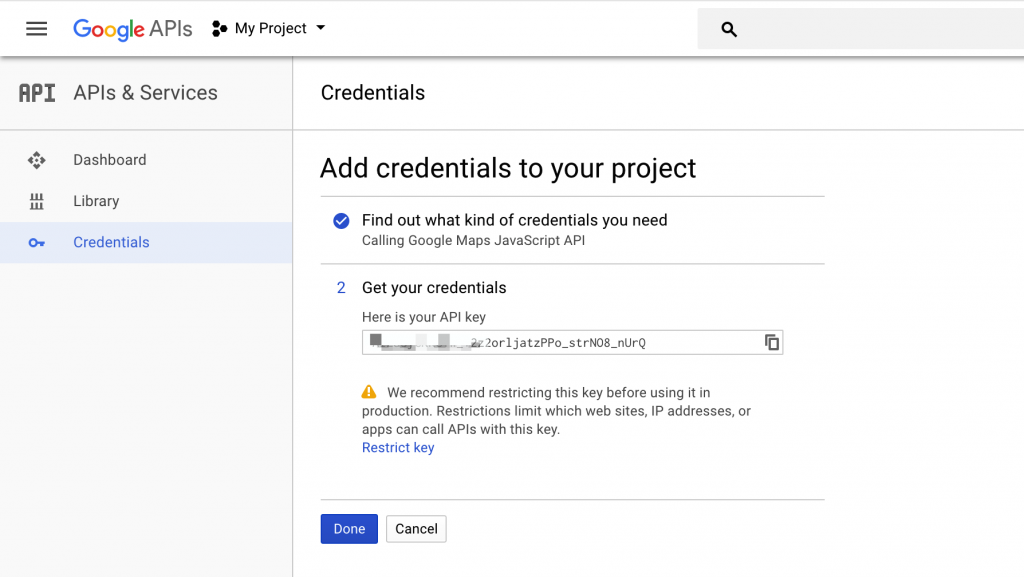
STEP 14: Go to Theme Options > Map Settings and paste Google Map API key in the field.
Enable the required API key functions
To work API correctly API needs some permissions. So you will need to enable only the required API functions.
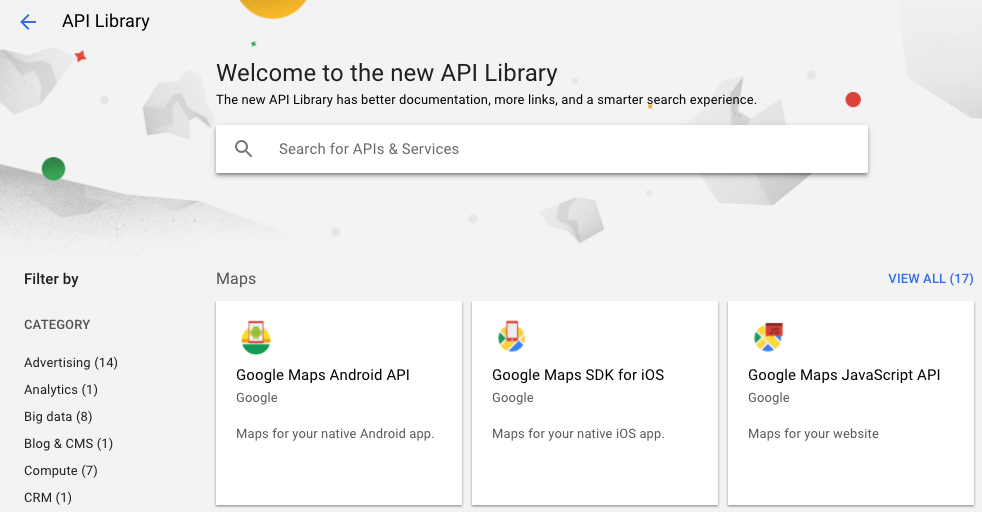
STEP 1: Click the Library link from the sidebar.
STEP 2: Click on the Google Maps JavaScript API.
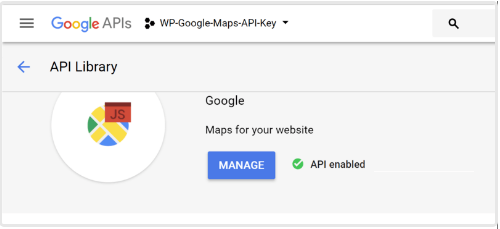
The JavaScript API will probably already be enabled as shown in the screenshot below. If the JavaScript API is not enabled, then click Enable on the Google Maps Javascript API window.
Additionally, read the following.
Google Maps Platform best practices: Restricting API keys