What is Claim Listing?

Now Paid Claim feature is also available.
  • What is Claim Now Feature
  • Why Should Someone Claim a Listing
  • How Free Claim Works
  • How Paid Claim Works
  • Change Claimed Badge Name

What is the Claimed Badge?

The Claimed badge helps businesses distinguish and stand out from the others by establishing ownership by verifying with the website admin. Once the site admin verifies and accepts the claim & verification request, then only a business listing gets a Claimed badge.

There are two places the Claimed badge is visible.

1. Claimed badge on Detail Page


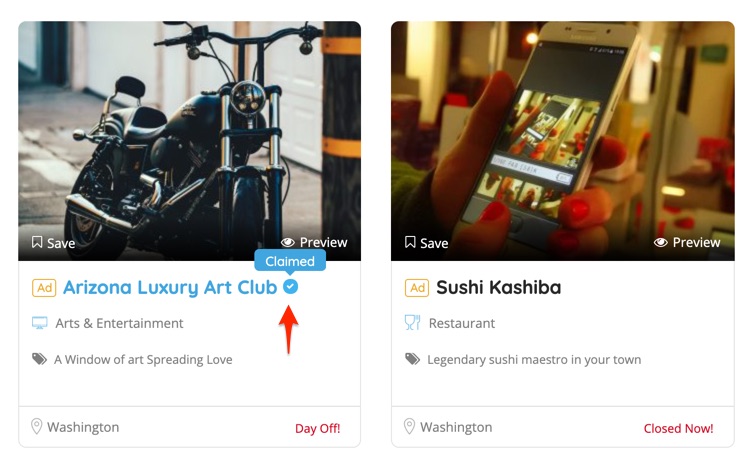
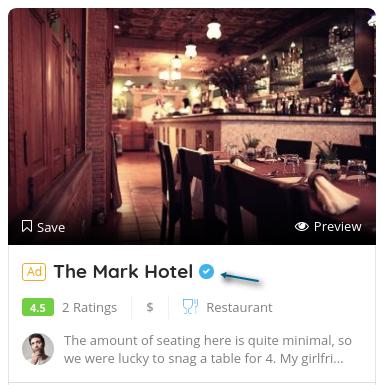
2. Claimed badge on Listing Card

Every business owner is not required but recommended to go through the claim process to make sure their business is not claimed by someone else and also to gain the trust of their customers. As a site admin, you can disable this feature.


Why Should Someone Claim a Listing?

New listing submission (Free or Paid) does not mean listing owner verification, only the admin can verify and grant access after a claim request is submitted.

Admins can certify if the claimed business has come from the true owner by verifying the details sent when claiming a listing. Unfortunately, due to the differences between countries and their laws, it’s recommended for the admin to include details on their FAQ and how to proceed and verify the ownership for a listing.

Having a listing claim process gives peace 0f mind to users that each listing is being verified by the website.

If your business doesn’t require to claim a listing, you can disable this feature.


How Free Claim Works?

Here’s a typical scenario where a user will claim a business listing. If a business is already listed in a directory, the business owner can request to claim their business listing by verifying and establishing their identity as a real business owner to get the most out of a directory.

For example, John runs a pizza shop in downtown called Best Pizza Place and he comes across your awesome directory called downtown-pizzerias.com, where you list all the pizza shops in the downtown area.

John finds his pizza shop is already listed on the-downtown-pizzerias.com but he doesn’t have access to manage the listings, he can request access to the listing by clicking the claim now button and submitting the claim form.

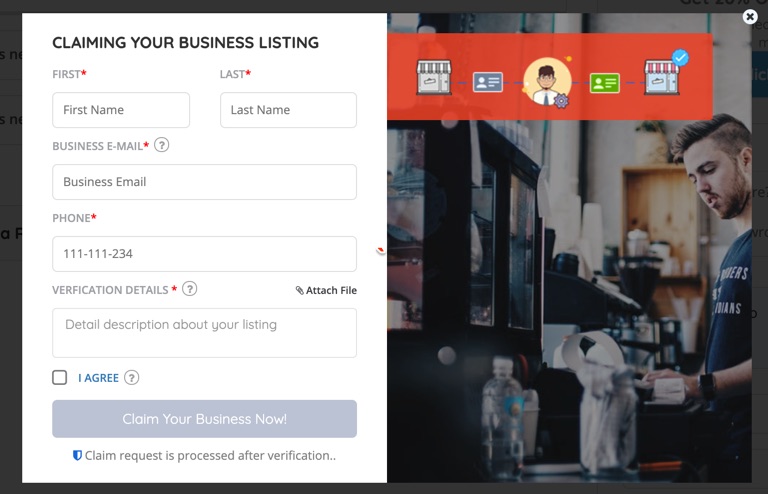
Once signed in user can claim by filling out the form with the additional details for verification based on the local guidelines and policy.

The site-admin needs to review and approve the Claim requests as shown below:

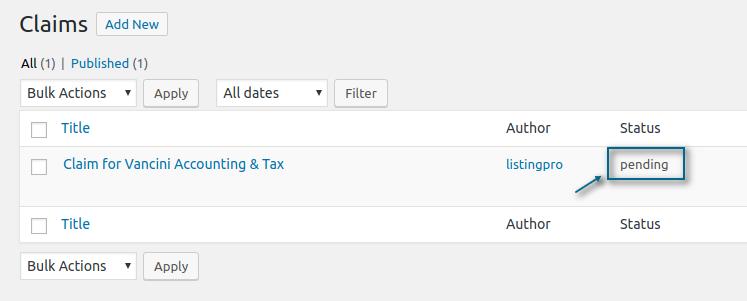
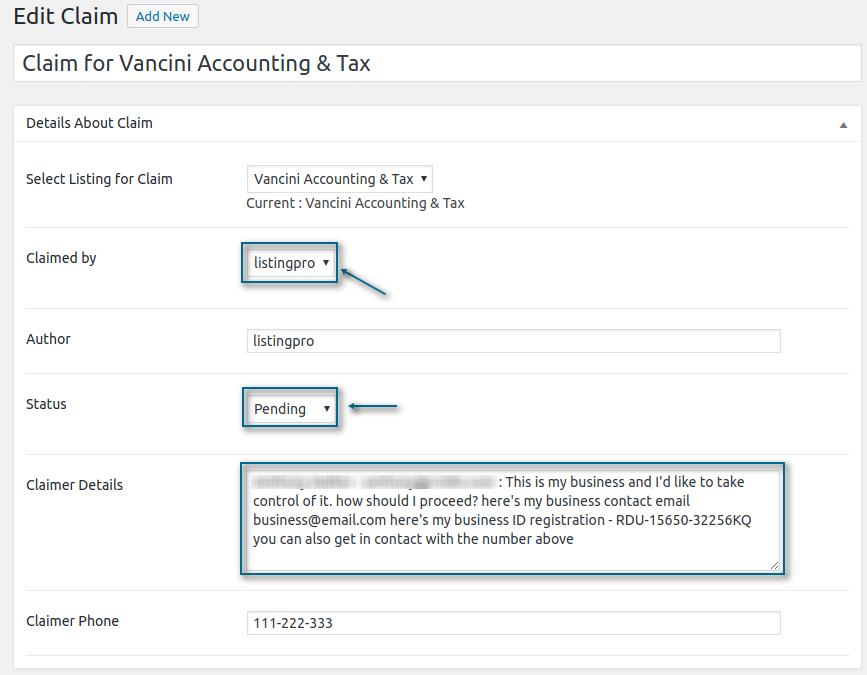
by simply clicking on the listing title, you’ll be able to edit the Claim and change the Status accordingly

Once the claim is approved the Claimed badge will show next to the listing name and the option to claim will disappear.


How Paid Claim Works?

Only once the admin approve he will be sent an email stating the claim has been approved to process the payment. The provided link in the email will take the user to checkout to make the payment. Once the payment is completed then the listing will get the Claim badge.


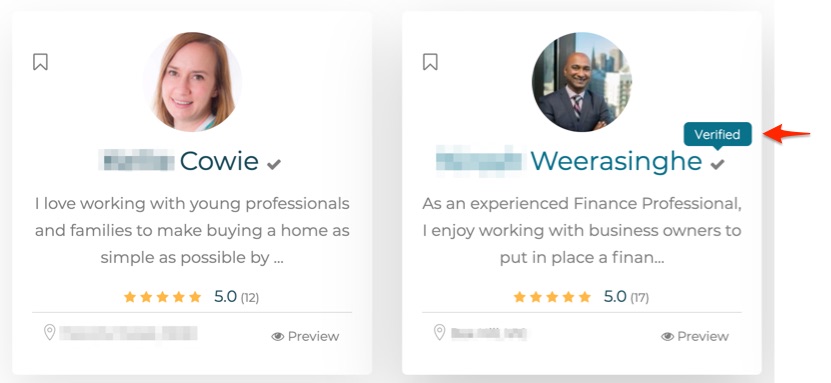
Change The Claimed Badge Name

Yes, you can change the text from Claimed to Verified or something else. In the below example a ListingPro user has already done it.

What is PayPal error 10002?

issue
Based on the API you’re using, PayPal returned API error code 10002, accompanied by one of the messages described in the following paragraphs.

Causes and Solutions
This error usually happens when permissions are set incorrectly in your PayPal account. To allow a third party to make API calls on your behalf, you must explicitly grant them permission to do so. If you’ve already done this but you got error code 10002, your shopping cart configuration may be the cause. Your vendor needs to know the primary email address on the PayPal account for which they’re making the third-party API call. They must add this email address to the API script making the API call on your behalf.

If you’re making third-party API calls but not using a vendor and you still get this error, it can be because of the following reasons:

  • Incorrect API information – Follow this procedure to request API Signature or API Certificate credentials.
  • Passing a value in the Subject field – This field should be blank if you’re not making an API call on behalf of another person.

One of several different error messages accompanies error code 10002. You’re most likely to see this message:

  • 10002: Authentication/Authorization – Username/Password incorrect

This error occurs when you provide an incorrect API username and API password to the PayPal server, for example, if you:

  • Provide the username and password for your actual PayPal account, instead of your API username and API password. PayPal generates your API username and API password when you generate your API Certificate and Signature.
  • Use the same API information for the Sandbox and Live environments. You need to generate separate API information for your Sandbox and Live accounts.
  • Don’t update the endpoint to point to PayPal’s Live API servers.
  • Format your API Certificate as .txt instead of .pem.
  • Add trailing or leading whitespace on any of the characters.

One of the following error messages also may accompany code 10002:

  • 10002: Account locked – The user account is locked
  • 10002: Authentication/Authorization Failed – Account is locked or inactive
  • 10002: Internal Error – Account is locked or inactive
  • 10002: Internal Error – Internal Error
  • 10002: Authentication/Authorization Failed – Account is not verified
  • 10002: Authentication/Authorization Failed – API access is disabled for this account
  • 10002: Authentication/Authorization Failed – Client certificate is disabled
  • 10002: Authentication/Authorization Failed – Internal Error
  • 10002: Authentication/Authorization Failed – This call is not defined in the database!
  • 10002: Authentication/Authorization Failed – Token is not valid
  • 10002: Receiving Limit exceeded – You’ve exceeded the receiving limit. This transaction can’t be completed
  • 10002: Restricted account – Account is restricted

These errors occur because the credentials are incorrect or invalid. Make sure they’re entered correctly and, if possible, try again. If the problem persists or you can’t try again, contact your Account Manager or open a ticket with Merchant Technical Services.

If you get error code 10002 with the message 10002: Security Header Invalid, you have incorrect API credentials. Check that the account that will receive payments was used to generate the API credentials. If you’re using PayPal’s Sandbox environment, you must generate API credentials from within the Sandbox business account rather than a Live account.

You should also check that you’re submitting your request to the correct environment (Live vs. Test). For information on endpoints, see NVP/SOAP API endpoints. If you use a shopping cart, there’s often a switch on their end to change from Live mode to Test or Sandbox mode. Make sure that this switch is set to the correct environment. In addition, your shopping cart often manages endpoints, so consult your shopping cart provider for help.

Note: Any extra spaces or characters in the username, password, or signature can also cause the Security Header invalid error. Check for any extra spaces at the end of the password or signature; it’s common for them to be added when pasting credentials into your cart.


Requesting API credentials
Depending on your shopping cart requirements, you may need an API Signature or an API Certificate. Here’s how to request API Signature or Certificate credentials.

  • If you choose API Signature, you can copy the API username, password, and Signature. Then, paste this information into your shopping cart configuration or administration screen and click Done. You can view or remove an API username, password, or Signature anytime.
  • If you choose API Certificate, copy your API username and password and click Download Certificate. Save the file to your computer. Remember where you saved the file because you’ll need it later in your shopping cart setup.

Example NVP responses for error 10002

  • L_ERRORCODE0=10002
  • L_SHORTMESSAGE0=Security error
  • L_LONGMESSAGE0=Security header is not valid
  • L_SEVERITYCODE0=Error


How to edit Home banner?

This article contains everything you must know about configuring the blog and it’s broken down into the following topics.

  1. Home page Banner Text
  2. Change the search box text (what – where)
  3. Change the search bar’s main title
  4. Hero-header background Video format
  5. Fixing NULL error in WHERE field


1. Home page Banner Text

STEP 1: Log in to the WordPress admin dashboard.

STEP 2: Go to Theme Options > Banner Settings

Scroll to find all the fields to edit such as Banner Search Placeholder, Location Default Text, Search Top Title, etc.

STEP 3: Edit the text in appropriate fields.

STEP 4: Click Save Changes


2. Change the search bar (what/where)?

STEP 1: Log in to the WordPress admin dashboard.

STEP 2: Go to Theme Options > Search Settings

STEP 3: Select whether you want to hide (What – Where) options in your homepage search

STEP 4: Hit save and sync.


3. Change the search bar’s main title

If you still want to get dynamic access to IP ADDRESS but want to customize the box main title, kindly follow the following steps:

STEP 1: Log in to the WordPress admin dashboard.

STEP 2: Go to Theme Options > Banner Settings

See Screenshot below

STEP 3: Add a new title in the respective field

See Screenshot below

STEP 4: save changes

[custom-related-posts title=”Related Posts” order_by=”title” order=”ASC” none_text=”None found”]

4. Hero-header background Video format

Preferably MP4 format. You can edit your Video Banner the way you want to. There’s no limitation regarding time duration. But as we know, there should be included at least 30sec or 1min video.

More extended videos, may cause a delay on the screen, and users may face some instability during page loading.
Remember that the video should be added to your WordPress Media Gallery to parse the Video URL to your homepage directory


5. Fixing NULL error in WHERE field

When you click the target icon in the WHERE field, a script runs to find the city name against your IP address. If that script could not find any city name against your IP address then it returns NULL.

We are using geolocation-db.com which has a location database, which is based on IP addresses. Below is the calling URL that is triggered by click.

URL: https://geoip-db.com/json/geoip.php?jsonp=callback

Try the above URL to see your city name as shown below.

If your city name is not populated as shown in the above screenshot then we assume that there is no city name against your IP address in the GEO IP database. But if you do see the city name as shown in the screenshot but it’s not showing on your website then you can contact our support.

To change the search bar title from auto-detecting your city name, see How to remove location (city) from the search title? 


How to customize Add Listing form?

Theme Options for Submit Listing

Pricing Plan for Submit Listing

In the Theme Options settings, you can define the whole structure of the Submit Listing. It allows you to control which options will be available in the Directory.

The Pricing Plan settings, you can define which features of the Submit Listing defined before, will be accessible for users that sign up for each specific plan, it will only restrict those features available in the Directory for each type of plan.