List of all the custom built elements for WPBakery Page builder

By using the ListingPro Custom elements for WPBakery (Formerly Visual Composer) you can customize the layout as per your needs. These custom elements will do a lot for your directory. In this article, we will extend the functionality of every element and its usage.
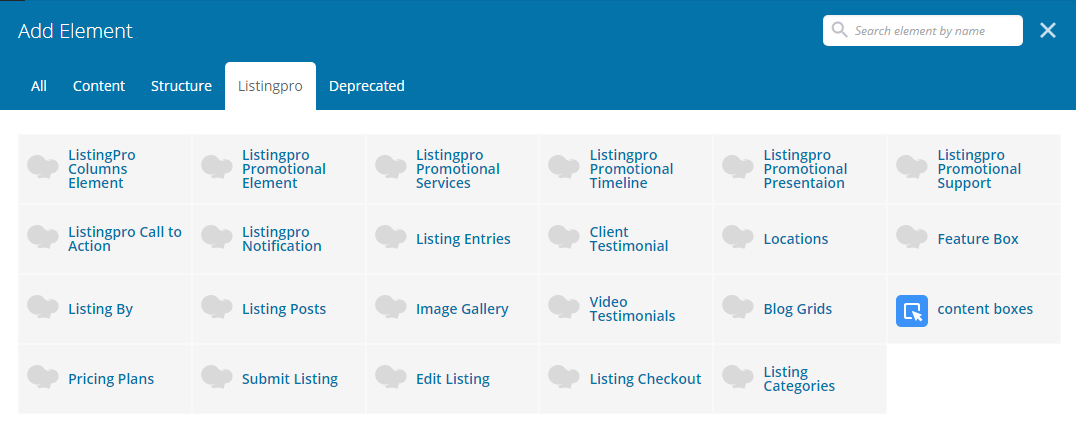
Click on any Element Title by Name to jump:

  1. ListingPro Columns Element
  2. Listingpro Promotional Element
  3. Listingpro Promotional Services
  4. Listingpro Promotional Timeline
  5. Listingpro Promotional Presentation
  6. Listingpro Promotional Support
  7. Listingpro Call to Action
  8. Listingpro Notification
  9. Listing Entries
  10. Client Testimonial
  11. Locations
  12. Feature Box
  13. Listing By
  14. Listing Posts
  15. Image Gallery
  16. Video Testimonials
  17. Blog Grids
  18. Pricing Plans
  19. Submit Listing
  20. Listing Checkout
  21. Listing Categories

ListingPro Columns Element

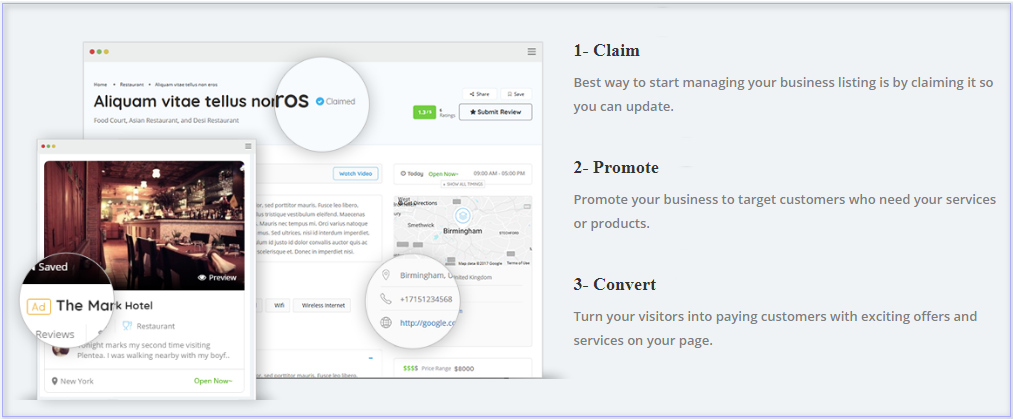
By using this element you can display content into 3 individual columns based on the content title and description.

Frontend View

This is how it looks once you fill out all the details in the Visual Composer elements.
 

All Available Options (Fields)
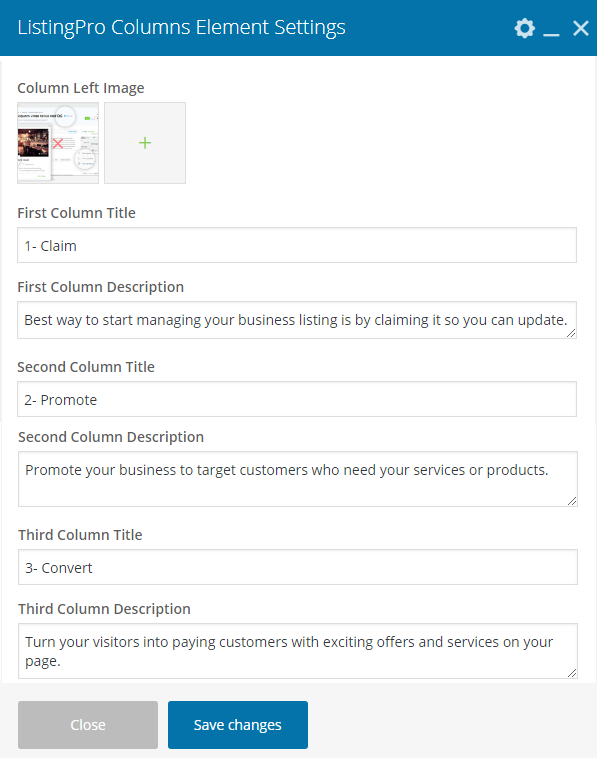
There are following options available in the ListingPro Columns Element

  • Column Left Image
  • First Column Title
  • First Column Description
  • Second Column Title
  • Second Column Description

Backend View

We have filled in all the details below to achieve the result you see in the above screenshot.

ListingPro Promotional Element

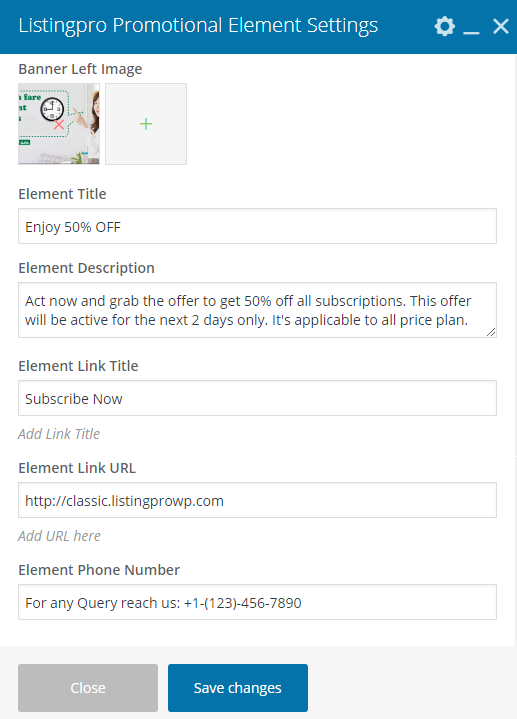
By using this element you can display a custom content block with title and description along with a button and hyperlink Sometimes it’s a perfect solution for promotional purpose and to refer new users by using a sing up or promotional button.

Frontend View

This is how it looks once you fill out all the details in the Visual Composer elements.

All Available Options (Fields)
There are following options available in the ListingPro Promotional Element


  • Banner Left Image
  • Element Title
  • Element Description
  • Element Link Title
  • Element Link URL
  • Element Phone Number

Backend View

We have filled in all the details below to achieve the result you see in the above screenshot.


ListingPro Promotional Services

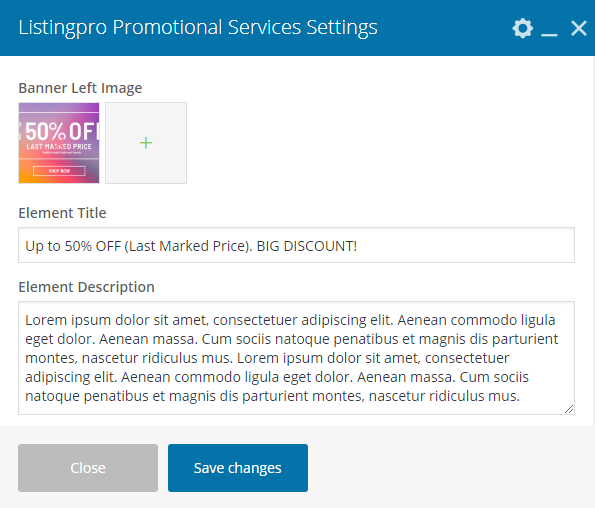
This element can be used for the special promotional purpose. You can add Element Title and Element Description along with an image to display promotional content.

Frontend View
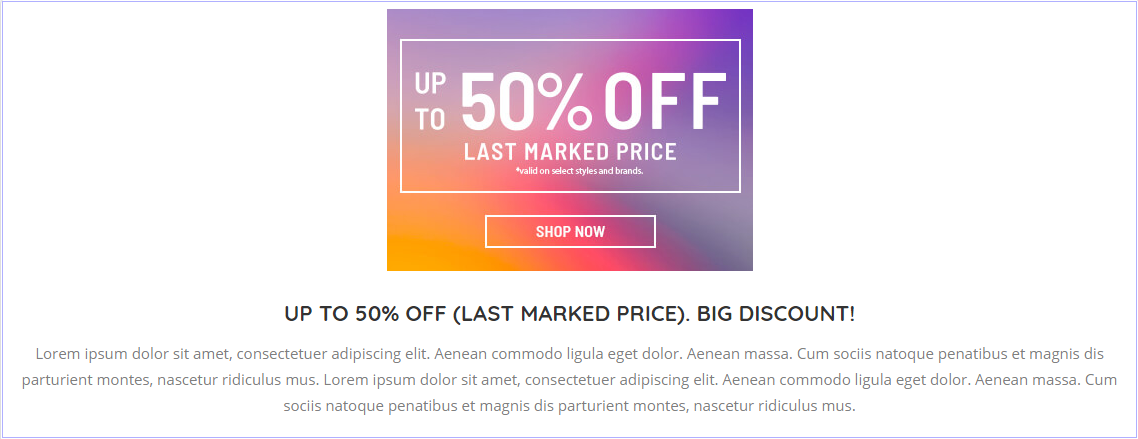
This is how it looks once you fill out all the details in the Visual Composer elements.
 

All Available Options (Fields)
There are following options available in the ListingPro Promotional Services element

  • Banner Left Image
  • Element Title
  • Element Description

Backend View

We have filled in all the details below to achieve the result you see in the above screenshot.


ListingPro Promotional Timeline

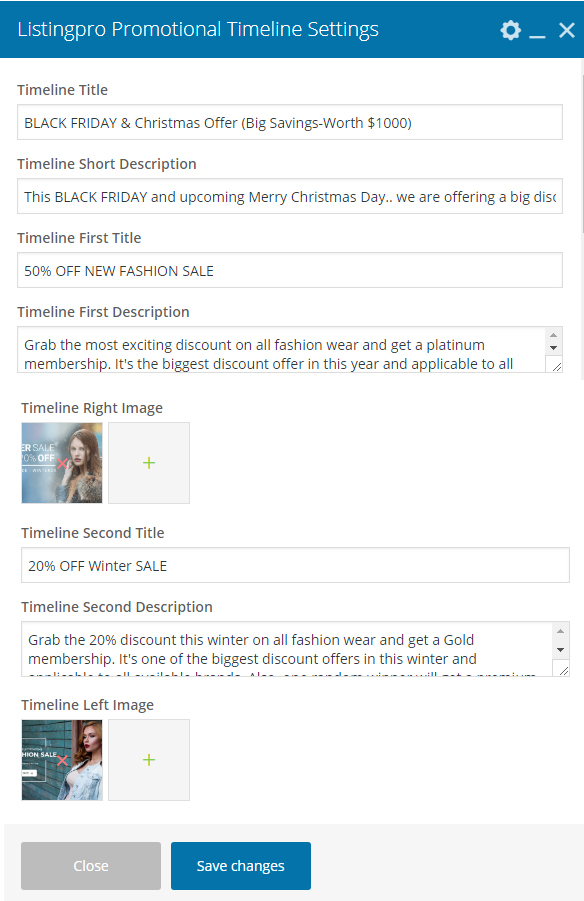
By using this element you can showcase timeline based promotional content. You can add up to 2 timelines into every element. (e.g: Timeline Title, Timeline Description).

Frontend View
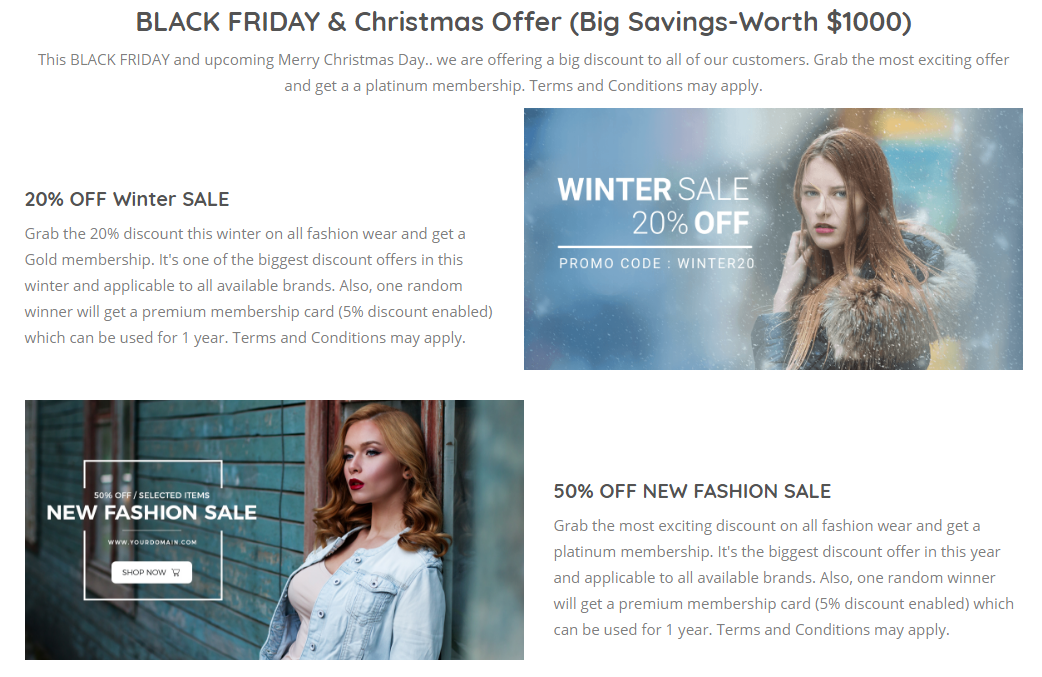
This is how it looks once you fill out all the details in the Visual Composer elements.

 All Available Options (Fields)

There are following options available in the ListingPro Promotional Timeline element.

  • Timeline Title
  • Timeline First Title
  • Timeline First Description
  • Timeline Right Image
  • Timeline Second Title
  • Timeline Second Description
  • Timeline Left Image


Backend View

We have filled in all the details below to achieve the result you see in the above screenshot.


ListingPro Promotional Presentation

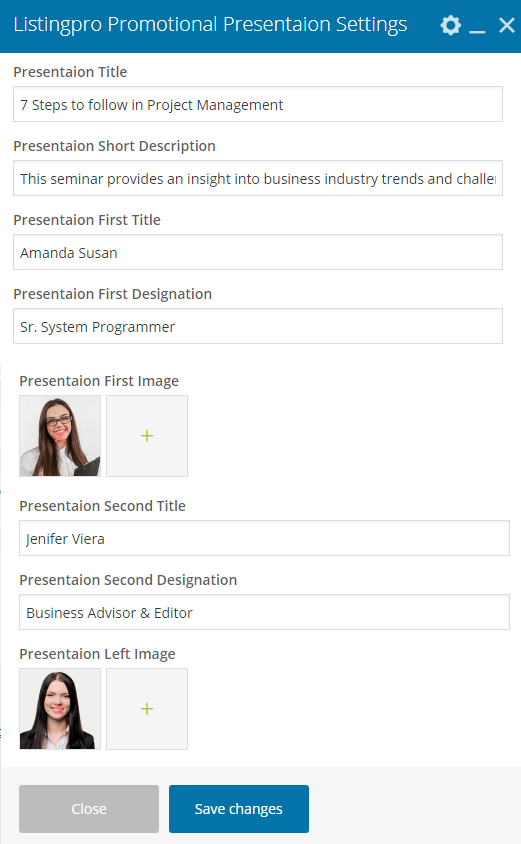
This is another promotional element which can be used to showcase presentation with title and designation or as per your needs.

Frontend View

This is how it looks once you fill out all the details in the Visual Composer elements.

 All Available Options (Fields)

There are following options available in the ListingPro Promotional Presentation element.

  • Presentation Title
  • Presentation Short Description
  • Presentation First Title
  • Presentation First Designation
  • Presentation First Image
  • Presentation Second Title
  • Presentation Second Designation
  • Presentation Left Image

Backend View

We have filled in all the details below to achieve the result you see in the above screenshot.


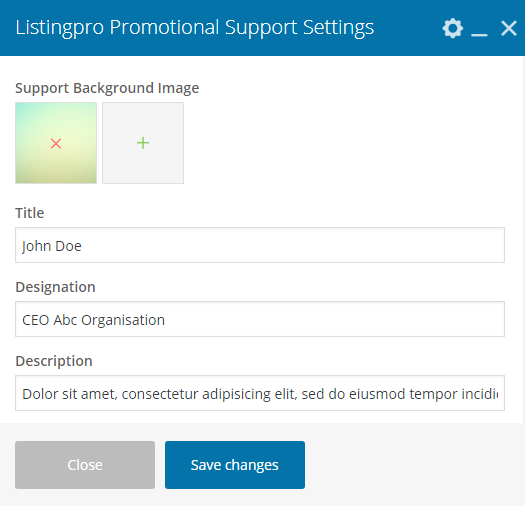
ListingPro Promotional Support

This element is especially used to display promotional contact info along with an image.

Frontend View
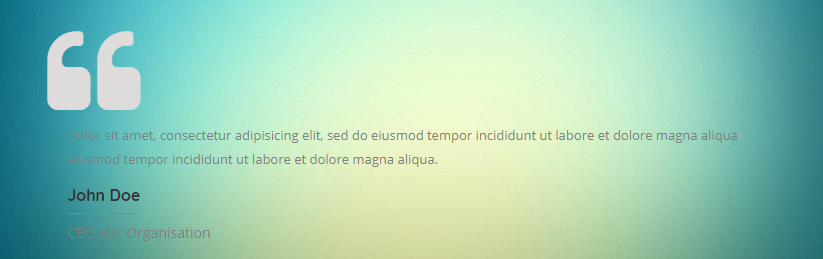
This is how it looks once you fill out all the details in the Visual Composer elements.

All Available Options (Fields)

There are following options available in the ListingPro Promotional Support element.

  • Designation
  • Description


Backend View

We have filled in all the details below to achieve the result you see in the above screenshot.


ListingPro Call to Action

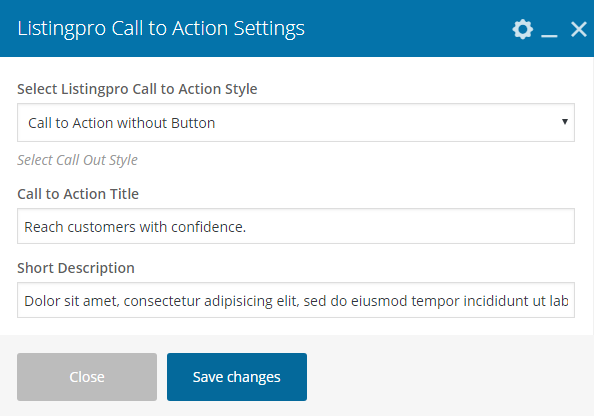
This element is a must-have element for every site. You can create a beautiful Call to Action Button along with style, title, and description.

This is how it looks once you fill out all the details in the Visual Composer elements.

Frontend View (Call to Action with Button)

Frontend View (Call to Action without Button)

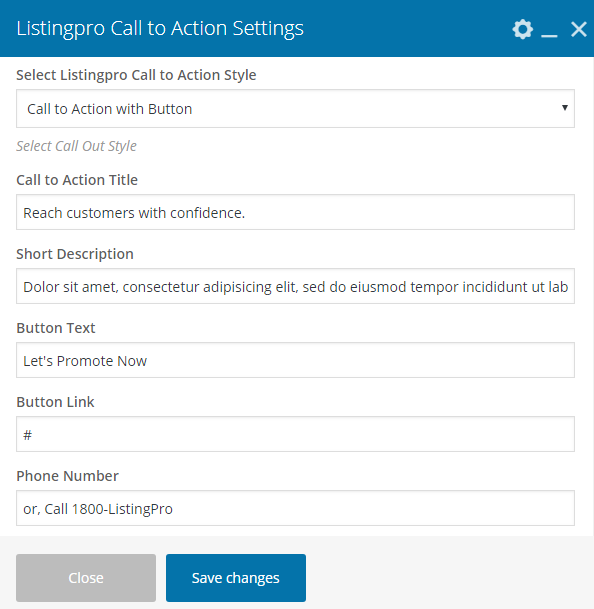
All Available Options (Fields)

There are following options available in the ListingPro Call to Action element.


  • Select ListingPro Call to Action Style
  • Call to Action Title
  • Short Description
  • Button Text
  • Button Link
  • Phone Number


We have filled in all the details below to achieve the result you see in the above screenshot.

Backend View (Call to Action with Button)
Backend View (Call to Action without Button)

ListingPro Notification

By using this element you can display notifications along with images.


Frontend View
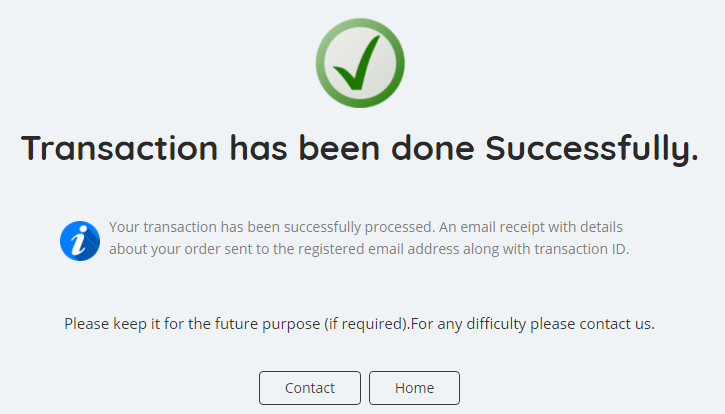
This is how it looks once you fill out all the details in the Visual Composer elements.

All Available Options (Fields)

There are following options available in the ListingPro Notification element.


  • Notification Image
  • Notification Title
  • Select Notice (Success or Failed option available in the dropdown)
  • Notification Description
  • Icon with description
  • Notification Description
  • Redirect to Page (You can redirect to any page. Page list will be visible as a dropdown to choose)


Backend View
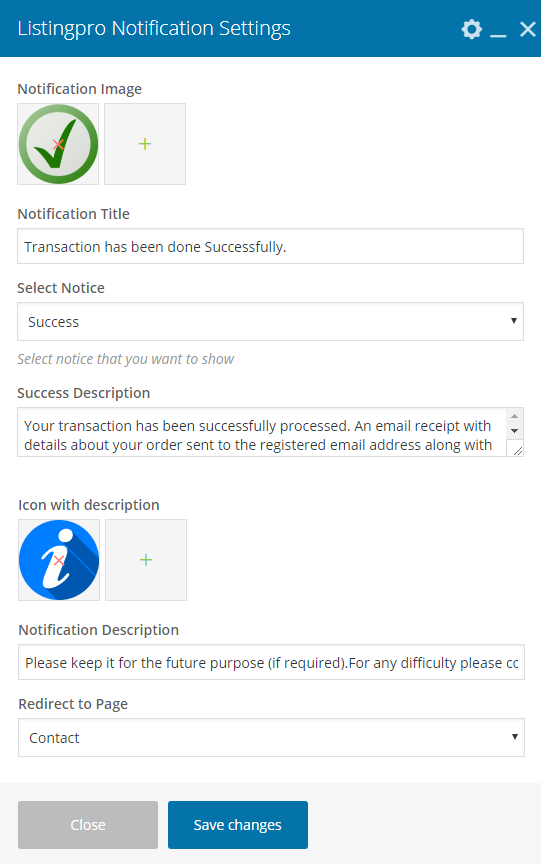
We have filled in all the details below to achieve the result you see in the above screenshot.
 

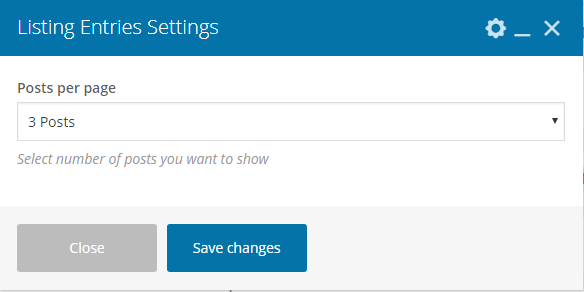
Listing Entries

This element is used to display category based listings on the homepage. Simply select the number of listings that you want to show on the homepage and click Save Changes button.

Frontend View

This is how it looks once you fill out all the details in the Visual Composer elements.

All Available Options (Fields)

There are following options available in the Listing Entries element.

  • Posts per page

Backend View

We have filled in all the details below to achieve the result you see in the above screenshot.


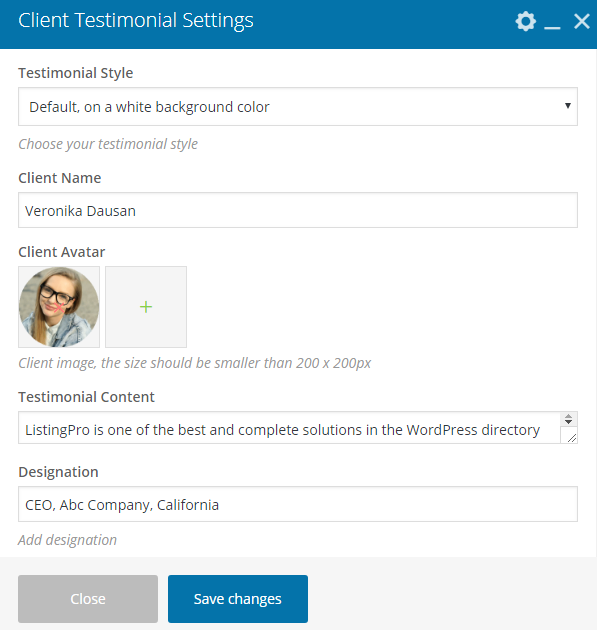
Client Testimonial

This element is used to display testimonial of clients with an image.


Frontend View
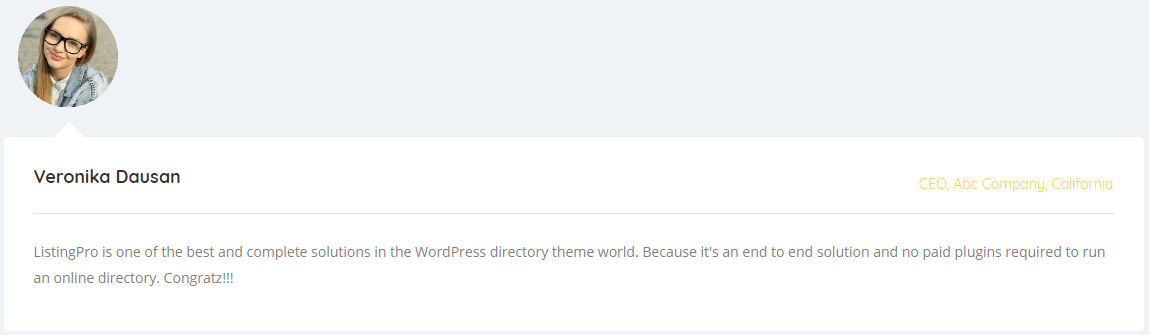
This is how it looks once you fill out all the details in the Visual Composer elements.


 All Available Options (Fields)

There are following options available in the Client Testimonial element.

  • Testimonial Style
  • Client Name
  • Client Avatar
  • Testimonial Content
  • Designation

Backend View

We have filled in all the details below to achieve the result you see in the above screenshot.


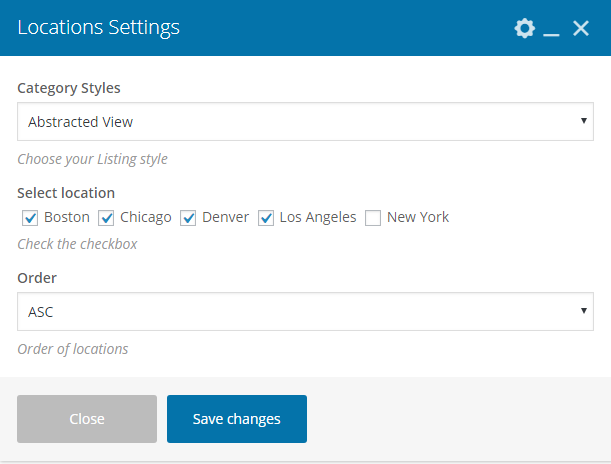
Locations

This element is used to display locations as Abstracted, Boxed or Grid view on the homepage based on the ASC or DESC order. All available location list will be visible inside of the element’s backend settings page. You can choose which location will be visible on the homepage or not.


Frontend View
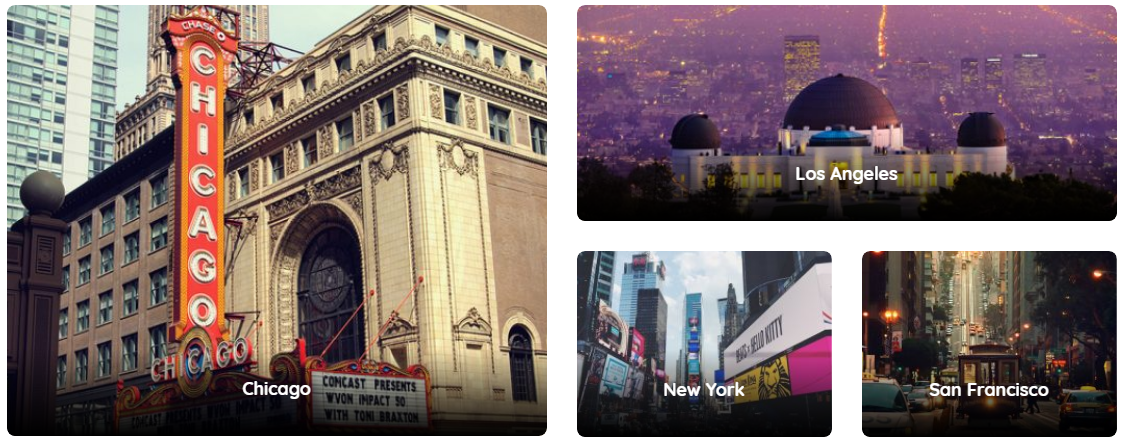
This is how it looks once you fill out all the details in the Visual Composer elements.

All Available Options (Fields)

There are following options available in the Locations element.

  • Category Styles (Abstracted View, Boxed View, Grid View)
  • Select location (All available saved locations will be visible as multi checkbox list under this menu)
  • Order (ASC, DESC)

Backend View

We have filled in all the details below to achieve the result you see in the above screenshot.


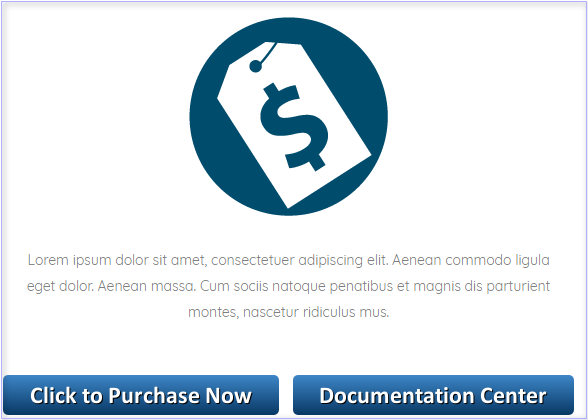
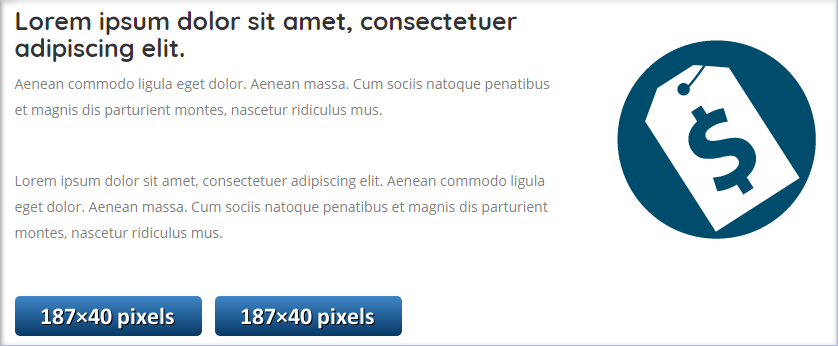
Feature Box

It’s a feature box element. You can display key features by using this element with 2 different styles.

Frontend View

This is how it looks once you fill out all the details in the Visual Composer elements.

(Style 1)

(Style 2)

All Available Options (Fields)

There are following options available in the Feature Box element.

  • Feature Image
  • Title for Description
  • Sub Title for Description
  • Feature Image
  • Description about this element
  • Button Link (1)
  • Button BG Image (1)
  • Button Link (2)
  • Button BG Image (2)

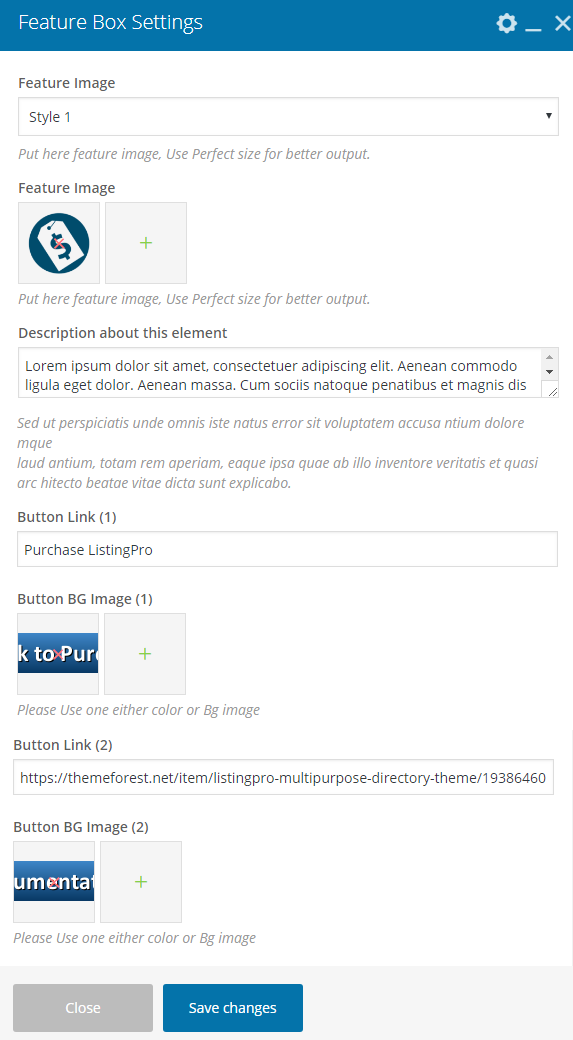
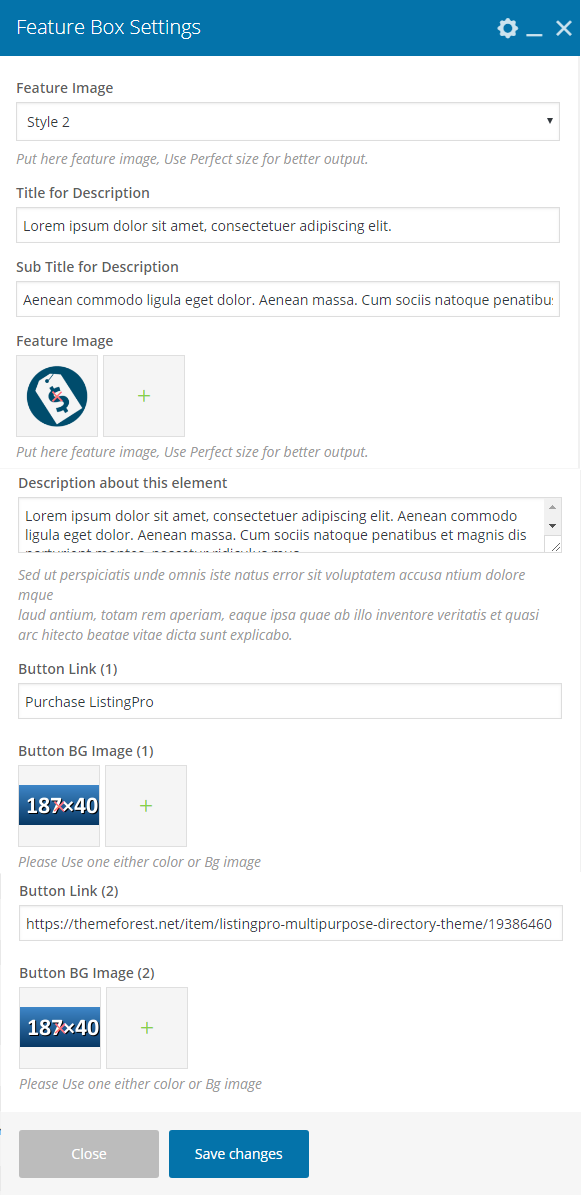
Backend View

We have filled in all the details below to achieve the result you see in the above screenshot.

(Style 1)

(Style 2)


Listing By

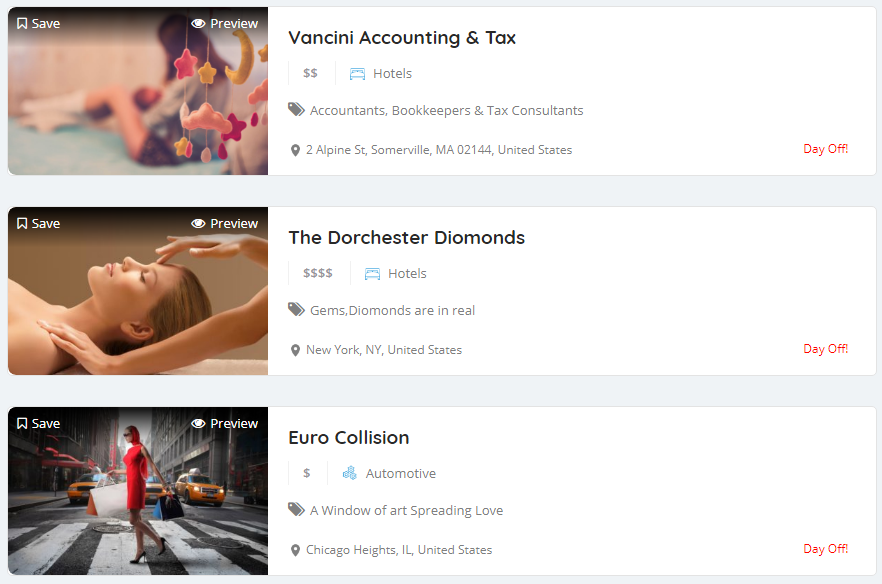
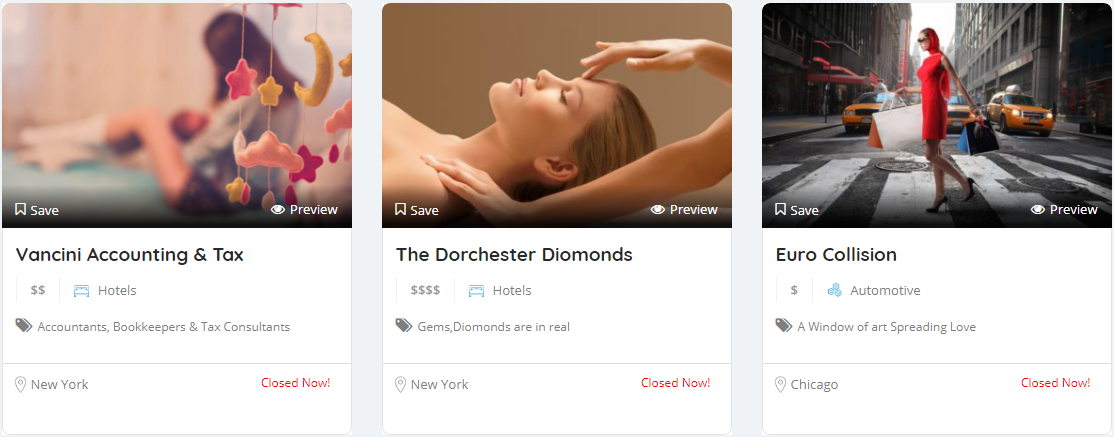
Listing By is an exceptional element to display Listings By Category, By Location, By Location & Category, Recent etc order as Grid View or List View.

Frontend View

This is how it looks once you fill out all the details in the Visual Composer elements.

List View

Grid View

All Available Options (Fields)

There are following options available in the Listing By element.

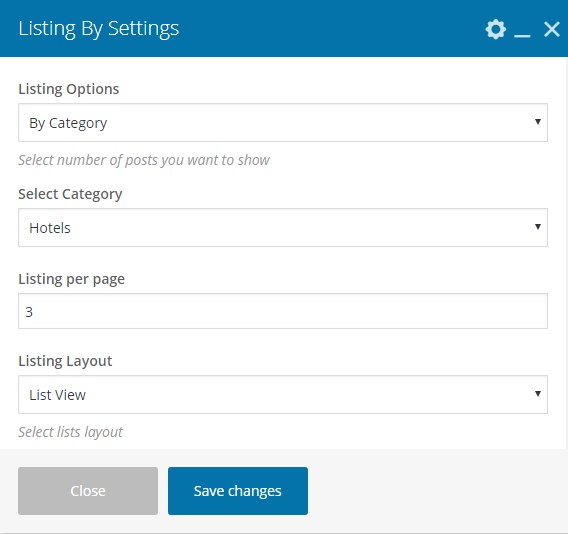
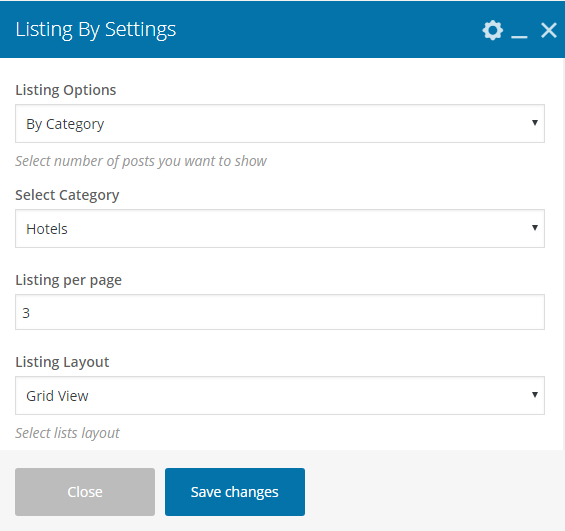
  • Listing Options (Dropdowns: By Category, By Location, By Location & Category, Recent)
  • Listing per page
  • Listing Layout (List View/Grid View)

Backend View

We have filled in all the details below to achieve the result you see in the above screenshot.

List View

Grid View


Listing Posts

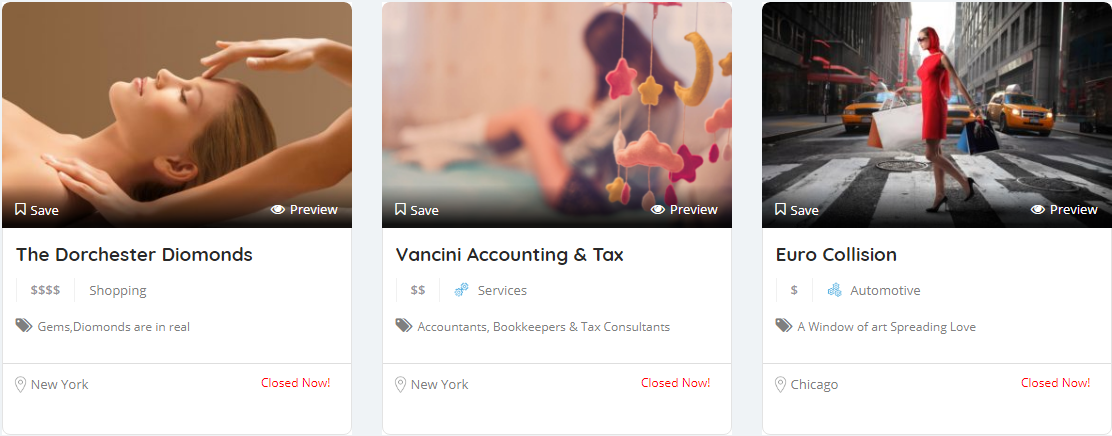
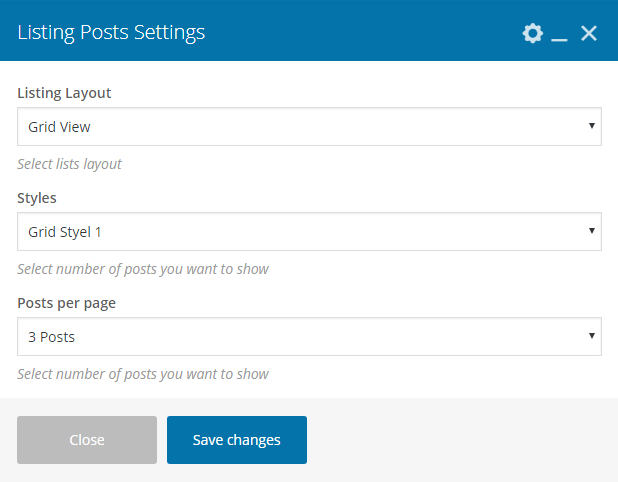
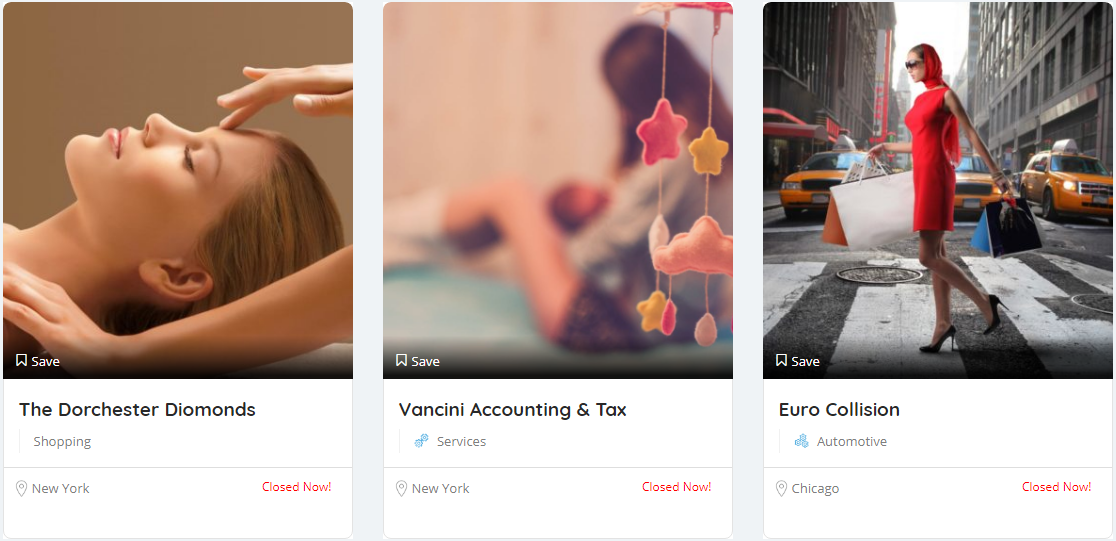
It’s an exceptional element to show the number of listings on the homepage. It’s simple but similar to the Listing By element. You can display listings as List View or Grid View. Grid View has two different styles (Grid Style 1 & Grid Style 2).

Frontend View
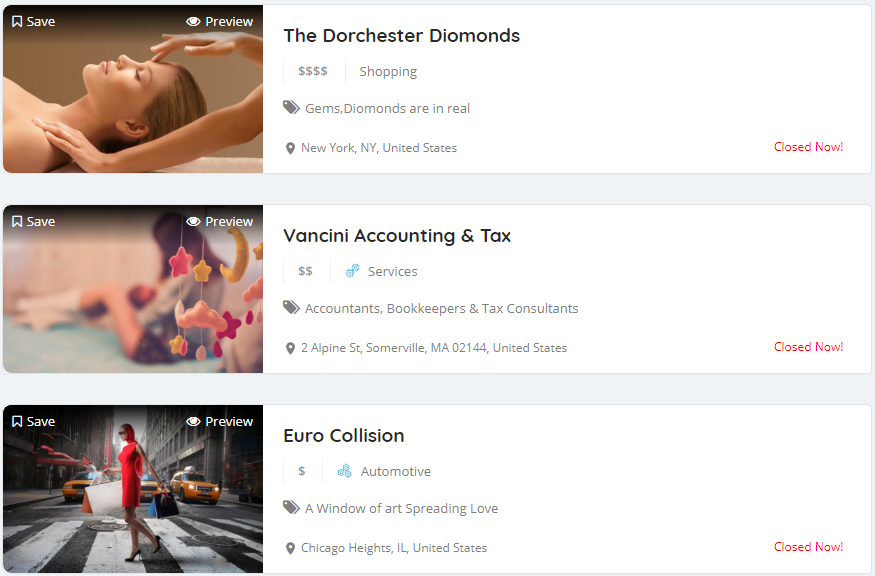
This is how it looks once you fill out all the details in the Visual Composer elements.
List View

Grid View (Grid Style 1)

Grid View (Grid Style 2)
All Available Options (Fields)

There are following options available in the Listing Posts element.


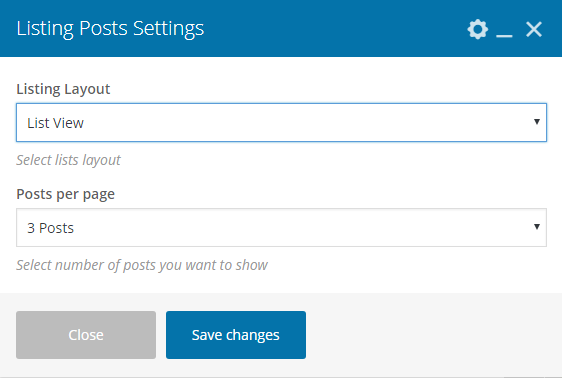
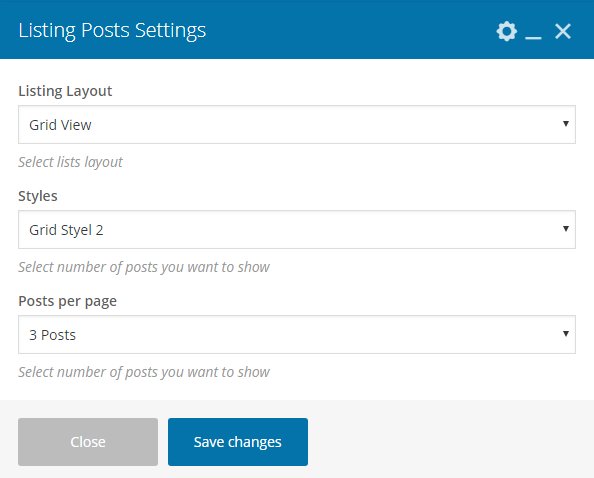
  • Listing Layout (Dropdown: List View/Grid View)
  • Posts per page (Dropdown: 3 Posts, 6 Posts, 9 Posts, 12 Posts, 15 listings)


Backend View

We have filled in all the details below to achieve the result you see in the above screenshot.

List View

Grid View (Grid Style 1)

Grid View (Grid Style 2)

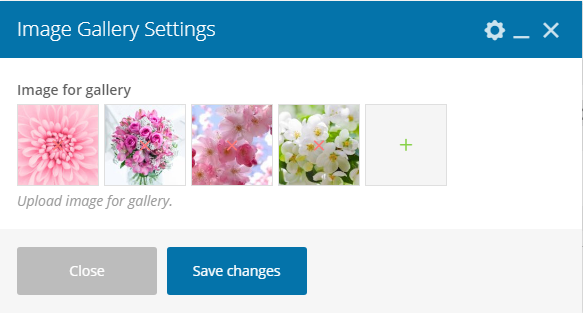
You can display multiple images as an image gallery into the homepage as per your uploaded image size.


Frontend View

This is how it looks once you fill out all the details in the Visual Composer elements.

All Available Options (Fields)

There are following options available in the Image Gallery element.


  • Images for gallery


Backend View

We have filled in all the details below to achieve the result you see in the above screenshot.


Video Testimonial

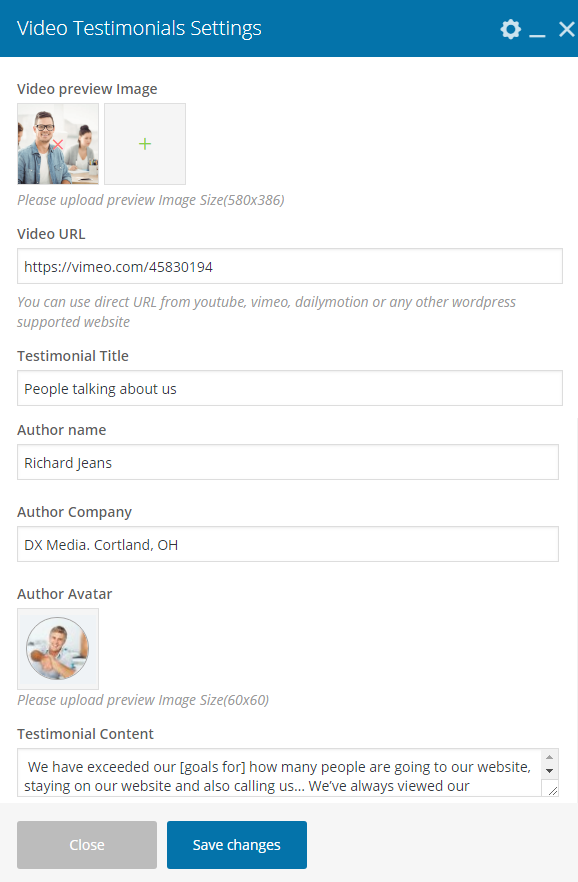
It’s a great element to display video testimonial on the homepage. You can add video preview image, video URL (Youtube URL, Vimeo, Dailymotion or similar sites that supports WordPress) along with Testimonial title, Author name, Author avatar along with testimonial content.


Frontend View

This is how it looks once you fill out all the details in the Visual Composer elements.

All Available Options (Fields)

There are following options available in the Video Testimonial element.


  • Video preview Image
  • Video URL
  • Testimonial Title
  • Author name
  • Author Company
  • Author Avatar
  • Testimonial Content

Backend View

We have filled in all the details below to achieve the result you see in the above screenshot.


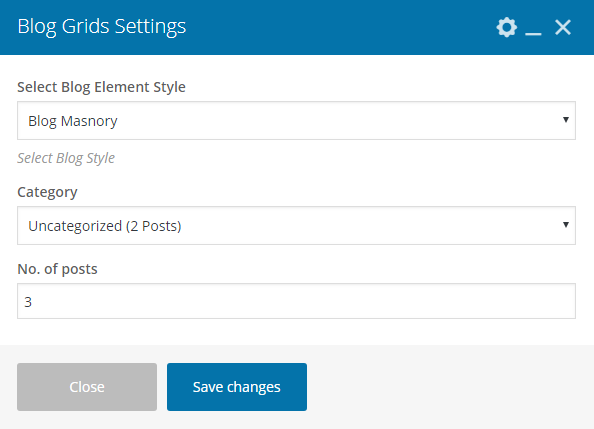
Blog Grids

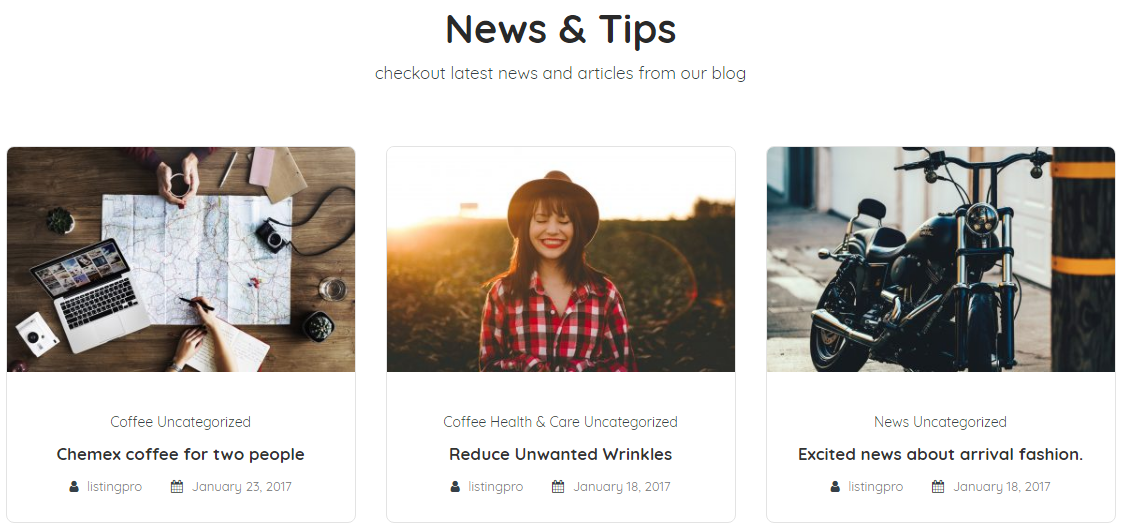
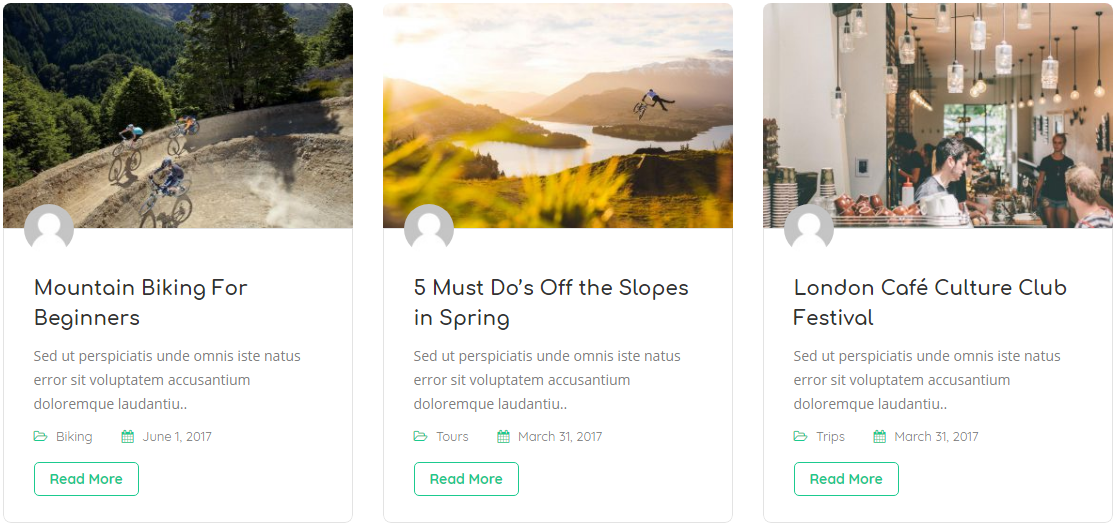
By using this element you can display blog posts as grid or masonry style as per any specific category or for all category.


Frontend View

This is how it looks once you fill out all the details in the Visual Composer elements.

Blog Grid

Blog Masonry

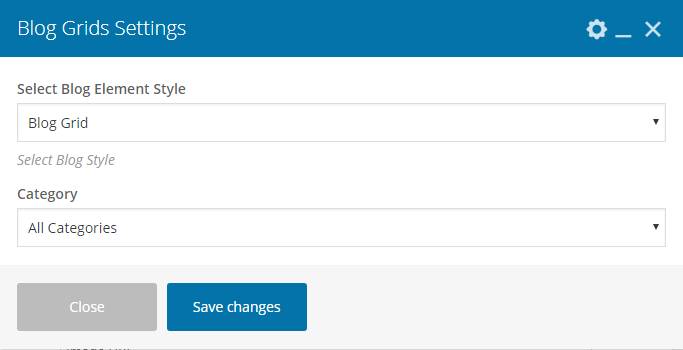
All Available Options (Fields)

There are following options available in the Blog Grids element.


  • Select Blog Element Style (Blog Grid, Blog Masonry)
  • Category

Backend View

We have filled in all the details below to achieve the result you see in the above screenshot.

Blog Grid

Blog Masonry


Pricing Plans

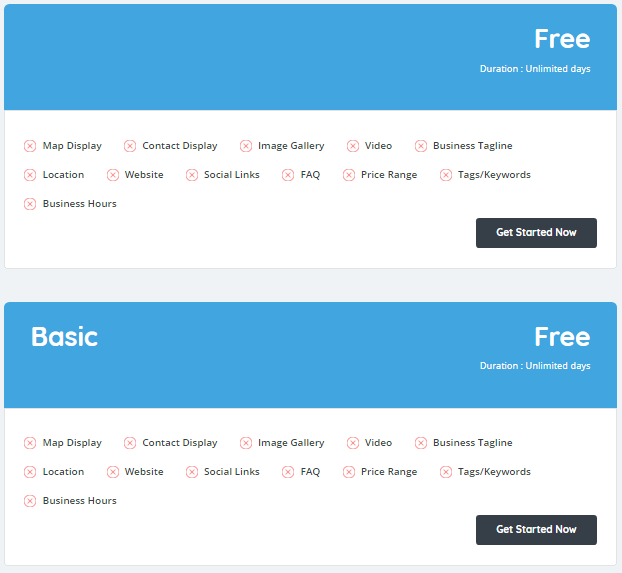
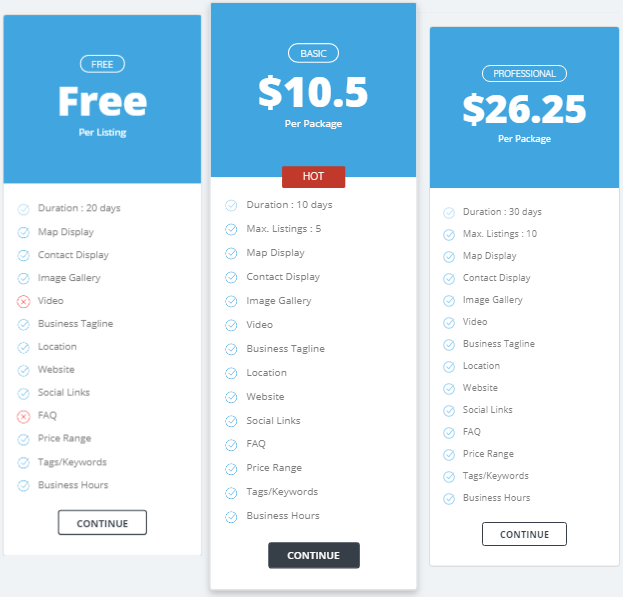
This element will display pricing plans in two different styles. List of all available pricing plans will be displayed automatically one by one as per your settings as Horizontal or Vertical view.

Frontend View

This is how it looks once you fill out all the details in the Visual Composer elements.

Horizontal

Vertical


All Available Options (Fields)

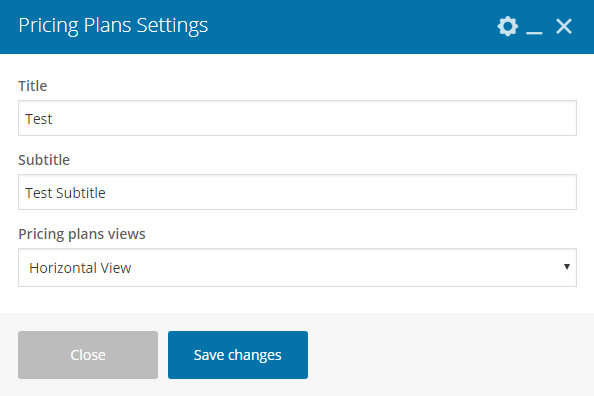
There are following options available in the Pricing Plans element.


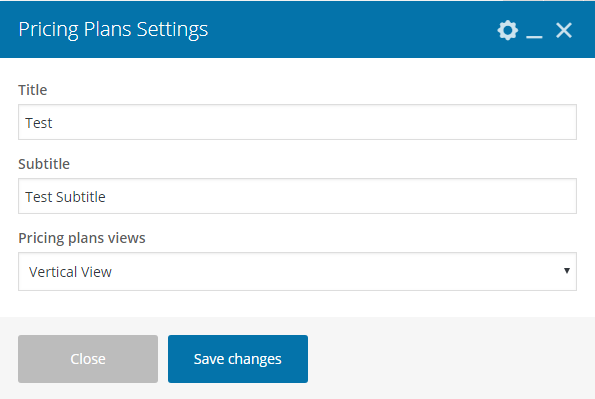
  • Title
  • Subtitle
  • Pricing plans views (Horizontal View, Vertical View)

Backend View

We have filled in all the details below to achieve the result you see in the above screenshot.

Horizontal

Vertical


Submit Listing

This element is used to insert Submit Listing page.

Frontend View

For frontend view please check the demo submission page: https://classic.listingprowp.com/submit-listing

All Available Options (Fields)

There are following options available in the Submit Listing element.

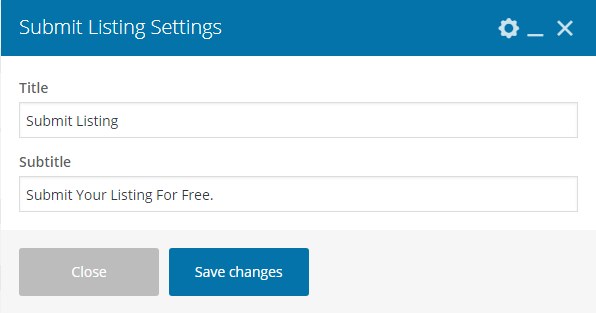
  • Title
  • Subtitle

Backend View

We have filled in all the details below to achieve the result you see in the above screenshot.


Listing Checkout

This is a checkout element and used to display checkout page.

Frontend View
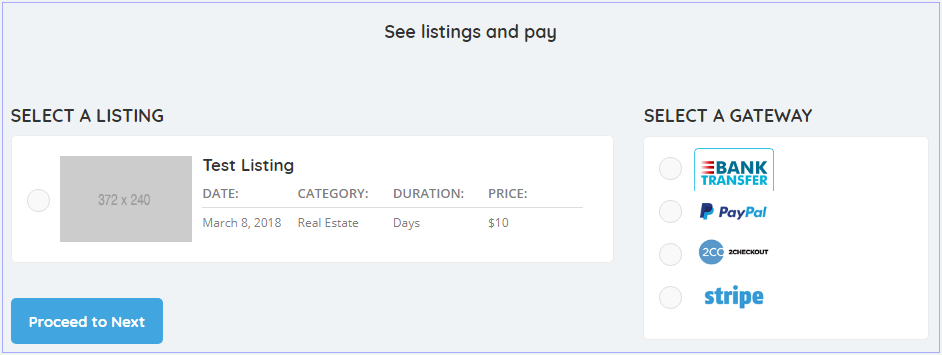
This is how it looks once you fill out all the details in the Visual Composer elements.

 All Available Options (Fields)

There are following options available in the Listing Checkout element.


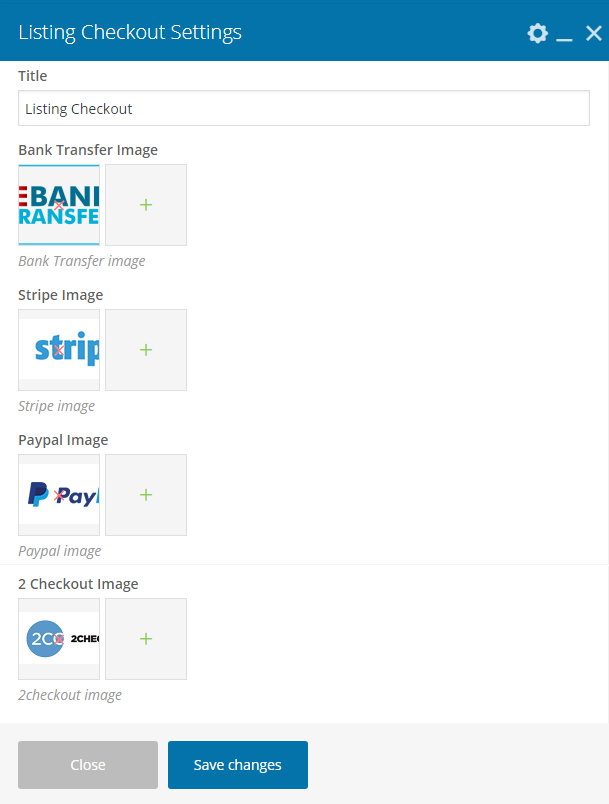
  • Title
  • Bank Transfer Image
  • Stripe Image
  • Paypal Image
  • 2 Checkout Image

Backend View

We have filled in all the details below to achieve the result you see in the above screenshot.


Listing Categories

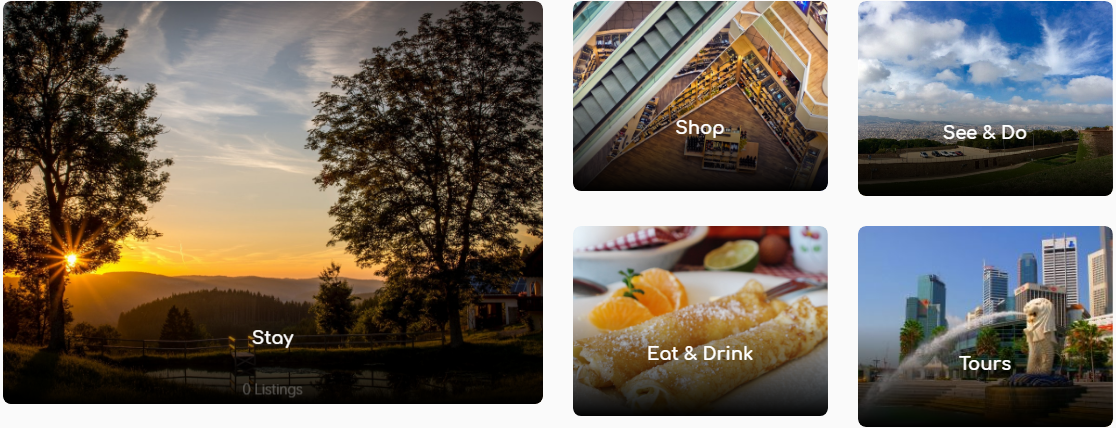
This element is used to display listings as Abstracted, Boxed or Grid view on the homepage. You can choose which category will be visible on the homepage or not.

Frontend View

This is how it looks once you fill out all the details in the Visual Composer elements.

Abstracted View

Boxed View

Abstracted & Boxed View
All Available Options (Fields)

There are following options available in the Listing Checkout element.


  • Category Styles (Abstracted View, Boxed View, Grid View)
  • Select Category (All available saved categories will be visible as multi checkbox list under this menu)

Backend View
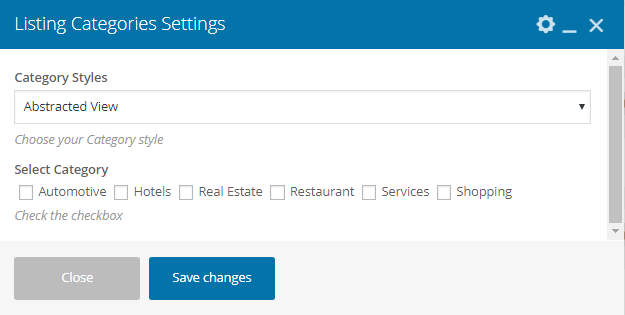
We have filled in all the details below to achieve the result you see in the above screenshot.


How does Recurring Billing works in ListingPro

Recurring (Subscription) payment option only works with Stripe, PayPal, and PayStack.

To enable & manage recurring billing based subscription in ListingPro please follow the below steps:

FOR ADMIN: Enabling Recurring Billing

FOR ADMIN: Listing Subscription Management

FOR LISTING OWNER: Listing Subscription Management


FOR ADMIN: Enabling Recurring Billing

Before enabling recurring option you have to create a paid pricing plan.


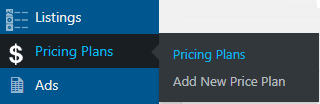
STEP 1: Go to Dashboard > Pricing Plans > Add New Price Plan


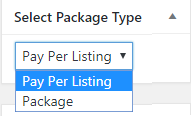
STEP 2: Create a new price plan and choose Select Package Type > Pay Per Listing while creating the price plan.


It is applicable for Pay Per Listing type only. So it’s required to choose ”Pay Per Listing” as the type of price plan. Otherwise, the recurring option will not be visible on the checkout page.

STEP 3: Complete rest of the options and click Publish

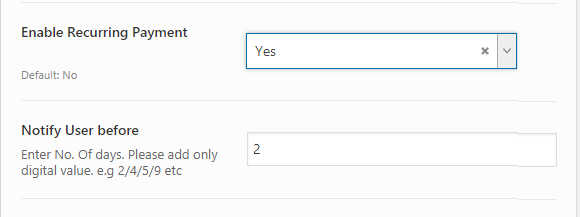
STEP 4: Now enable recurring option from Theme Options > Payment Settings > General > Enable Recurring Payment > Yes

STEP 5: Enter the no. of days inside of the Notify User Before box. The user will be notified of every recurring billing amount before being charged prior to the number of days.


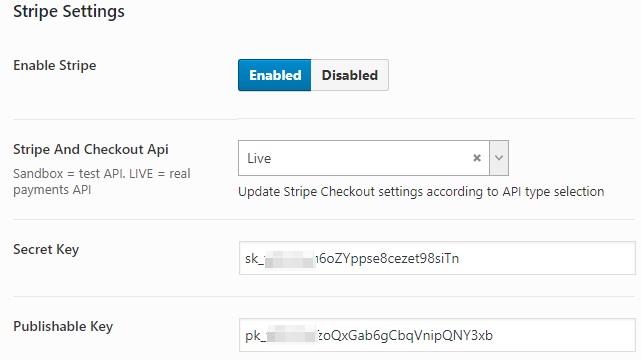
STEP 6: Go to Theme Options > Payment Settings > Stripe Settings and enable stripe as Live mode. Insert Stripe Live Secret Key and Live Publishable Key.


To generate the Stripe API Key please check the following article: How to Generate Stripe API Keys

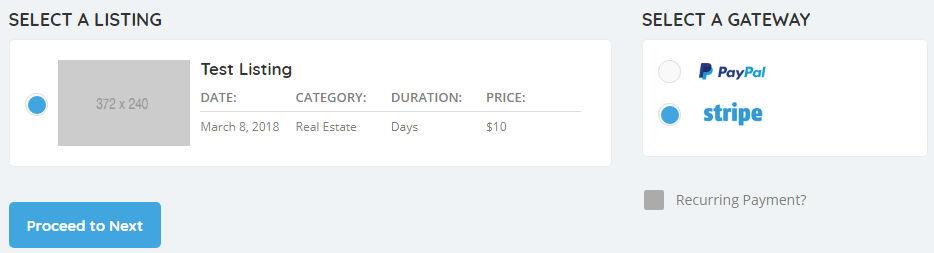
If everything is configured correctly then recurring billing option will be visible as per the screenshot is given below:


FOR ADMIN: Listing Subscriptions Management

When a user will use Stripe payment method with the recurring option and processed transaction successfully, a generated invoice will be sent to the user email. Transaction details will be available in the backend Subscriptions page. Admin can manage subscriptions from there.


NOTE: Recurring billing subscriptions will only happen if the recurring option is checked during the listing subscription with payment.

FOR USER: Listing Subscriptions Management

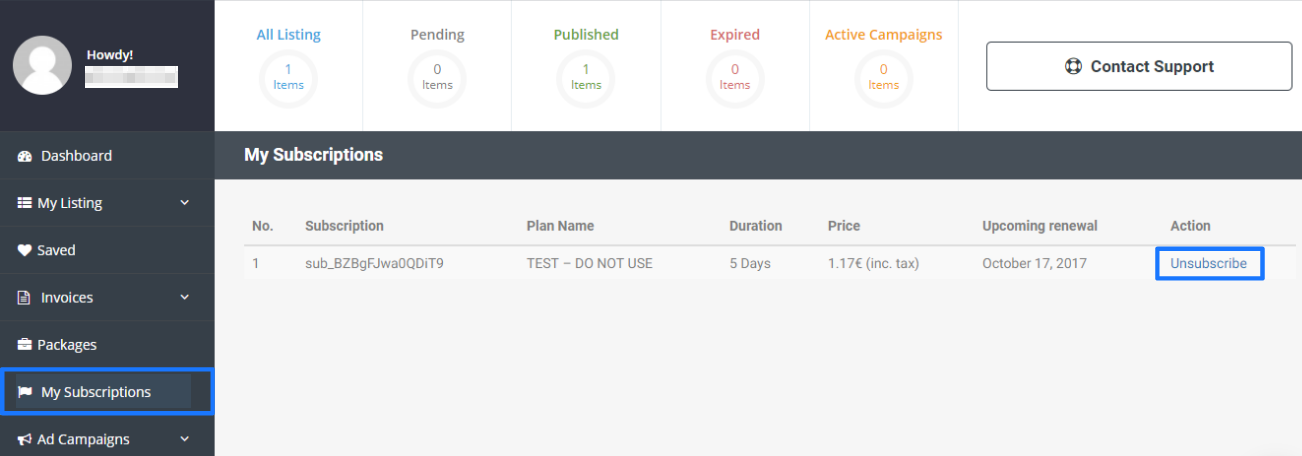
If a user has a subscription, it will be shown on the user dashboard under “My Subscriptions” tab. There will be available a list of all active subscriptions running by the user. A customer can stop subscriptions from their dashboard. Admin has also the power to cancel subscriptions of any user at any time through the admin panel.

To manage subscriptions:

STEP 1: Go to frontend user Dashboard > My Subscriptions

STEP 2: Refer to the Action column and click Unsubscribe.


NOTE: To cancel any subscription, firstly it’s required to unsubscribe it from your dashboard before removing subscriptions from stripe account.


Recurring option is not available for ad campaigns. Because it’s optional to activate ads after a period, but listings have to renew after a period.

NOTE: For claims, no payments methods are involved yet, but for package upgrades/change invoices are generated. Please keep in mind that on admin panel, it will show only those subscriptions which are paid by users through this particular site.


How to generate Stripe API Keys (Secret Key and Publishable Key)

To generate the Stripe API Keys (Secret Key and Publishable Key) please follow the below steps:

 
STEP 1: Log in to your Stripe dashboard.

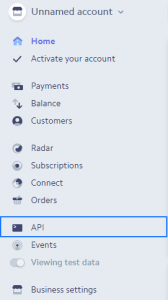
STEP 2: Go to API in the left menu.


STEP 3: Your secret and publishable keys should be on this page. Before using generated secret keys you will need to use the toggle switch that says “Viewing test data”. You have to set it to ”Viewing live data”.


STEP 4: Now click on Reveal live key token


Your account will have two sets of API keys – Live and Test. In order to get access to both of them, you will need to use the toggle switch in the left menu that says “View test data”. Clicking that switch will toggle between the live and test keys. Live keys will start with pk_ and sk_. The pk_ keys are the publishable keys. The sk_keys are the secret keys. Test keys will start with pk_test_ and sk_test_. The pk_ keys are the publishable keys. The sk_keys are the secret keys.

How to customize ListingPro?

If you need advanced customization then you will need coding knowledge required or will have to request for customization service.
The customization is divided into two main areas.

General Pages (NON-Directory and Listing): 

Pages such as Home and About Us are not related to directory and listing. To customize such pages you can do the following:
  • Use Elementor (Free) or Visual Composer (drag & drop page builder) to customize non-directory related pages.
  • You can even use any page builder like Elementor or beaver but the custom elements that are designed for Visual Composer will not be available.
We have 20+ custom Visual Composer elements designed for ListingPro. For more Read This.

Directory and Listing pages

Pages such as Search result page, Listing by Category Page, Listing by Location Page, Listing Details Page are related to directory and listing. To customize such pages you can do the following:
  • Use Theme Options Settings for changing branding, color, styling, typography, etc.
  • Listing details page layout manager. (Built-in Drag & Drop)
  • Use Widgets – read this.
For Directory and Listing pages you cannot use Visual Composer.

How does Business Hours Work

The following topics are covered in this knowledge base article.

  1. Setup Business Hours for English Users
  2. Setup Business Hours for Non-English Users
  3. Enabling a Second Time-slot for Submit Listing
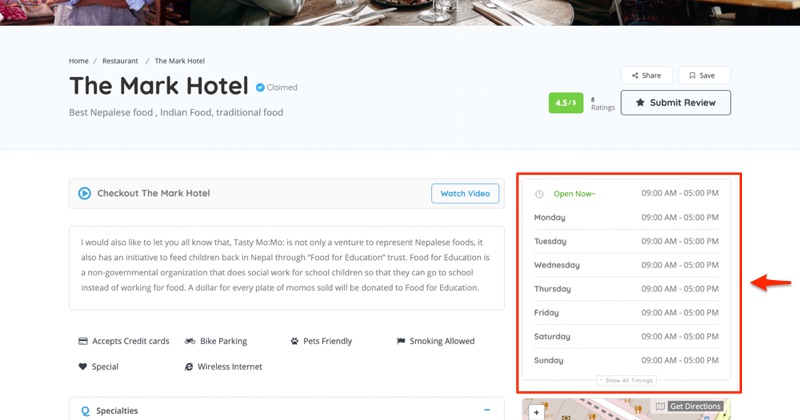
Business Hours Expanded with Open Now Indicator


In order to display Opened or Closed status correctly of all business listings, the below steps must be followed carefully.

Business hours are mainly for two different types of users.
  1. English Users – Users whose default Site Language is English.
  2. Non-English Users – Users whose default Site Language is not English.

1. Setup Business Hours for English Users

If your native language is English by default, there’s no need to edit the default WordPress language. Simply follow the below steps to configure your time zone.
STEP 1: Log in to the WordPress admin dashboard.
STEP 2: Go to Settings > General
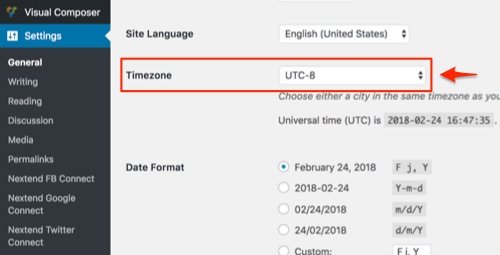
STEP 3: Select the appropriate Timezone from the drop-down list.
.
STEP 4: Click Save Changes


Business hours can vary based on the timezone as well as the country. So it’s very important for ALL USERS (English and Non-English users) to configure relevant settings in order to display open and closed timings properly. Otherwise open and closed timings may work incorrectly.


2. Setup Business Hours for Non-English Users

For Non-English users, there are THREE parts.

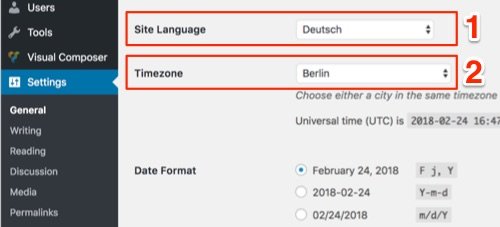
PART-1: Set Local Site Language and Timezone

If your default WordPress language is NOT ENGLISH, you must set your local language and timezone. Follow the procedure below:
STEP 1: Log in to the WordPress admin dashboard.
STEP 2: Go to Settings > General
STEP 3: Select your Site Language (Example: For German, it’s Deutsch).
STEP 4: Select your Timezone (Example: For Germany, it’s Berlin).
Choose either a city in the same timezone as you or a UTC timezone offset.
.

PART-2: Translate Weekdays into Local Language

Before proceeding you must install Loco Translate plugin. [WATCH THIS]

a. Create a new language file

Make sure to select ListingPro Plugin in STEP 1, and NOT ListingPro Theme.
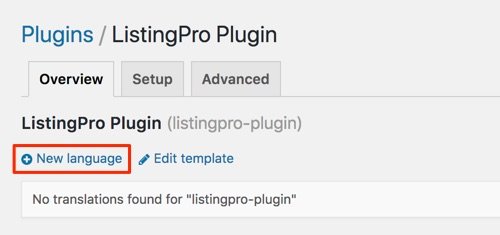
STEP 1: Go to Loco Translate > Plugins > ListingPro Plugin
STEP 2: Under Overview tab, select New language
.
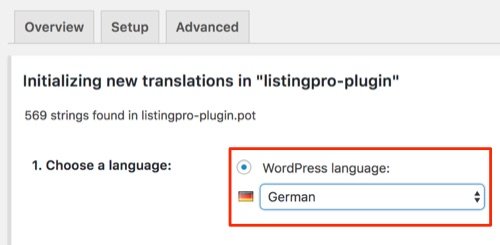
STEP 3: Choose your local language (Same as your Site Language under Settings > General in STEP 3 of PART-1 above).
.
STEP 4: Click Start translating

b. Translate strings (words) in new language

.
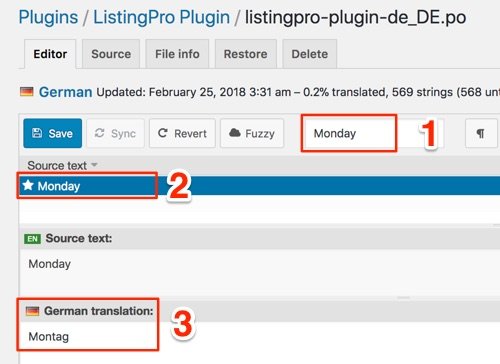
STEP 1: Find the strings related to the operational hours, weekdays (Example: Monday).
STEP 2: Select the string from the source text results.
STEP 3: Enter translation (Example: Montag)
STEP 4: Repeat steps 1-3 and translates all weekdays (Example in German: Tuesday = Dienstag, Wednesday = Mittwoch, and so on.)
STEP 5: Click Save, and  then click Sync
When translating the Weekdays for ListingPro Plugin (Not ListingPro Theme) make sure to match the upper-case and lower-case as it’s case-sensitive. Always use full-forms such as Monday, Tuesday, Wednesday etc, and DO NOT USE short-forms such as Mon, Tues, Wed as it won’t work. Also, make sure when translating weekdays it must be matched with the official name of the weekday.

PART-3: Proper Testing

STEP 1: Add a NEW business listing.
STEP 2: Add all Weekdays and their appropriate timing (in a new language).
STEP 3: Save the listing.
STEP 4: Check the timing of the new listing.
If you want to test a previously created listing you must delete all the weekdays/timing and re-add all the weekdays along with appropriate timings and save.


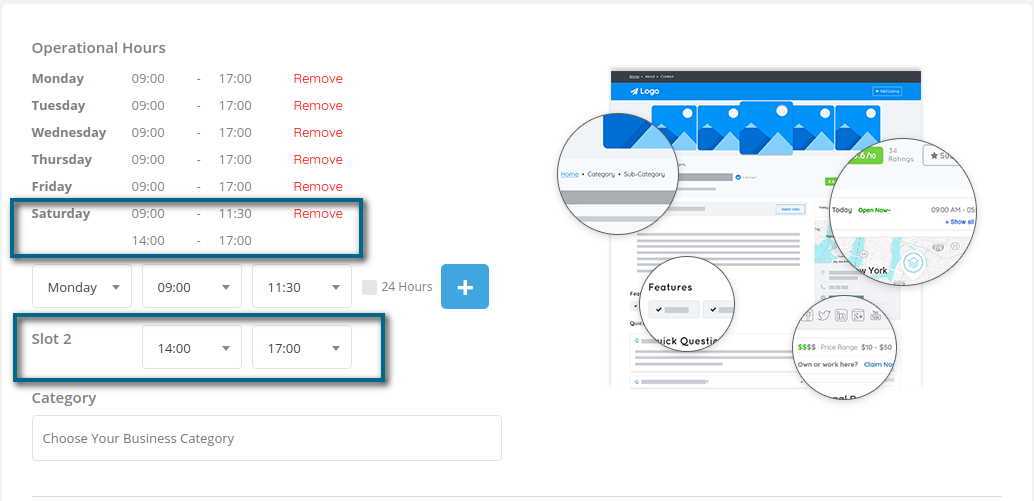
3. Enabling a Second Time-slot for Submit Listing

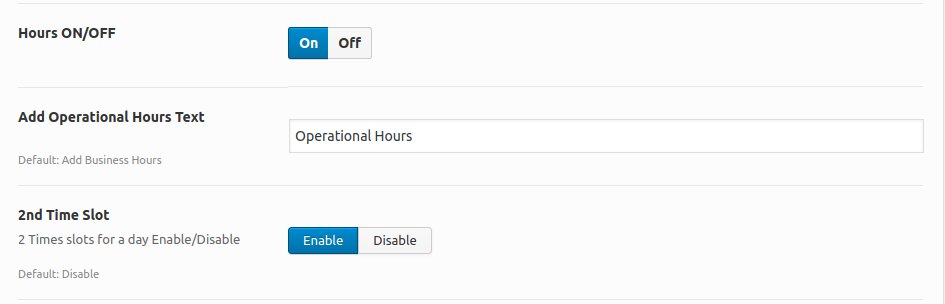
To include the 2-time slots into the Submit Listing, first, go to Theme Options > Listing Settings > Listing Submit & Edit

Enable the 2-time slots as shown in the image below

Click on Save Changes

In case if your business has a defined weekday that works for 24hours, just click on the box and hit on the + Button to set the working hour for the day as “Open 24hrs“.
It’s recommended to use the 24H format instead of the 12H format. Also, operational hours with your language translation, the weekdays should be translated correctly, without word contractions. Use the standard weekdays translation.

Why am I facing 404 redirect errors?

For new users who have recently installed ListingPro, there are some settings that need to take into consideration to avoid any 404 errors or blank images with shortcodes.

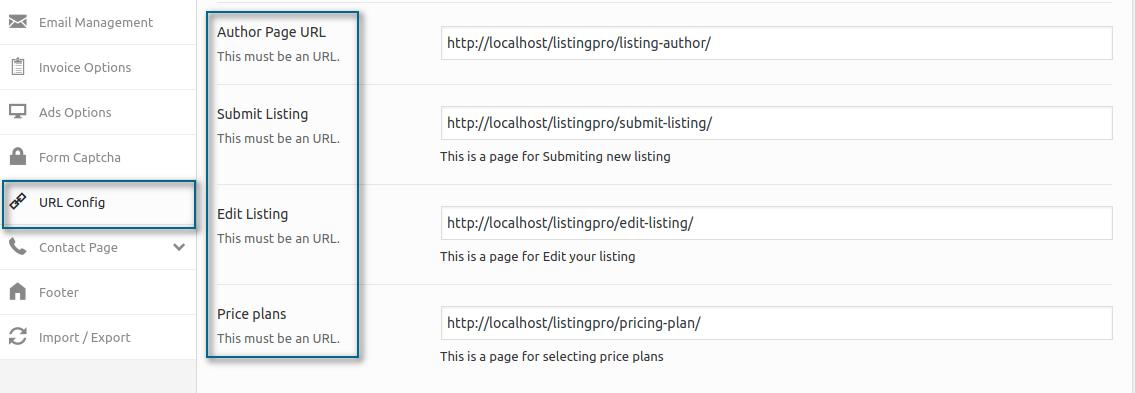
1 – Go to the Theme Options > URL Config and check the following details

Add the corresponded URLs in this settings, to avoid 404 errors while clicking on these pages, Author Dashboard, Submit Listing, Edit Listing, and Price Plans.


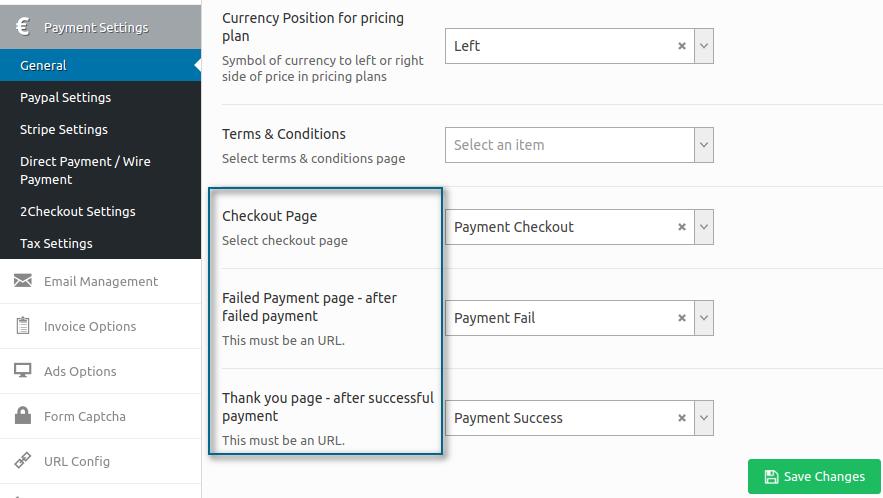
2 – While using the Price plans, make sure that the settings are also configured, Go to Theme Options > Payment Settings > General and check the following details

Including these pages from the drop-down, you won’t face any more issue with blank pages showing only a shortcode. Simply add the Payment Checkout, Payment Fail, and Payment Success into the correspondent section.


3 – If you’re facing issues on the homepage, more specifically at the +Add Listing button, simply go to the Theme Options > Payment Settings > General and check the following details

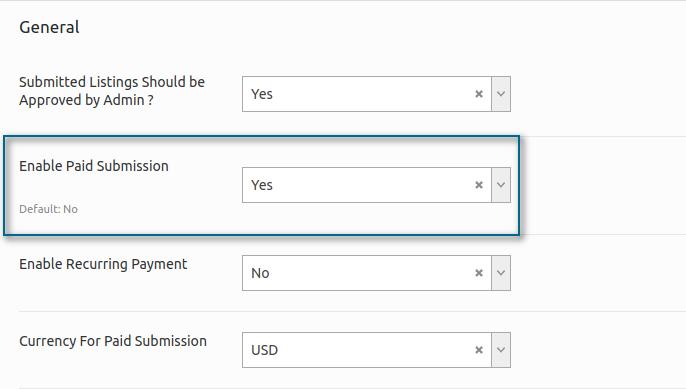
Set the Paid Submission to YES instead of the Default NO. This way, users will be redirected to the Price Plans before submitting a listing into the Directory. If you define this option as NO, users will be able to add listings without any restriction for free.

The Default option is better suited for users who want to grant free access without charging for added listings. Instead, the admin can be monetized by using the Ad Campaign System, when certain users want to leverage their added listings into the Directory.