I’ve excluded/lost the default pages on my directory. How to add them again?

Sometimes we may have made a customized page but then we forgot the other patterns of our default page and wanted to check on how to proceed, or maybe we were simply unaware and accidentally deleted one or more of the default pages.

In order to fix this, we have a few options that we can restore or recreate our default pages.

Go to Pages > Add New and let’s create for example the Submit Listing page

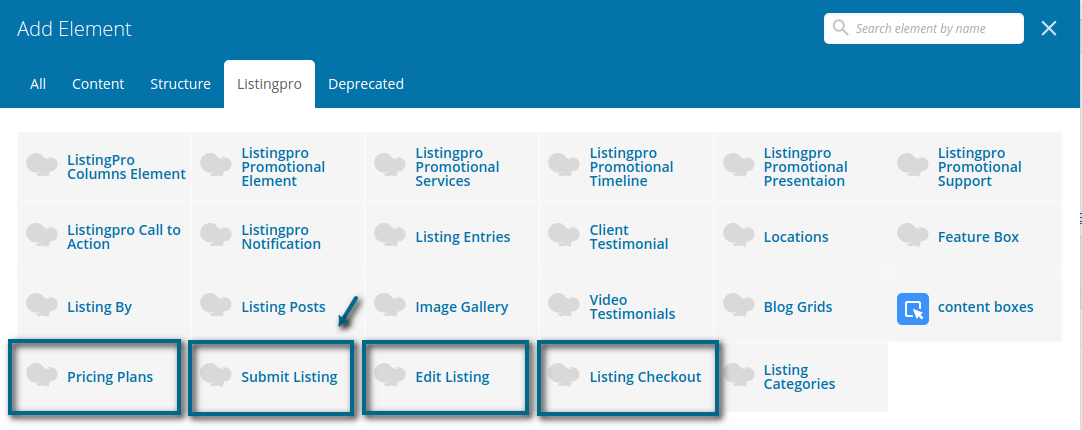
On this page, you can easily be found through the Visual Composer Elements, just go to the ListingPro section to find all the elements related to ListingPro.

These Elements are the ones that give the functionality of your default pages, to insert Pricing Plan, Submit Listing, Edit Listing, and Listing Checkout.

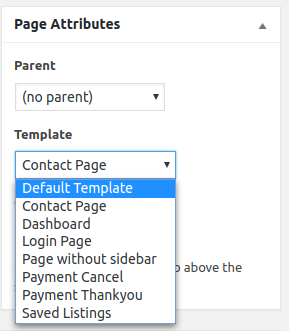
In case you have lost any other default page, you can check the Page Attributes. You’ll find the Page Attributes below the Publish

These Attributes give you the respective pages: Contact Page, Dashboard, Login Page, Payment Cancel, Payment Thankyou, Saved Listings.

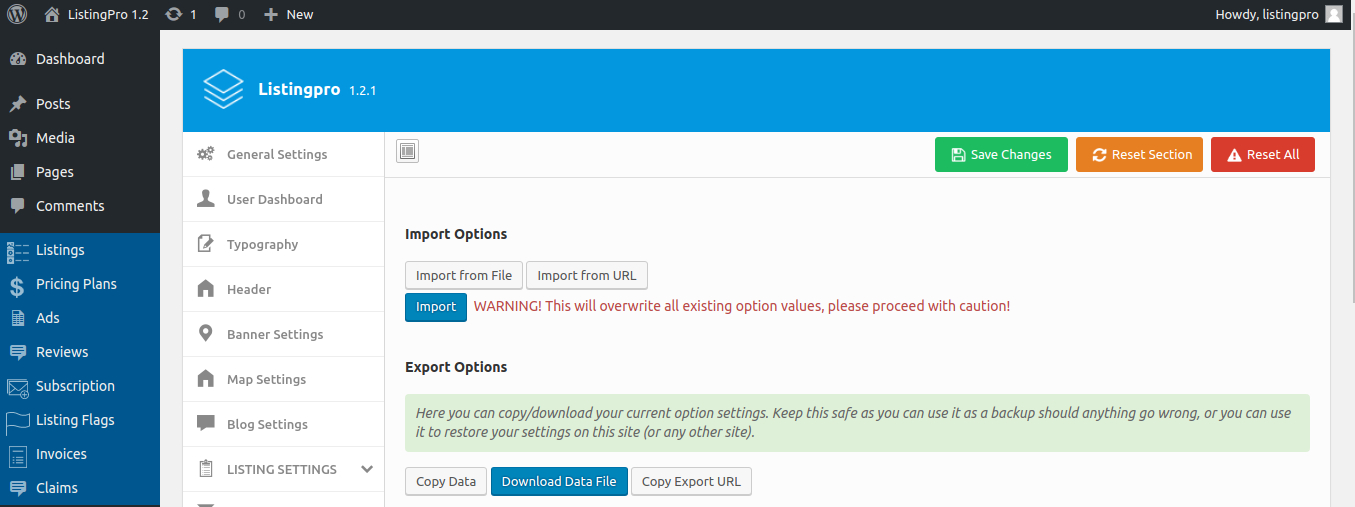
Please, don’t forget to always create your backup on WordPress and also on Theme Options. In case of something similar happen, you can easily import your saved backup.


How to define Default Location on Map?

In order to include a default location for your map, follow the instruction below.

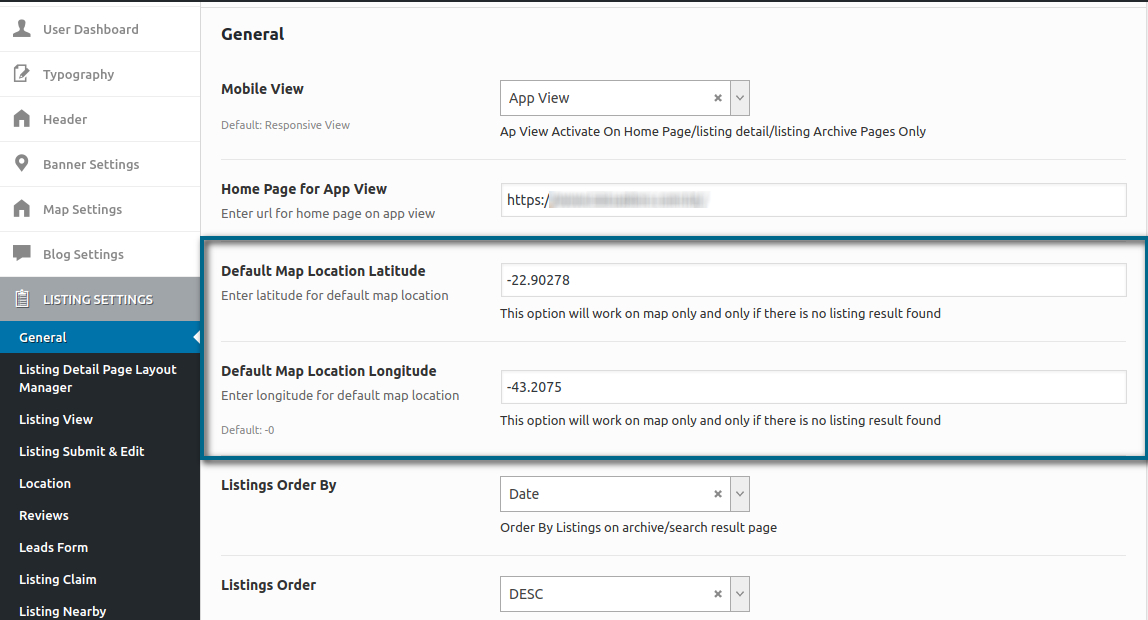
Go to Theme Options > Listing Settings > General and include the Latitude and Longitude of your country, state or city.

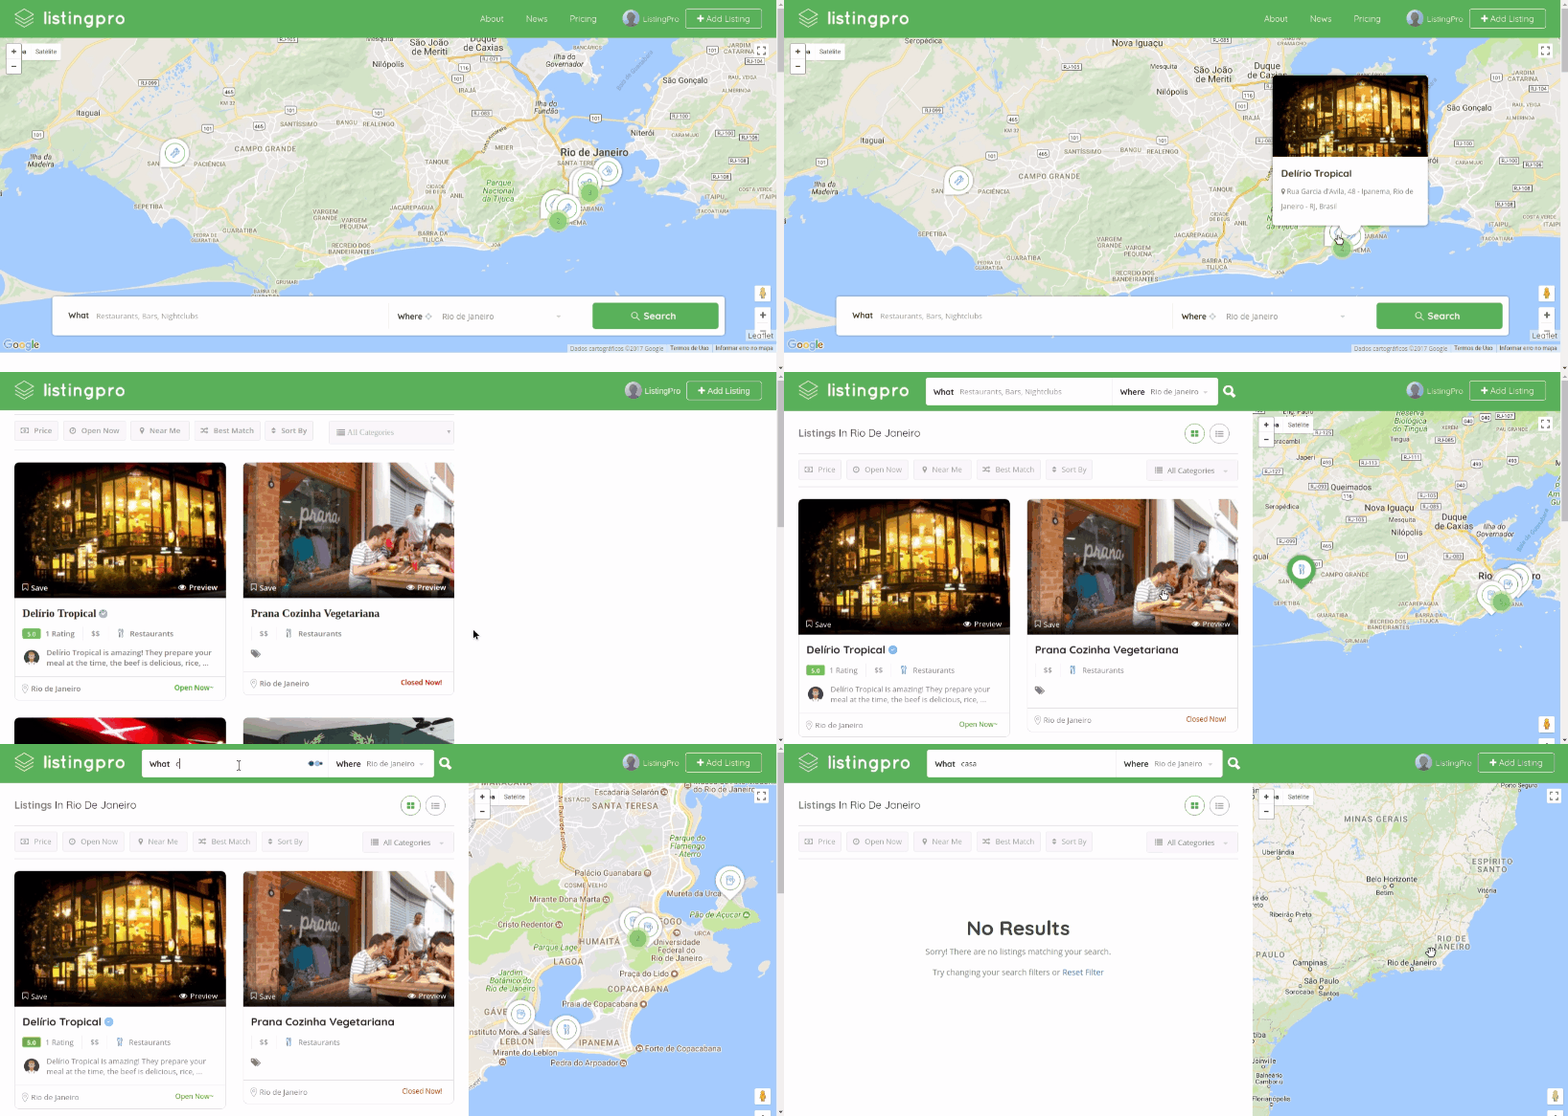
This default location will work on your map and also for the results not found on the search results page. This brings more empathy for the location that you’re working within your directory, and if in case some typed words don’t match the results, the default location will be shown for this scenario.

To find the Latitude and Longitude of your country/state/city, simply go to this link


How to sort Listings on Search Results?

If you want to change the order on your Search Results page and sort your listings differently, follow the steps below.

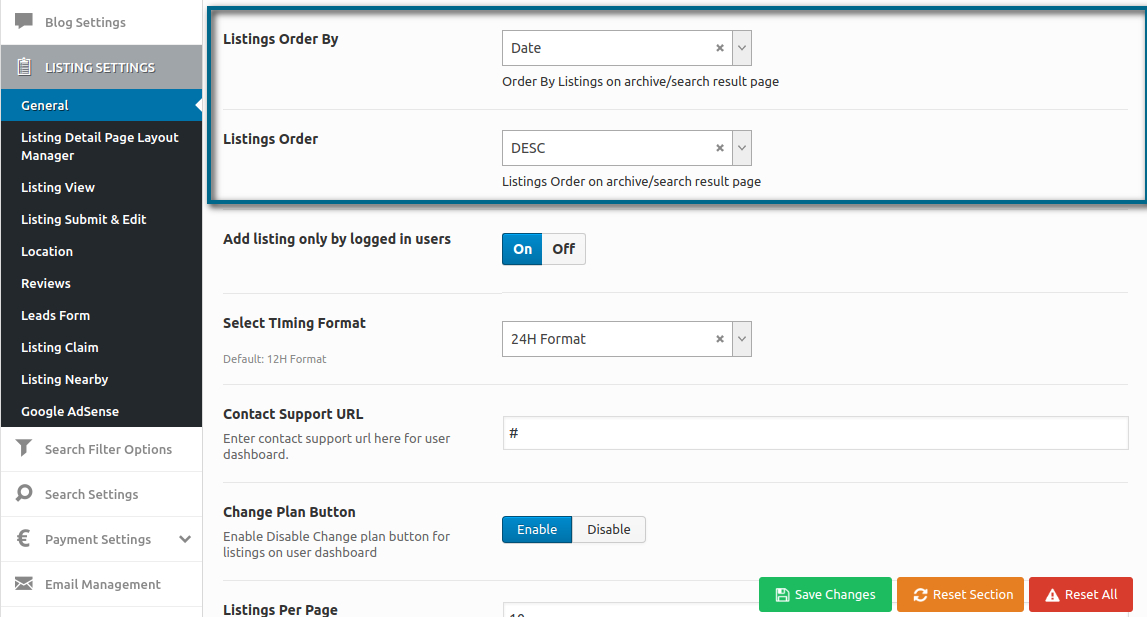
Go to Theme Options > Listings Settings > General

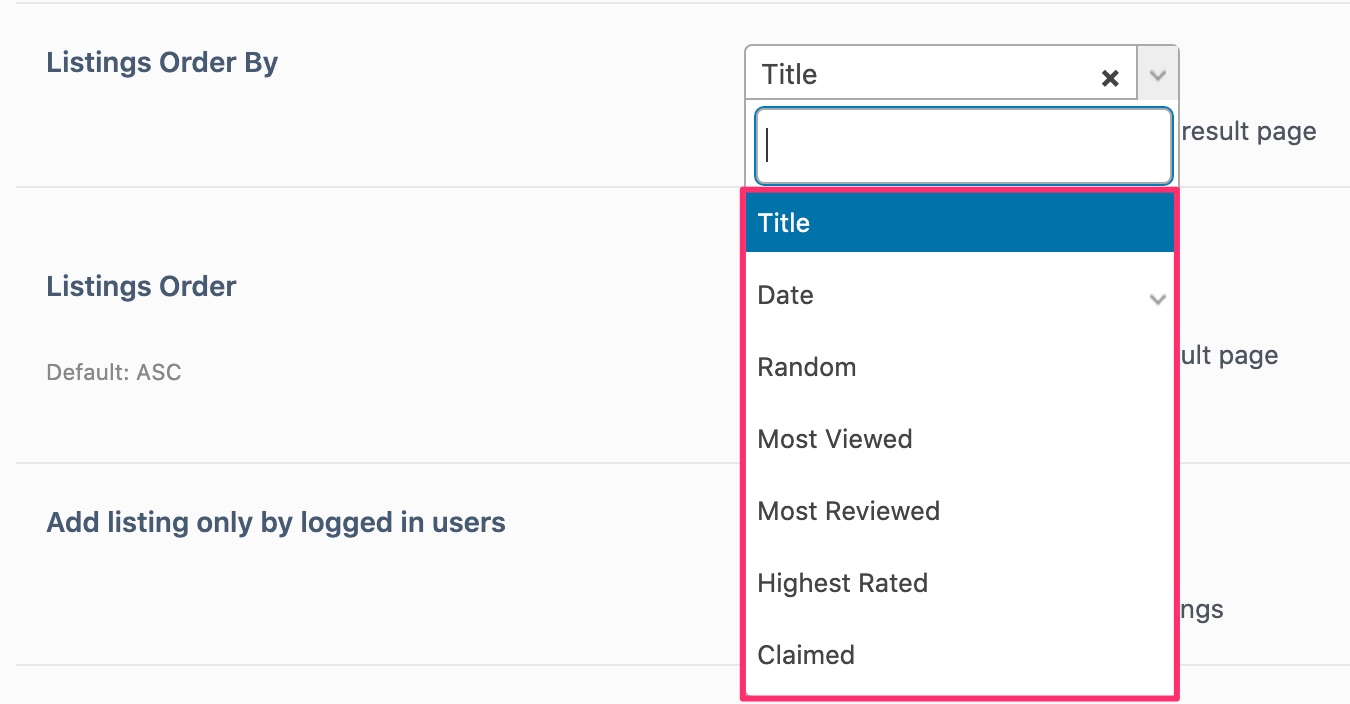
For Listings Order by, you have options to sort listings by:

  1. Title
  2. Date
  3. Most Viewed
  4. Most Reviewed
  5. Highest Rated
  6. Claimed
  7. Random

How to Renew an Expired Support?

Once the support is expired you must renew your support in order for our support engineer be able to respond to your technical support related questions. Also note that all support queries are answered only via help desk, and not via ThemeForest comments page or any email.

If you have found a bug in the product, you can report it to us and you do not need to have an active support for reporting a bug. Once you report a bug we will evaluate and provide a temporary fix as needed and will fix it in the next release. We can try to provide the patch as soon as possible but there is no guarantee on how long it may take. It all depends on the severity of the bug.

In order to extend or renew an item’s support offering, you must have less than 6 months of the existing support period remaining.

To renew the support component on an item, please follow these steps:

STEP 1: Log in to your  Envato Account

STEP 2: Hover over your username and click Downloads from the drop-down menu.

STEP 3: The download section displays a list of all the items purchased using your account.

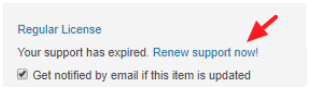
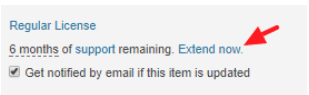
STEP 4: Click on Renew support now! or Extend now next to the item you wish to renew the item support for

and that’s it!

See screenshot below

Renew

Extend

Why can’t I extend or renew support for an item?

You have more than 6 months support remaining on your current support grant

ATTENTION

If you have less than 6 months of remaining Support, it’s recommended to extend your support for ListingPro. This way we can guarantee the support to our customers as we’re working hard to keep the excellence of our Support Team.

For more details go to link

How Invoices Work?

Invoices work as a guarantee that the pricing plan was bought correctly into the specific options defined and chosen by customers.

These Invoices will show each listing that was already bought, and also some additional details that the admin can give in the invoices. Customers will also be able to print these invoices if needed.

Invoices will also be shown for each Ad Campaign bought by customers and the logic follows the same. Exhibiting purchase details, and contact information defined by the admin.

1 – Invoices by Listings & Packages end-user Dashboard

Invoices generated by after choosing a plan and creating the business listing, users will be able to see their invoices just by going to Dashboard > Invoices > For Listings
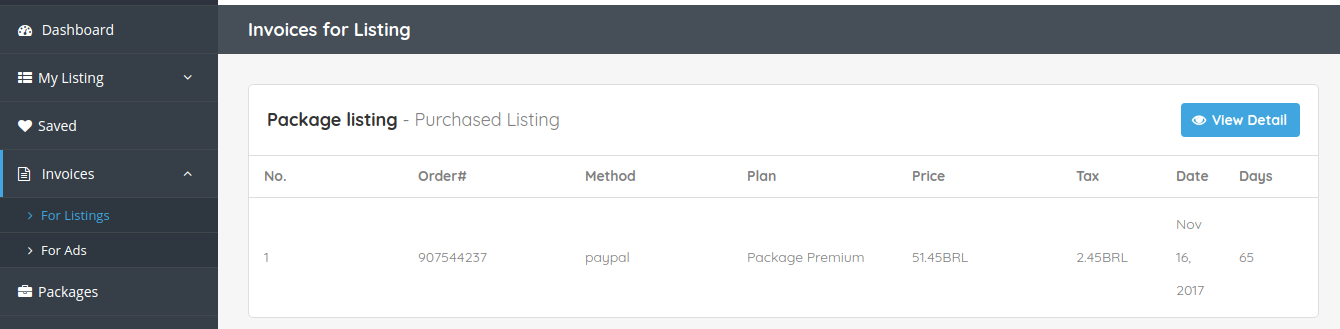
The example above details only one listing in our example, but on your end, it may have more listed in this section.

Let’s click on the View Detail and see the invoice for this Package Listing
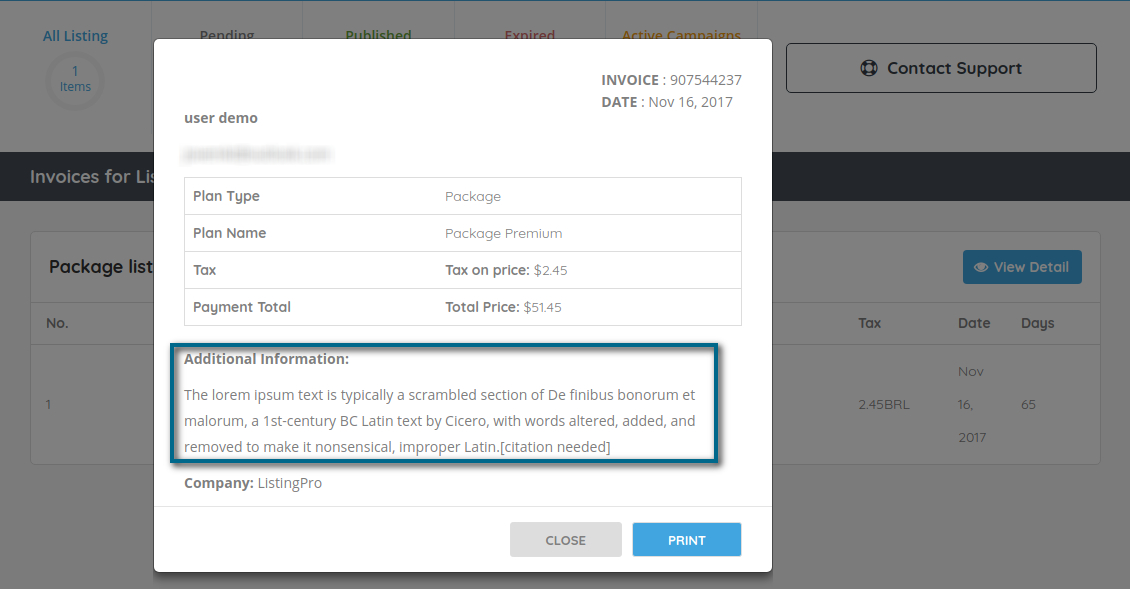
The detail shows us the name of our package, the type, tax (if included), and the total payment.

The additional information, admins can then create their own and insert more details about the procedure in case of refunds, terms & conditions, and any other important information that the admin considers to include. Exclusively to describe wire transfer procedures, time for the approvement listing, etc.

On the other hand, we have the invoices for Ad Campaigns which will perform the same result for end customers.

2 – Ads Invoices end-user Dashboard

To see the Ad invoices just go to Dashboard > Invoices > For Ads
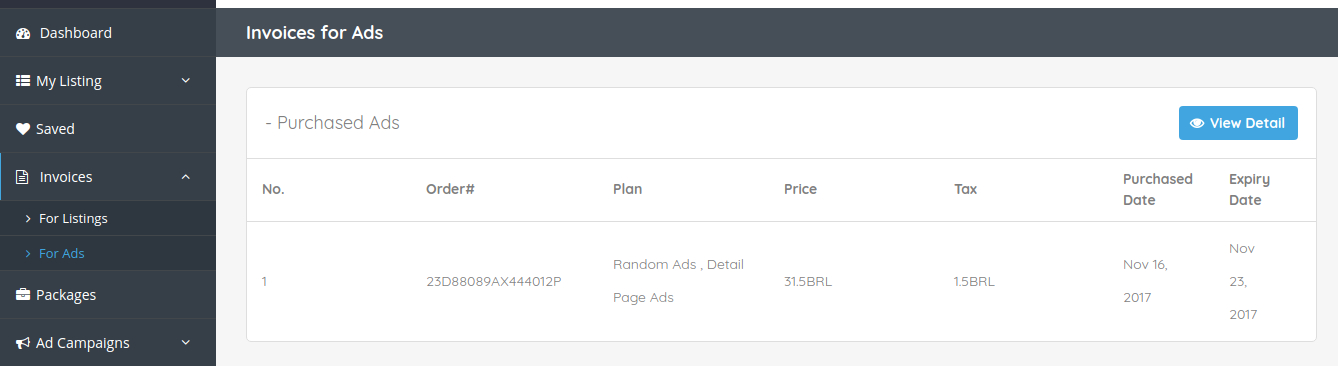
The example above details only one Ad in our example, but on your end, it may have more listed in this section.

Let’s click on the View Detail and see the invoice for this Campaign
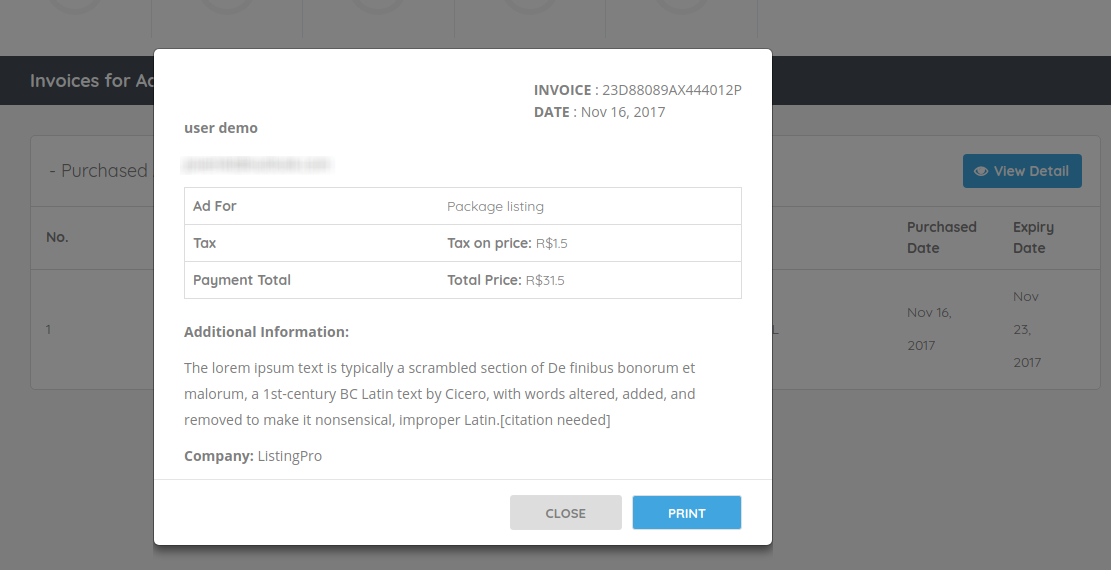
The detail shows us the name of the campaign, the tax (if included), and the total payment.

The additional information, admins can then create their own and insert more details about the procedure in case of refunds, terms & conditions, and any other important information that the admin considers important to include.

3 – Invoices showed in Admin Dashboard

You can see the invoice created for the Ad Campaign by going to WordPress Dashboard > Invoices > Ads Invoices
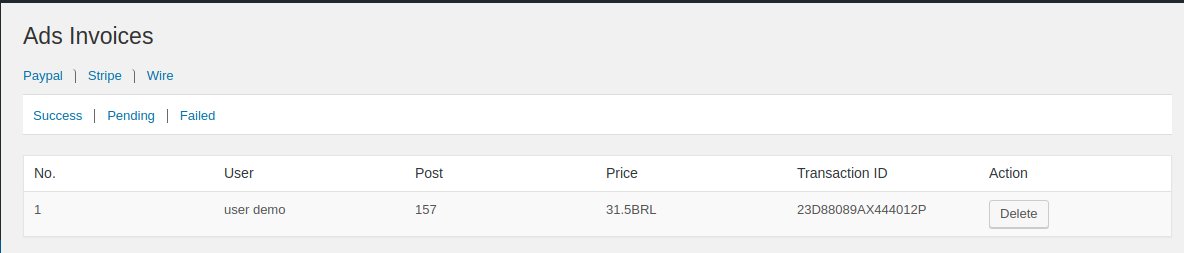
 

4 – Payment made through Wire Transfer

If the admin has decided to work with a wire transfer, customers after selecting the write transfer as their payment gateway, the final result will look like the screenshot below
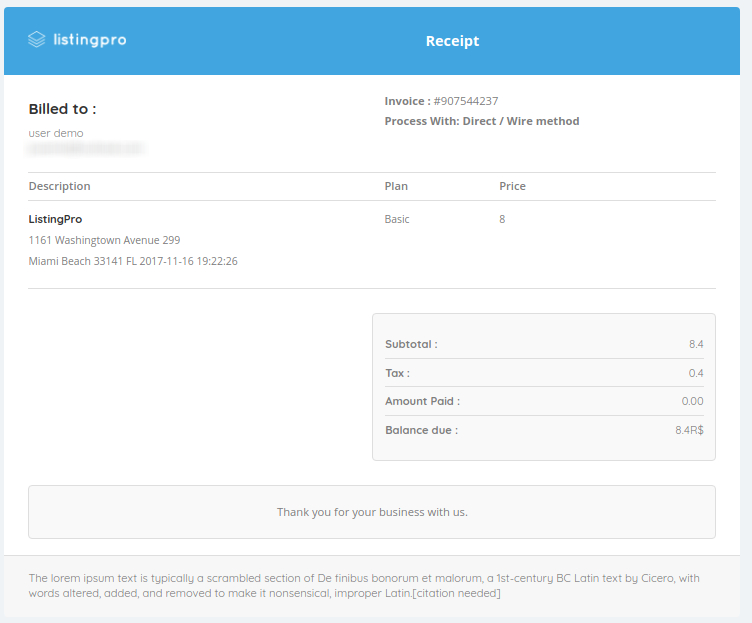
Admin can add more details about the invoice receipt by going to Theme Options > Invoice Options

Remember that the Wire Transfer details at the frontend, users should print and pay the respective plan. And admin should confirm if the payment was made. After this confirmation, the admin can follow step 5 below.

5 – Admin confirmation of the Wire Payment

After that, the admin will have to confirm with the bank account used to receive the payments, and after confirmed, admin should go to WordPress Dashboard > Invoices > Invoices and search for pending payments waiting for approval.
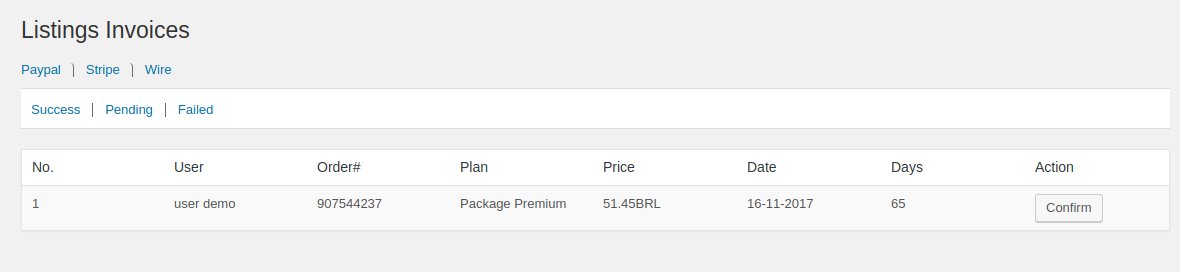
Here, we can see the Order# that was created, the Order# number is exactly the invoice receipt that the user has created while opting for paying through write transfer. After the admin confirmation, the Listing or/and Ad Campaign will be displayed in the Directory successfully.

 

What are the Support Timings?

Our support engineers will be available to help you during the following hour from Monday to Friday:

01:00 am – 11:00 am EST/EDT (US)
12:00 am – 10:00 am CST/CDT (US)
10:00 pm – 08:00 am PST/PDT (US)
05:00 pm – 03:00 am AEDT/AEST (AUS)
06:00 am – 04:00 pm GMT/BST (UK)
11:30 am – 9:30 pm IST (INDIA)

To convert this timing to your timezone, please go here.

Average Response Time: 3-6 Hours based on the tickets volume. Sometimes it may even take 24-48 Hours to get back to you, so please kindly bear with us.

After hours and on weekends there might be limited support available based on available resources. Please kindly bear with us while we respond to your questions and concerns.