The logic is that the themes have nothing to do with storing the number of listings as the storage happens in the database. Themes have to do everything how it retrieves the data. If it handles a query that runs an infinite loop to retrieve all data at once, instead of smaller datasets (Example: Batch of 20 listings), then it runs into problems such as resulting in crashing the site.
But all our loops are checked and tested to make sure none of them have an infinite loop. We have users with over 300,000 listings and we have even tested with over a million listings as well without a problem.
For optimal performance, a low cost shared hosting is never recommended for running a real business directory site with thousands of listings. What you want to consider is a VPS or Dedicated Hosting.
Purchasing a low cost shared hosting is never recommended for running a real business directory site with thousands of listings. What you want to consider is a VPS or Dedicated Hosting (Read More).
First, We have 2 styles that will differ the appearance of the listing page.
You have the option to opt-in between these 2, and then we can follow along with the Content Layout and Sidebar Layout
Let’s dive in…
Go to Theme Options > Listing Settings > Listing Detail Page Layout Manager
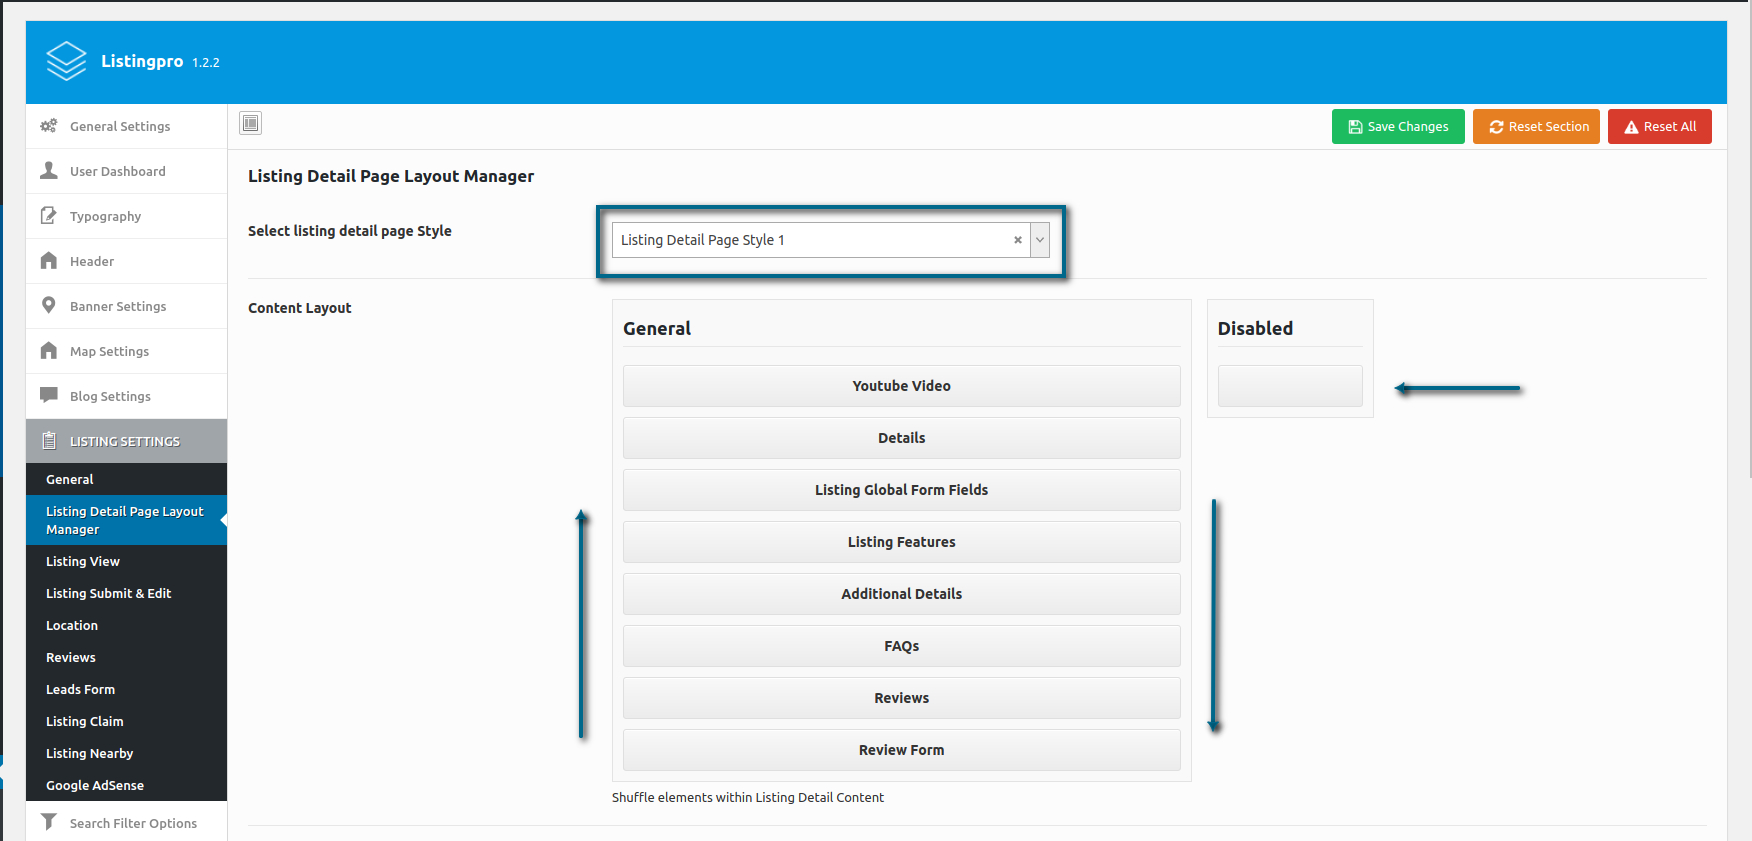
At the beginning select the Detail Page Style that you want to work with and see the difference between them.
Below, we have the Content Layout. The arrows speak for themselves, you can simply drag and drop the elements and reorder them by your needs. Exactly! TOTAL FLEXIBILITY. In case you don’t want a specific element to appear on the listing page, you can simply drag the element to your right and add the element in the Disabled Panel. This means that the selected element will be disabled and won’t show on the listing page.
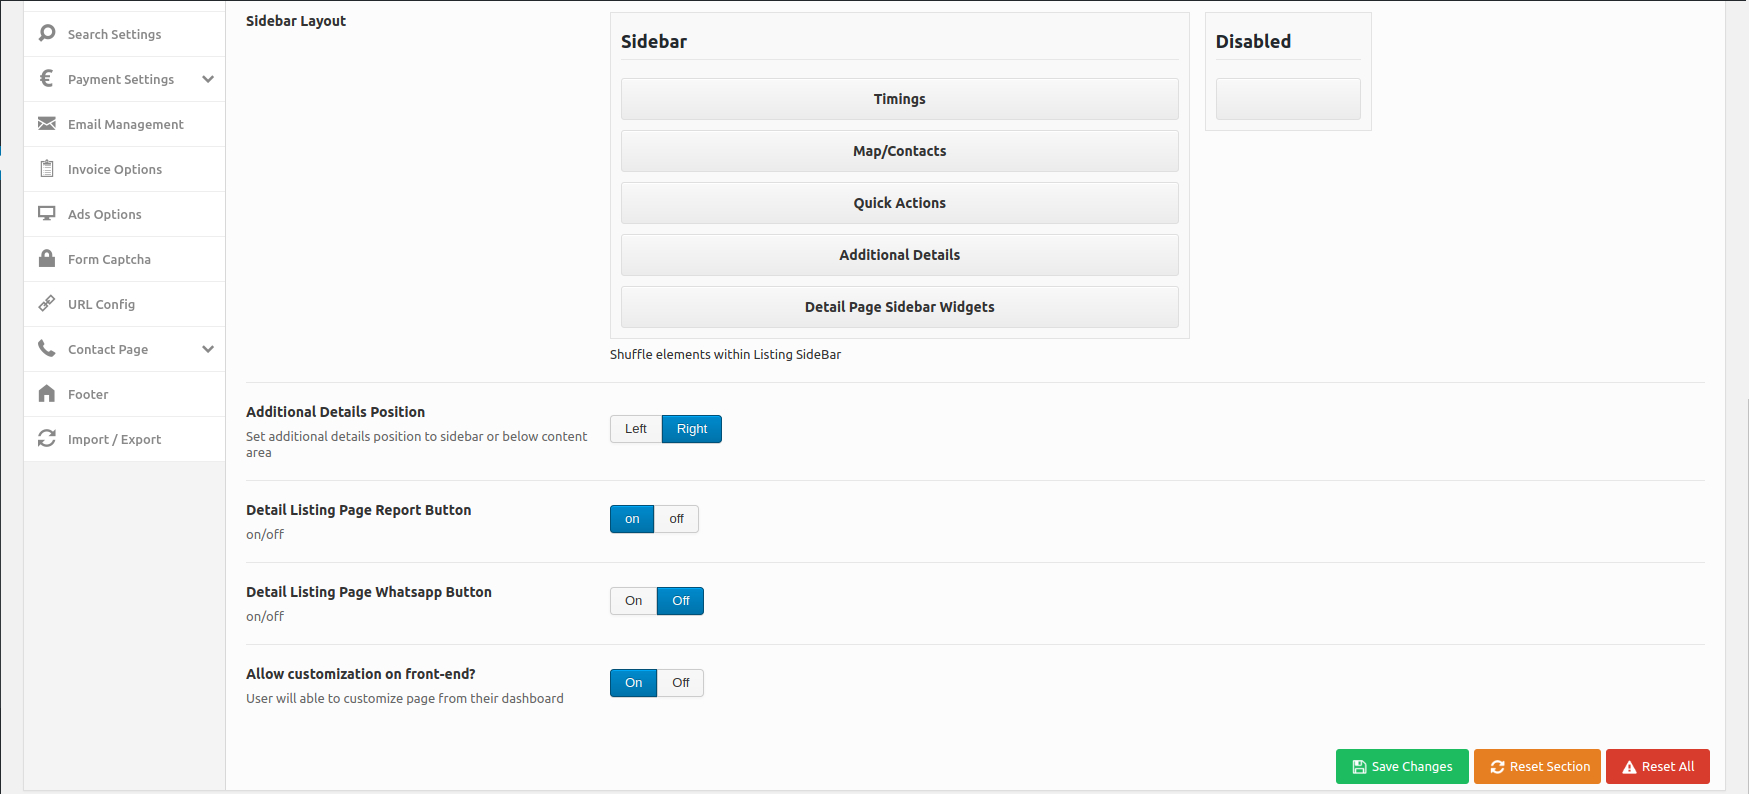
Going further, we have more FLEXIBILITY to reorder the listing page sidebar.
To finish, 4 final options to opt-in. With a special one that couldn’t be left behind… WHATSAPP.
REMEMBER, we always recommend making some tests simply to find the final result that best fits your purpose and business strategy. Also, The drag and drop function on the listing page increases a huge FLEXIBILITY to differ your directory and bring a unique experience for your end-users and customers.
ACTIVATING WHATSAPP ON LISTING MANAGER
To enable or disable this option in the Listing Page Detail…
Go to Theme Options > Listing Settings > Listing Detail Page Layout Manager
Scroll down the page and find this referred option

Now you can define whether you want your Listing Owners to receive contacts through Whatsapp or not.
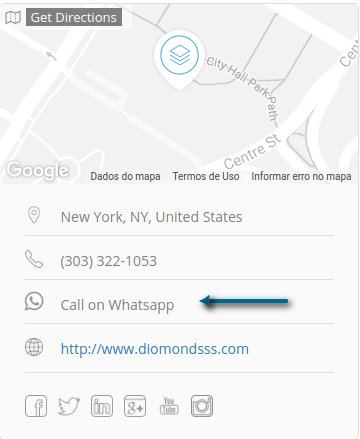
When some user clicks on the Whatsapp link, the above phone number will be linked to the Whatsapp API. This will allow users to send the first message to the listing owners. A new page will then appear…
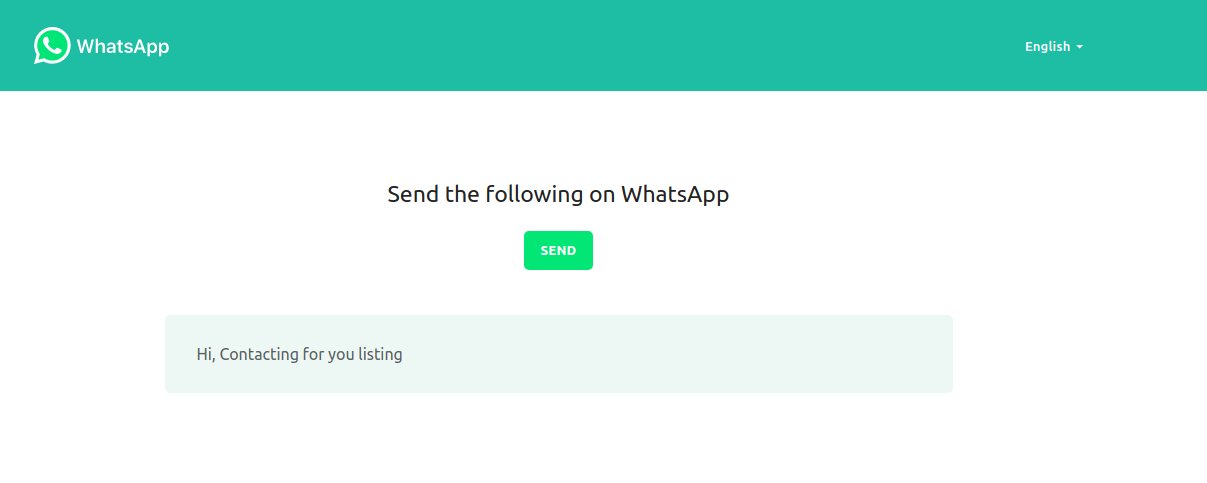
Advise your end-users to add their phone number to fully work with Whatsapp. If the current number added has the activated Whatsapp, the procedure will work normally.
ATTENTION
To edit or translate the above text shown in the Whatsapp Page, simply go to the Loco Translate > Themes and find the respective phrase to be changed or translated. You can also use any other method to translate your .po files. Remember to upload your saved .po files again after updating your Theme, after that you can simply click on the Sync Button to fetch the new strings available. Save the new .po and .mo files with the updated strings.
As we know, the Pricing Plans have already included a sort of defined features that you as admin has enabled in the Theme Options and others that’s defined during the creation of your Pricing Plans, according to your relevant strategies.

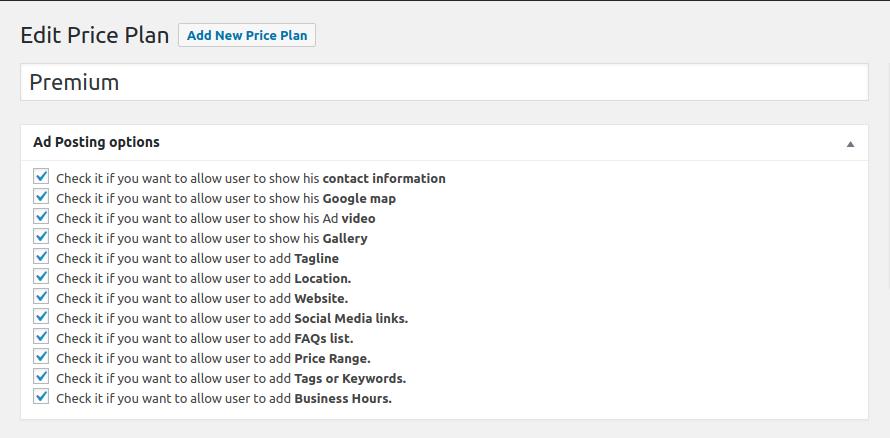
But what if we want to write some strategic feature or enhance some premium features to our users by inserting it into a Specific Plan?
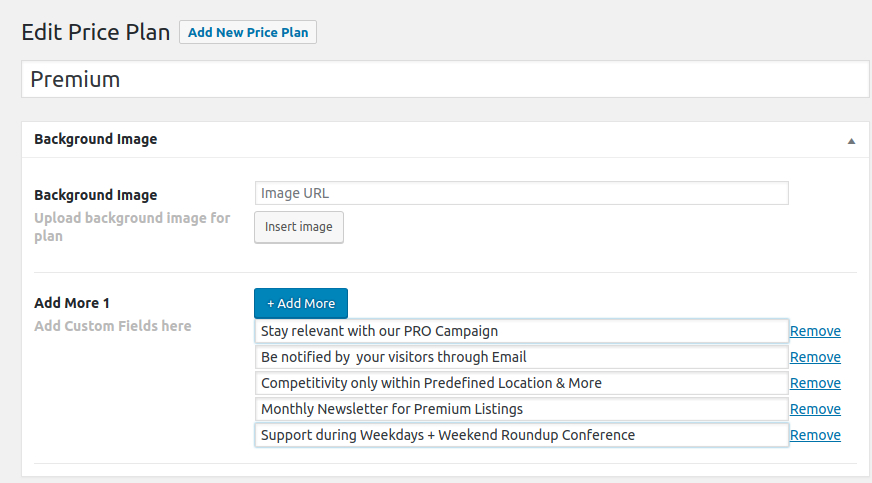

Then we can do so, by going to WordPress Dashboard > Pricing Plans and select the Plan which you’ll be going to add these Custom Fields
After selecting and editing your Customized Fields for your specific Plan. Let’s check the result…
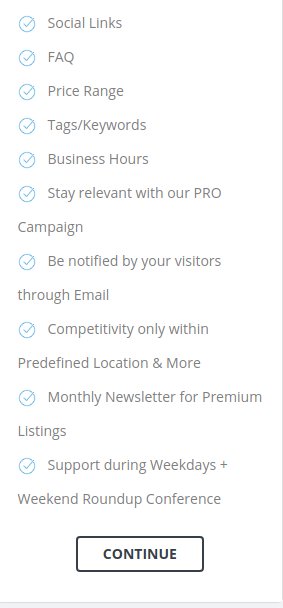
As we can see, the Custom Fields will appear right after the standard features available and enabled for the Plan.
Write small sentences or keywords that fit into one line. E.g. “Stay relevant with our PRO Campaign“, we can change it to “PRO Campaign“. Now it’s your time to define your keywords and bring more value to your Pricing Plans.
Have you guys noticed the feature available on the Results Page?
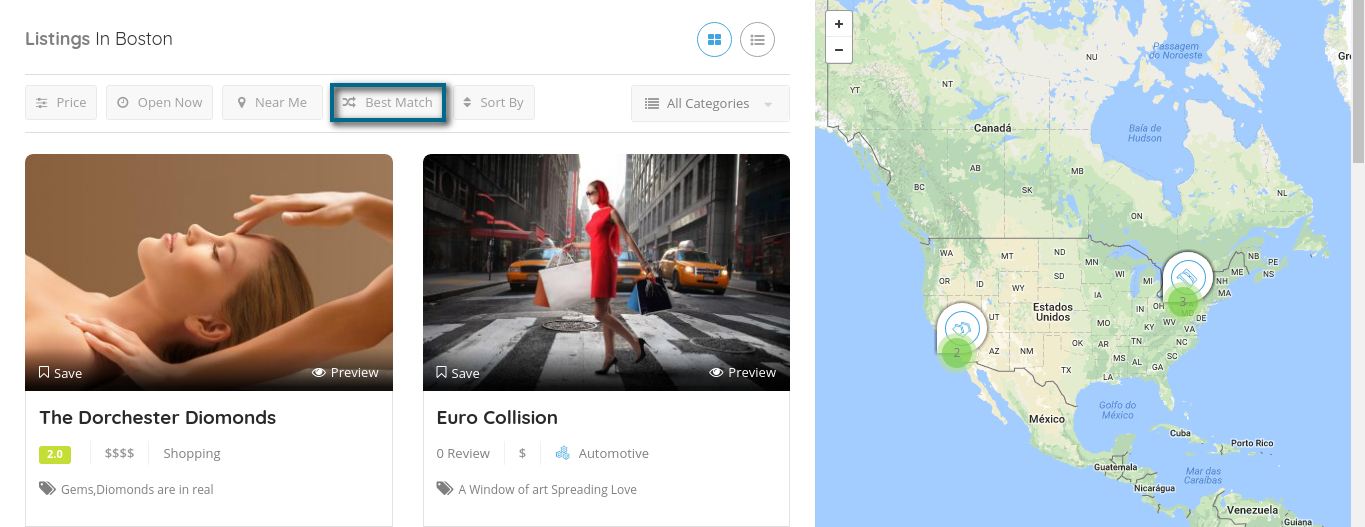
This option when selected will be automatically selected the Open Now Listings + with all Sort by Filters Selected.
This means that all of the most relevant listings will be displayed automatically, giving you what’s the best option available within the specific Category on the Results Page.
This option only works on the Results Page and its behavior is automatically applied. There’s no need for customization or any change by the admins to reach the purposed result.
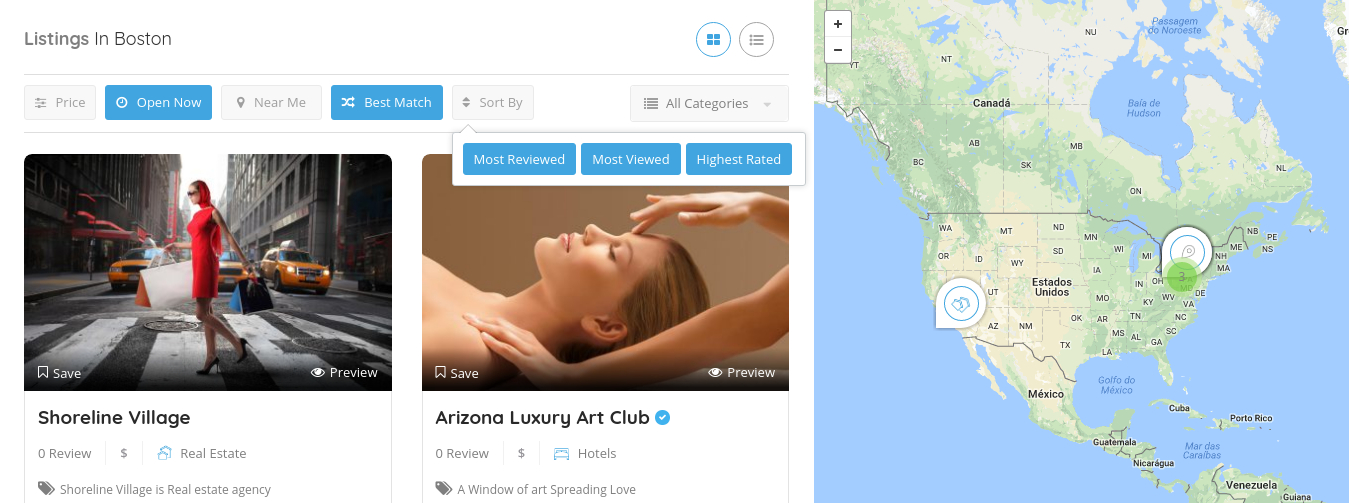
Also, users can then include the Price Range and Near Me to give a better result of the listings defined by the Best Matches criteria.
ATTENTION
Best Match doesn’t filter nor selects any of the related features created within those categories and applied within specific listings. The features option by itself has already its own method of sorting out listings with the respective feature included.
SUMMARIZE
Best Match will grab the listings with the most viewed, rated, reviewed and those which is currently opened, giving as a final result the most relevant listings in the selected category. With this purpose, you can make a second filter by searching within the previous result by Price Range and or applying the Near Me to bring the relevant listings nearby with this refined criteria.