By using the ListingPro Custom elements for WPBakery (Formerly Visual Composer) you can customize the layout as per your needs. These custom elements will do a lot for your directory. In this article, we will extend the functionality of every element and its usage.
Click on any Element Title by Name to jump:
- ListingPro Columns Element
- Listingpro Promotional Element
- Listingpro Promotional Services
- Listingpro Promotional Timeline
- Listingpro Promotional Presentation
- Listingpro Promotional Support
- Listingpro Call to Action
- Listingpro Notification
- Listing Entries
- Client Testimonial
- Locations
- Feature Box
- Listing By
- Listing Posts
- Image Gallery
- Video Testimonials
- Blog Grids
- Pricing Plans
- Submit Listing
- Listing Checkout
- Listing Categories
ListingPro Columns Element
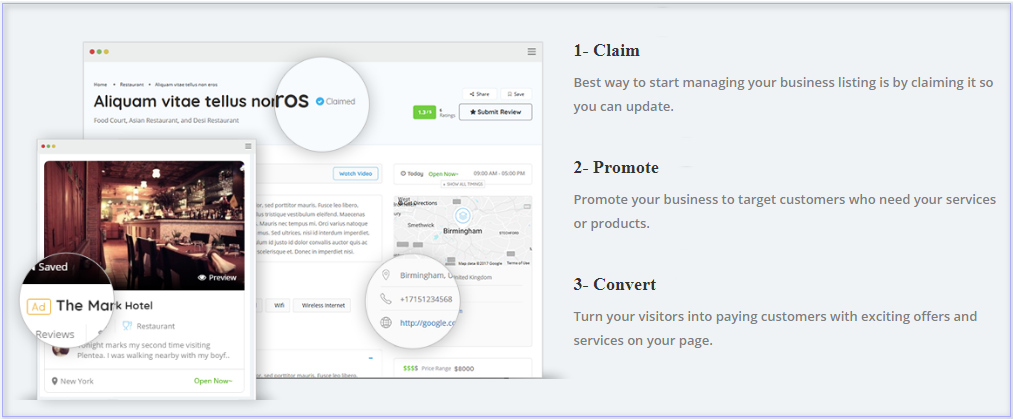
By using this element you can display content into 3 individual columns based on the content title and description.
Frontend View
This is how it looks once you fill out all the details in the Visual Composer elements.
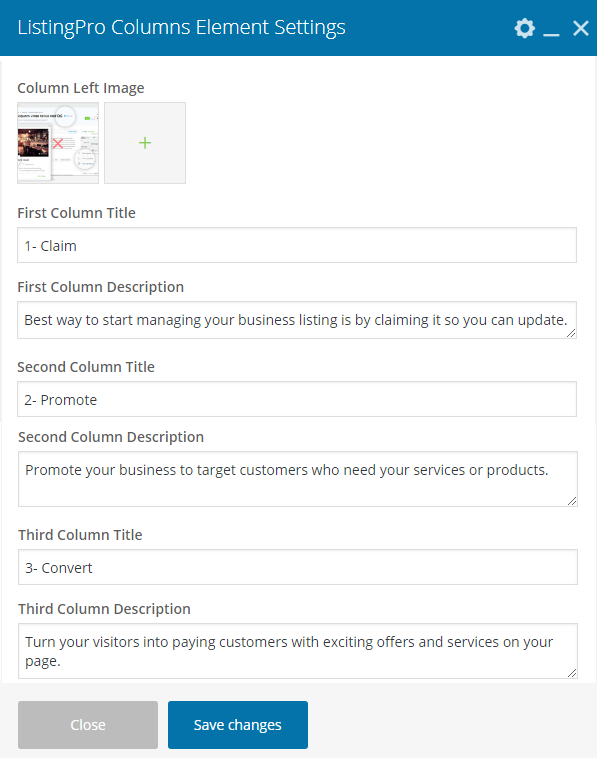
All Available Options (Fields)
There are following options available in the ListingPro Columns Element
- Column Left Image
- First Column Title
- First Column Description
- Second Column Title
- Second Column Description
Backend View
We have filled in all the details below to achieve the result you see in the above screenshot.
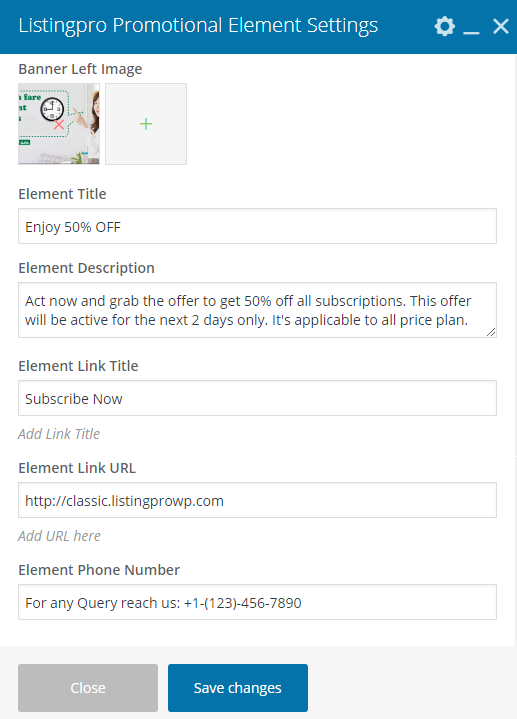
By using this element you can display a custom content block with title and description along with a button and hyperlink Sometimes it’s a perfect solution for promotional purpose and to refer new users by using a sing up or promotional button.
Frontend View
This is how it looks once you fill out all the details in the Visual Composer elements.

All Available Options (Fields)
There are following options available in the ListingPro Promotional Element
- Banner Left Image
- Element Title
- Element Description
- Element Link Title
- Element Link URL
- Element Phone Number
Backend View
We have filled in all the details below to achieve the result you see in the above screenshot.
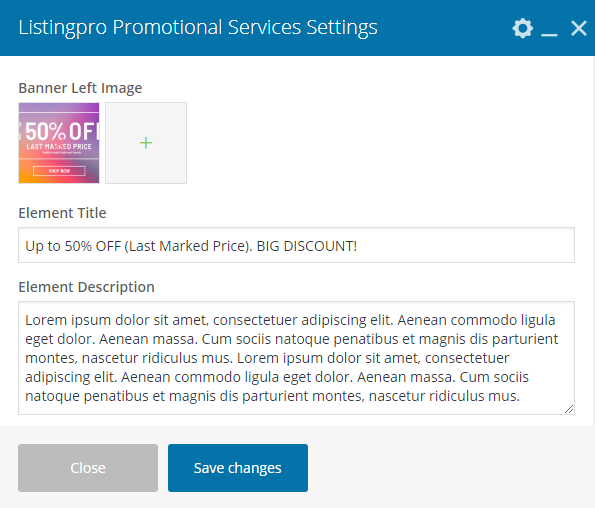
This element can be used for the special promotional purpose. You can add Element Title and Element Description along with an image to display promotional content.
Frontend View
This is how it looks once you fill out all the details in the Visual Composer elements.
All Available Options (Fields)
There are following options available in the ListingPro Promotional Services element
- Banner Left Image
- Element Title
- Element Description
Backend View
We have filled in all the details below to achieve the result you see in the above screenshot.
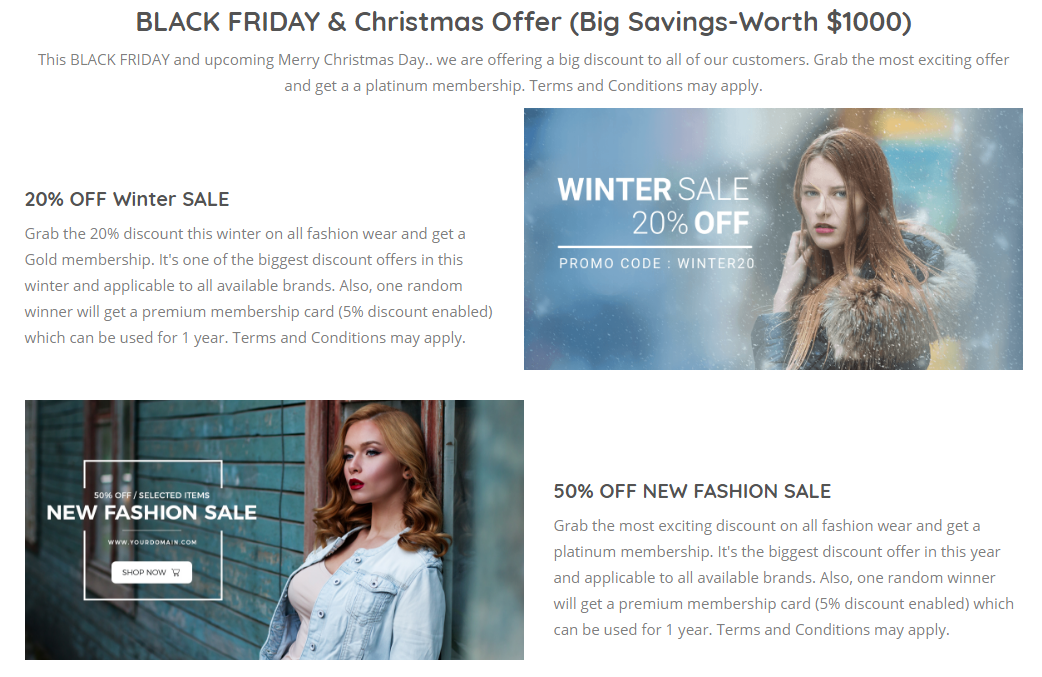
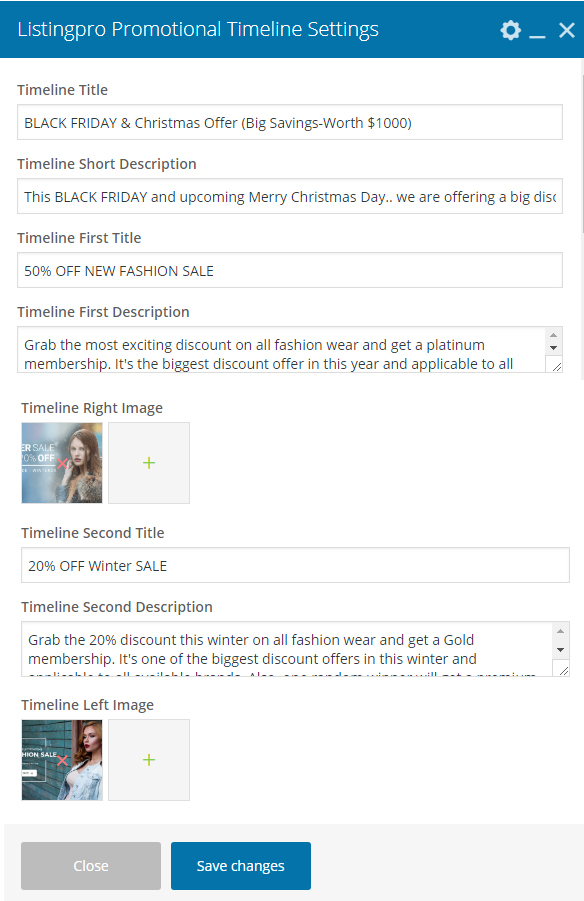
By using this element you can showcase timeline based promotional content. You can add up to 2 timelines into every element. (e.g: Timeline Title, Timeline Description).
Frontend View
This is how it looks once you fill out all the details in the Visual Composer elements.
All Available Options (Fields)
There are following options available in the ListingPro Promotional Timeline element.
- Timeline Title
- Timeline First Title
- Timeline First Description
- Timeline Right Image
- Timeline Second Title
- Timeline Second Description
- Timeline Left Image
Backend View
We have filled in all the details below to achieve the result you see in the above screenshot.
This is another promotional element which can be used to showcase presentation with title and designation or as per your needs.
Frontend View
This is how it looks once you fill out all the details in the Visual Composer elements.

All Available Options (Fields)
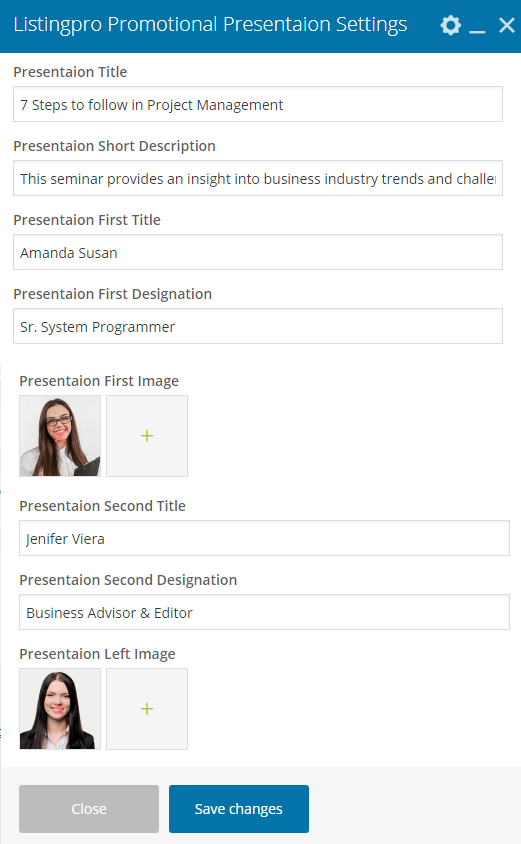
There are following options available in the ListingPro Promotional Presentation element.
- Presentation Title
- Presentation Short Description
- Presentation First Title
- Presentation First Designation
- Presentation First Image
- Presentation Second Title
- Presentation Second Designation
- Presentation Left Image
Backend View
We have filled in all the details below to achieve the result you see in the above screenshot.
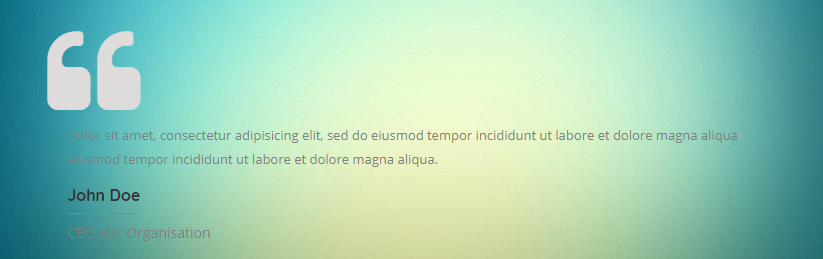
This element is especially used to display promotional contact info along with an image.
Frontend View
This is how it looks once you fill out all the details in the Visual Composer elements.
All Available Options (Fields)
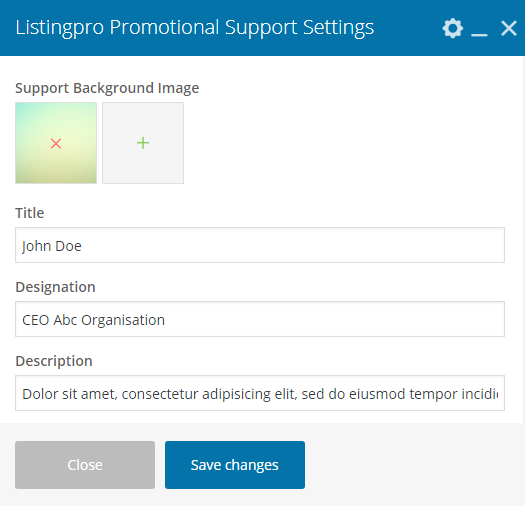
There are following options available in the ListingPro Promotional Support element.
Backend View
We have filled in all the details below to achieve the result you see in the above screenshot.
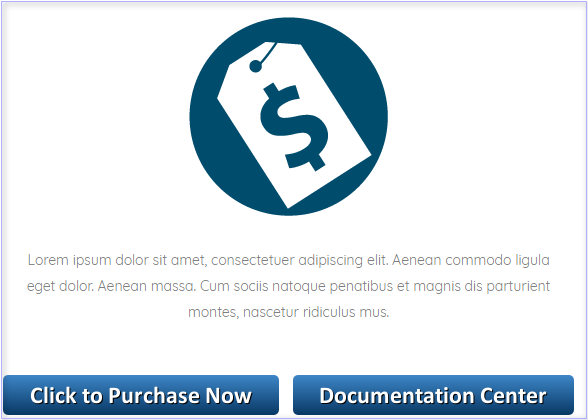
ListingPro Call to Action
This element is a must-have element for every site. You can create a beautiful Call to Action Button along with style, title, and description.
This is how it looks once you fill out all the details in the Visual Composer elements.
Frontend View (Call to Action with Button)

Frontend View (Call to Action without Button)

All Available Options (Fields)
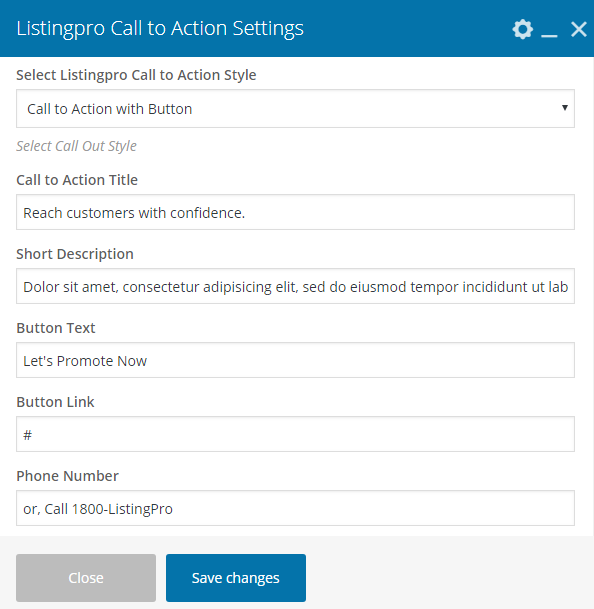
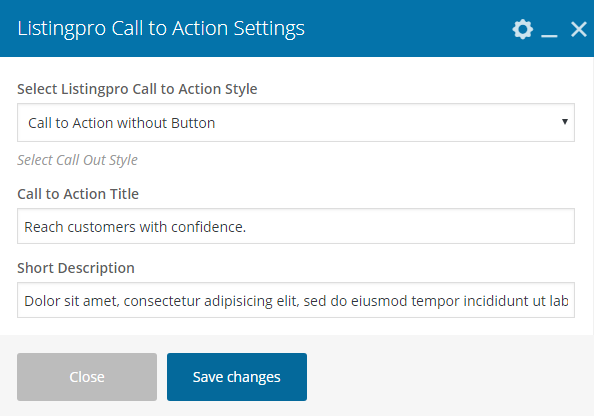
There are following options available in the ListingPro Call to Action element.
- Select ListingPro Call to Action Style
- Call to Action Title
- Short Description
- Button Text
- Button Link
- Phone Number
We have filled in all the details below to achieve the result you see in the above screenshot.
Backend View (Call to Action with Button)
Backend View (Call to Action without Button)
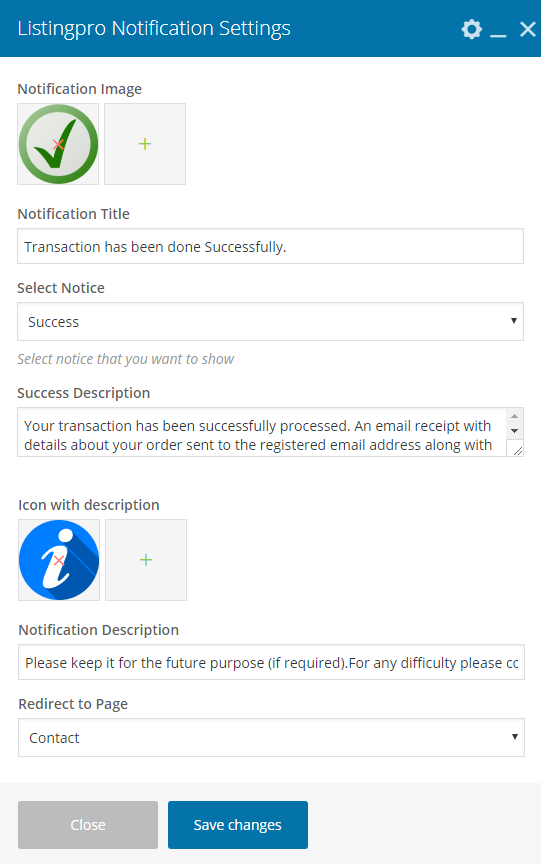
By using this element you can display notifications along with images.
Frontend View
This is how it looks once you fill out all the details in the Visual Composer elements.
All Available Options (Fields)
There are following options available in the ListingPro Notification element.
- Notification Image
- Notification Title
- Select Notice (Success or Failed option available in the dropdown)
- Notification Description
- Icon with description
- Notification Description
- Redirect to Page (You can redirect to any page. Page list will be visible as a dropdown to choose)
Backend View
We have filled in all the details below to achieve the result you see in the above screenshot.
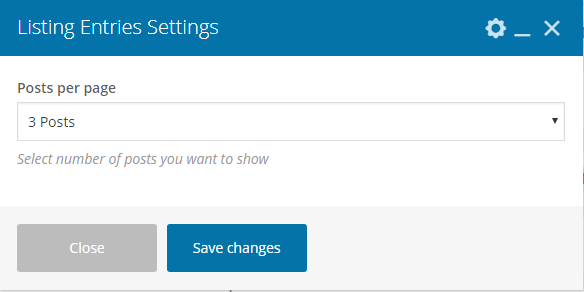
This element is used to display category based listings on the homepage. Simply select the number of listings that you want to show on the homepage and click Save Changes button.
Frontend View
This is how it looks once you fill out all the details in the Visual Composer elements.

All Available Options (Fields)
There are following options available in the Listing Entries element.
Backend View
We have filled in all the details below to achieve the result you see in the above screenshot.
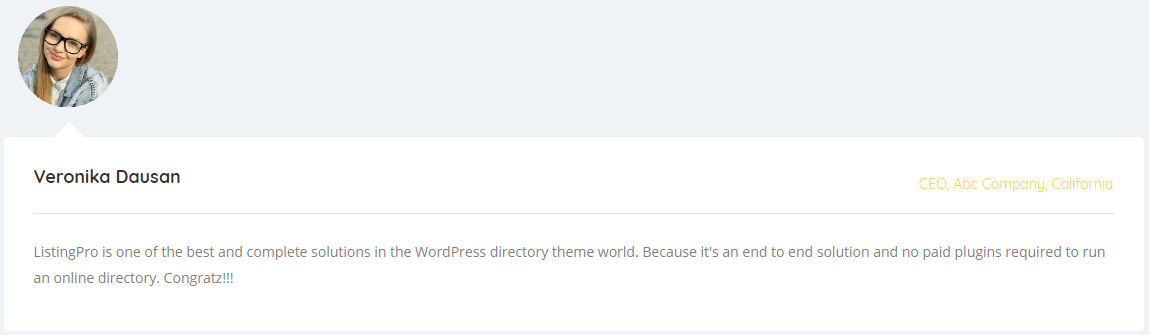
This element is used to display testimonial of clients with an image.
Frontend View
This is how it looks once you fill out all the details in the Visual Composer elements.
All Available Options (Fields)
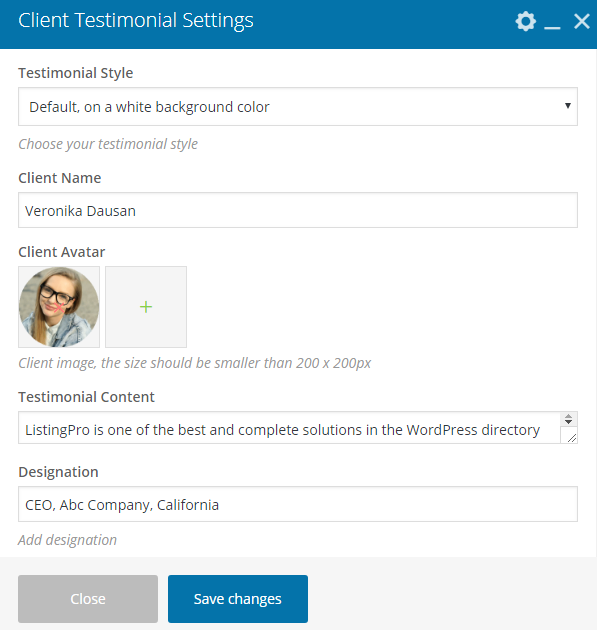
There are following options available in the Client Testimonial element.
- Testimonial Style
- Client Name
- Client Avatar
- Testimonial Content
- Designation
Backend View
We have filled in all the details below to achieve the result you see in the above screenshot.
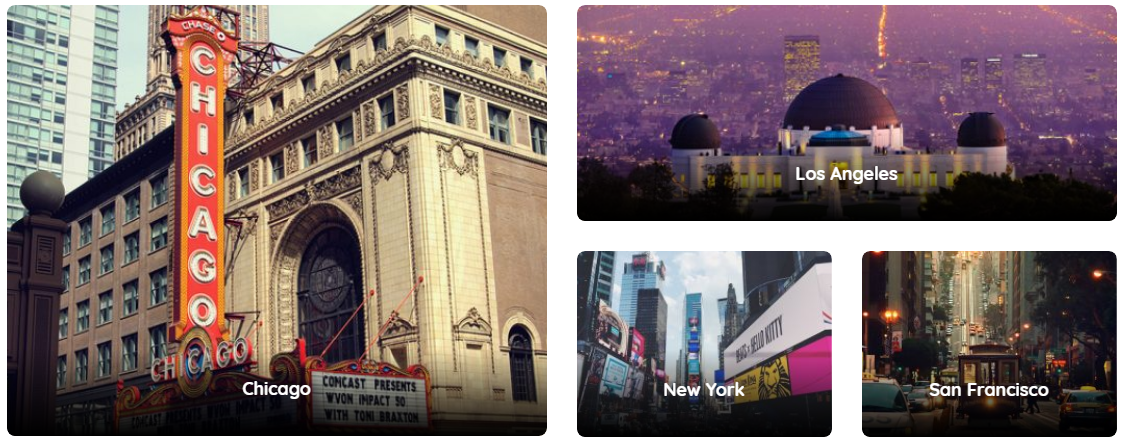
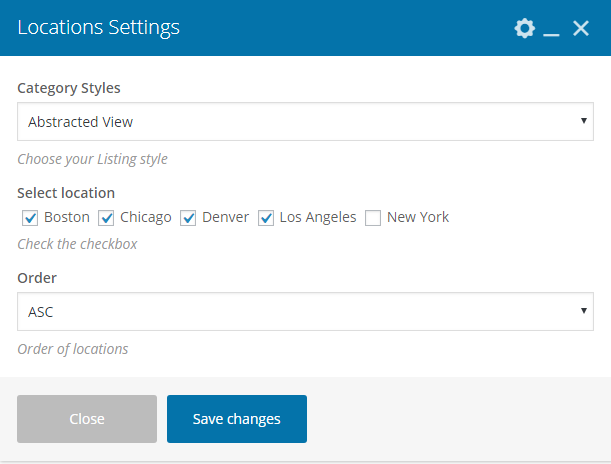
This element is used to display locations as Abstracted, Boxed or Grid view on the homepage based on the ASC or DESC order. All available location list will be visible inside of the element’s backend settings page. You can choose which location will be visible on the homepage or not.
Frontend View
This is how it looks once you fill out all the details in the Visual Composer elements.
All Available Options (Fields)
There are following options available in the Locations element.
- Category Styles (Abstracted View, Boxed View, Grid View)
- Select location (All available saved locations will be visible as multi checkbox list under this menu)
- Order (ASC, DESC)
Backend View
We have filled in all the details below to achieve the result you see in the above screenshot.
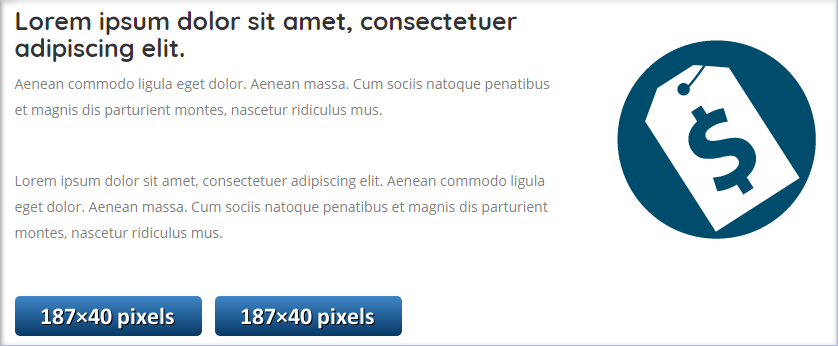
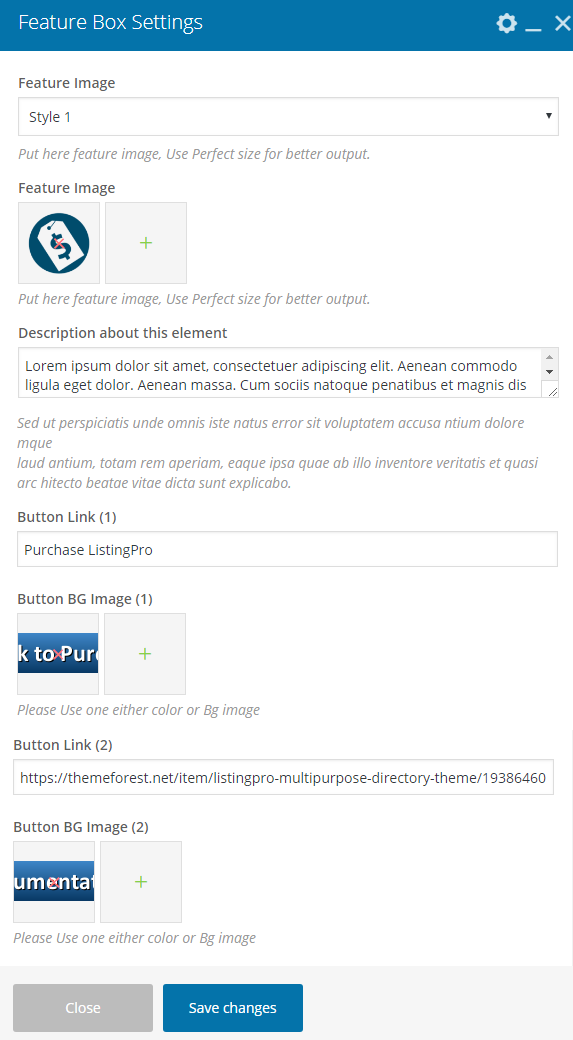
It’s a feature box element. You can display key features by using this element with 2 different styles.
Frontend View
This is how it looks once you fill out all the details in the Visual Composer elements.
(Style 1)
(Style 2)
All Available Options (Fields)
There are following options available in the Feature Box element.
- Feature Image
- Title for Description
- Sub Title for Description
- Feature Image
- Description about this element
- Button Link (1)
- Button BG Image (1)
- Button Link (2)
- Button BG Image (2)
Backend View
We have filled in all the details below to achieve the result you see in the above screenshot.
(Style 1)
(Style 2)

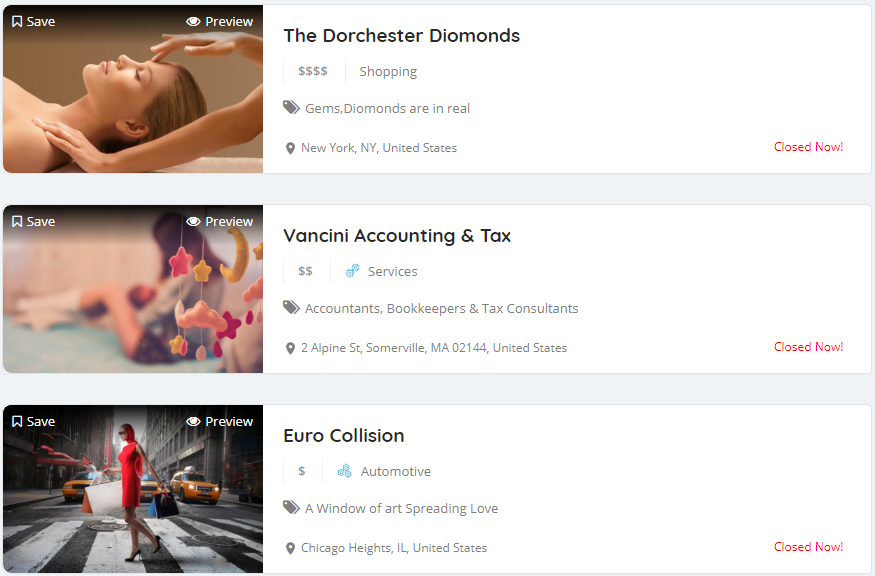
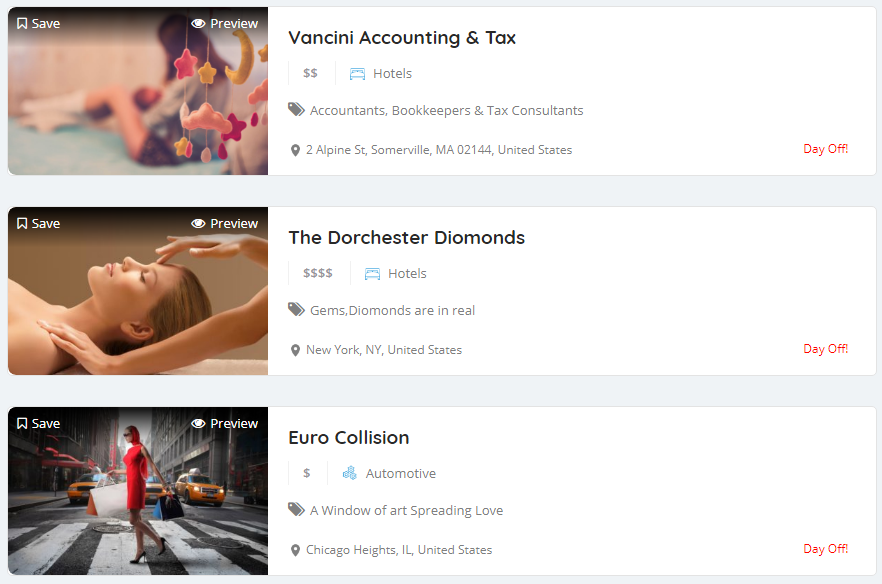
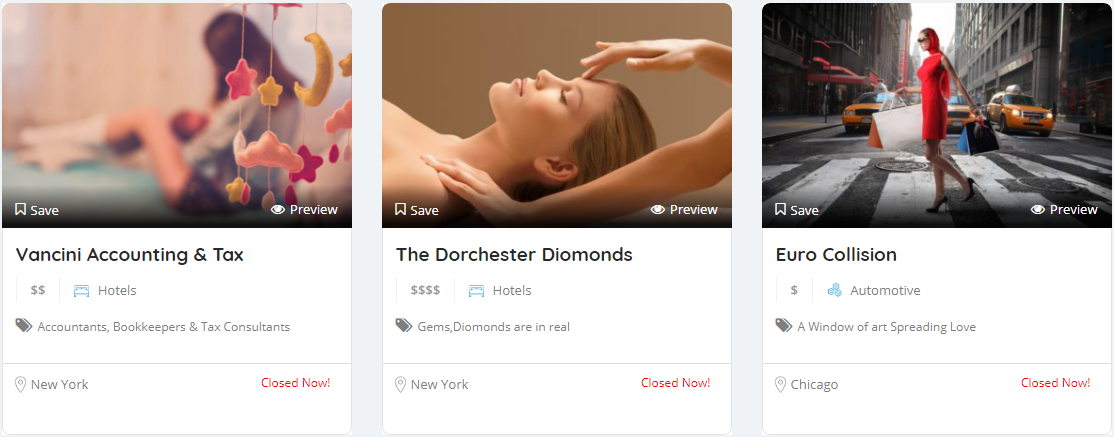
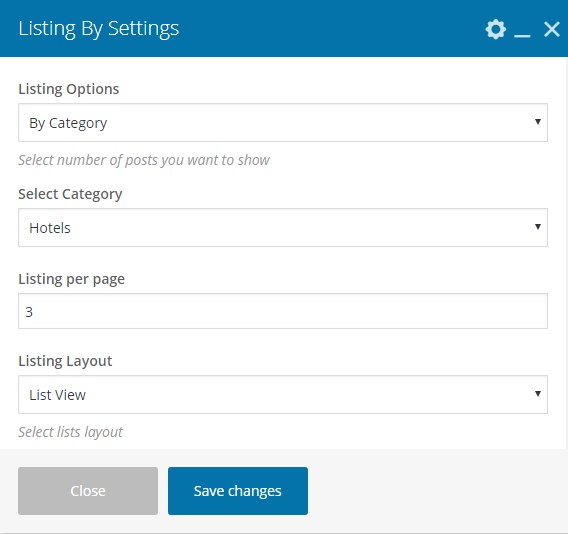
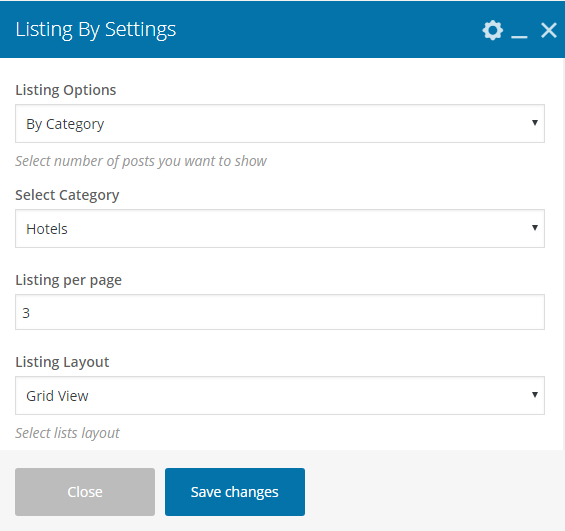
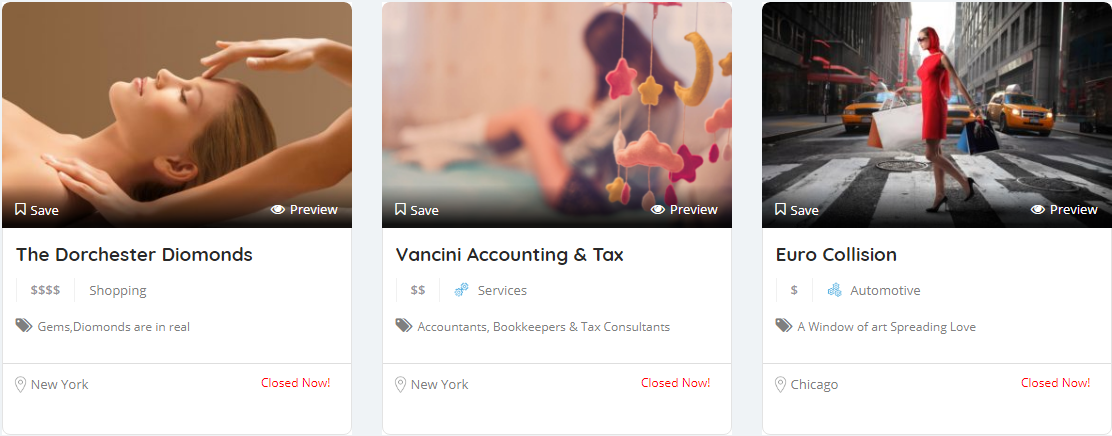
Listing By is an exceptional element to display Listings By Category, By Location, By Location & Category, Recent etc order as Grid View or List View.
Frontend View
This is how it looks once you fill out all the details in the Visual Composer elements.
List View
Grid View
All Available Options (Fields)
There are following options available in the Listing By element.
- Listing Options (Dropdowns: By Category, By Location, By Location & Category, Recent)
- Listing per page
- Listing Layout (List View/Grid View)
Backend View
We have filled in all the details below to achieve the result you see in the above screenshot.
List View
Grid View
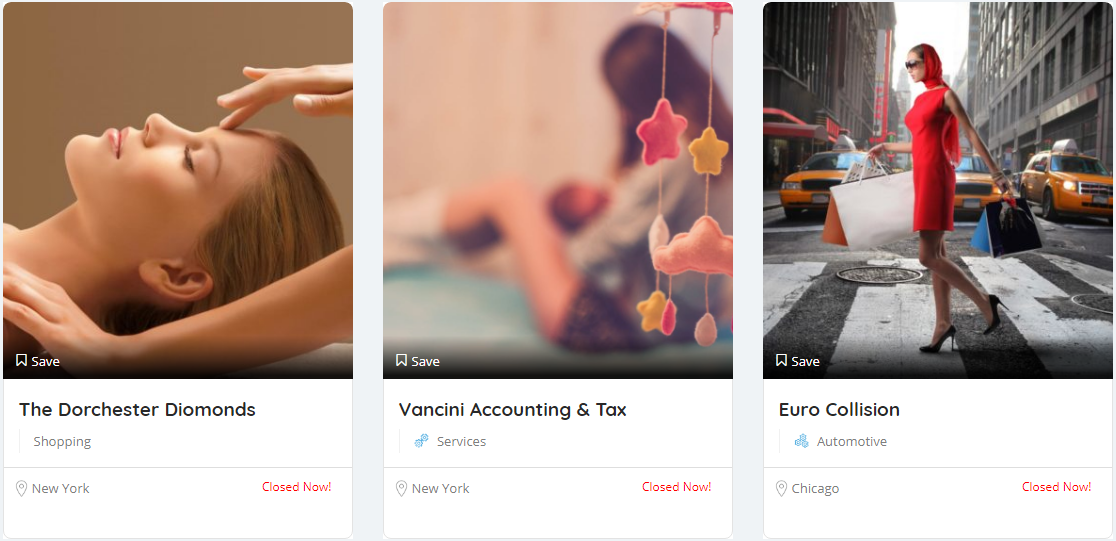
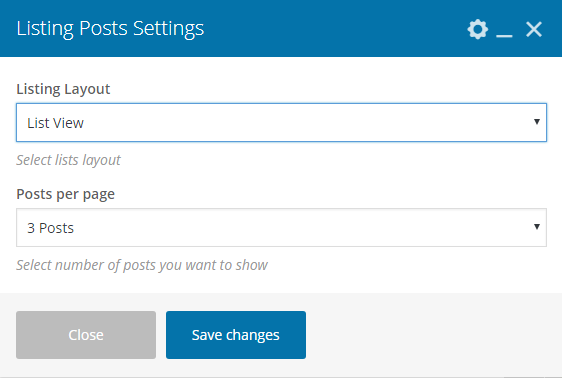
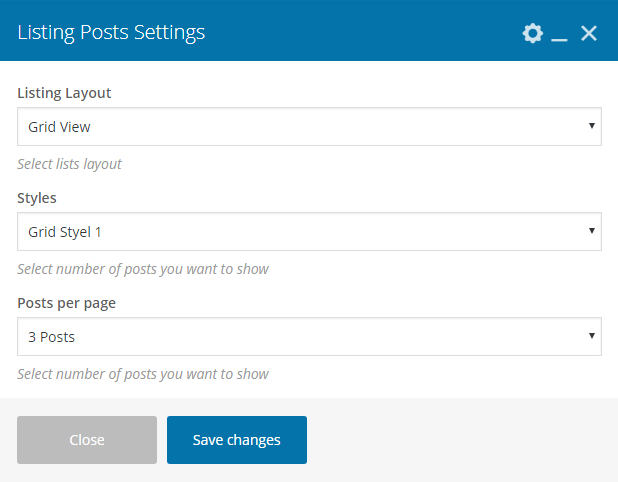
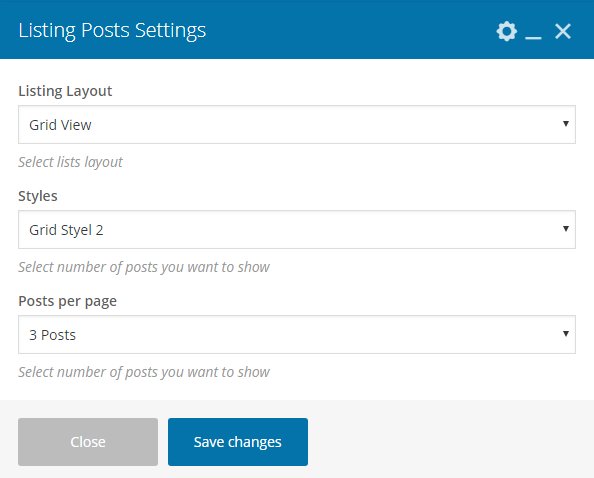
It’s an exceptional element to show the number of listings on the homepage. It’s simple but similar to the Listing By element. You can display listings as List View or Grid View. Grid View has two different styles (Grid Style 1 & Grid Style 2).
Frontend View
This is how it looks once you fill out all the details in the Visual Composer elements.
List View
Grid View (Grid Style 1)
Grid View (Grid Style 2)
All Available Options (Fields)
There are following options available in the Listing Posts element.
- Listing Layout (Dropdown: List View/Grid View)
- Posts per page (Dropdown: 3 Posts, 6 Posts, 9 Posts, 12 Posts, 15 listings)
Backend View
We have filled in all the details below to achieve the result you see in the above screenshot.
List View
Grid View (Grid Style 1)
Grid View (Grid Style 2)
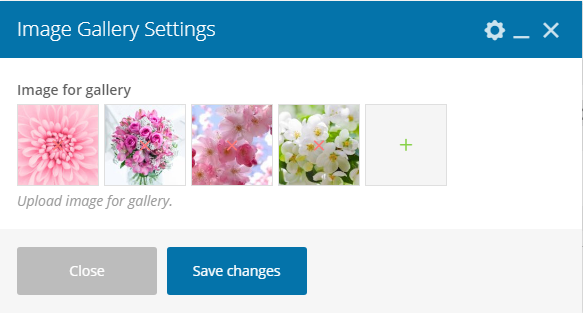
You can display multiple images as an image gallery into the homepage as per your uploaded image size.
Frontend View
This is how it looks once you fill out all the details in the Visual Composer elements.

All Available Options (Fields)
There are following options available in the Image Gallery element.
Backend View
We have filled in all the details below to achieve the result you see in the above screenshot.
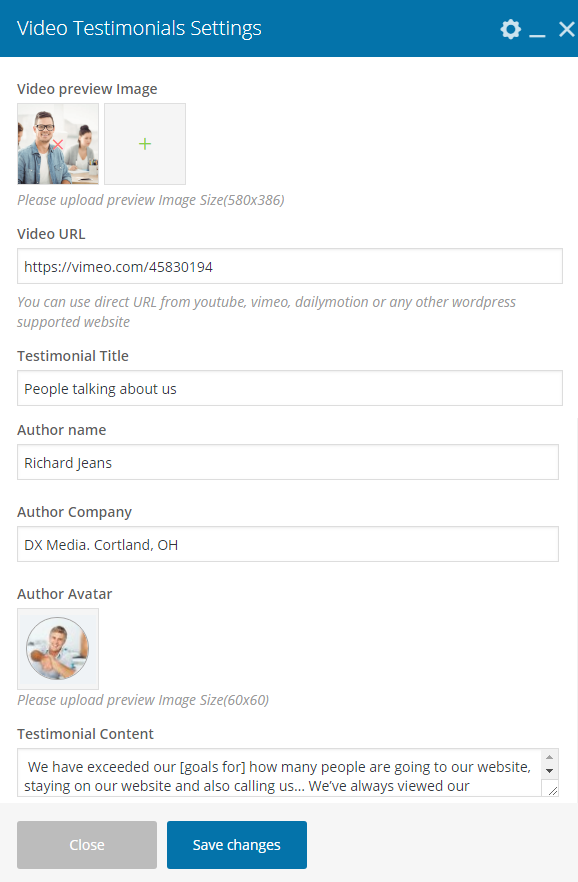
It’s a great element to display video testimonial on the homepage. You can add video preview image, video URL (Youtube URL, Vimeo, Dailymotion or similar sites that supports WordPress) along with Testimonial title, Author name, Author avatar along with testimonial content.
Frontend View
This is how it looks once you fill out all the details in the Visual Composer elements.

All Available Options (Fields)
There are following options available in the Video Testimonial element.
- Video preview Image
- Video URL
- Testimonial Title
- Author name
- Author Company
- Author Avatar
- Testimonial Content
Backend View
We have filled in all the details below to achieve the result you see in the above screenshot.
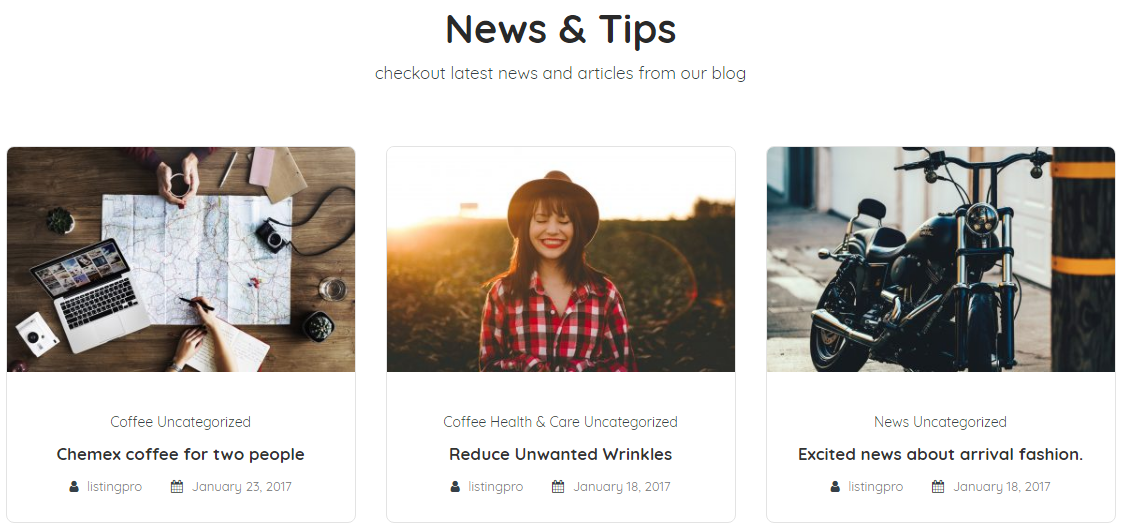
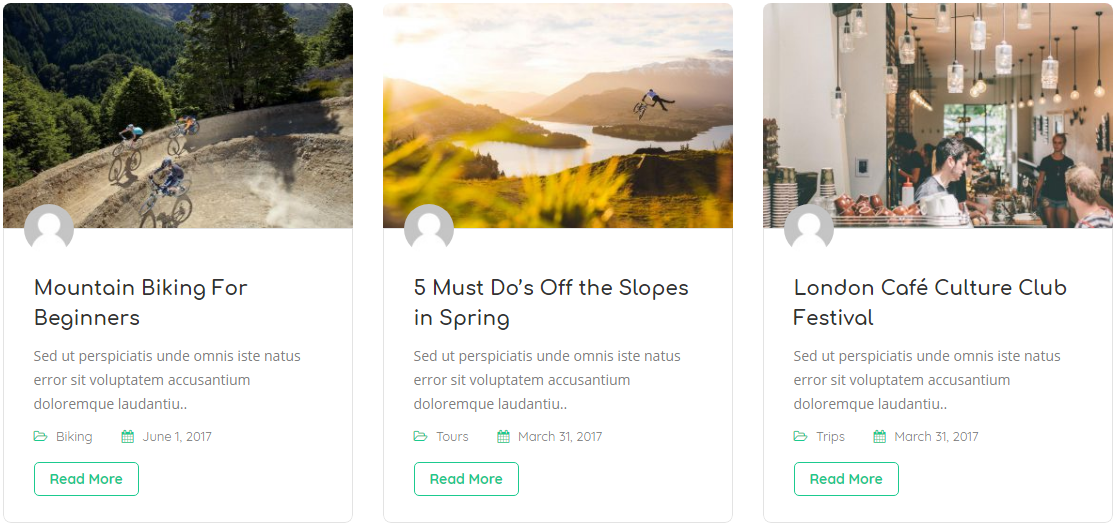
By using this element you can display blog posts as grid or masonry style as per any specific category or for all category.
Frontend View
This is how it looks once you fill out all the details in the Visual Composer elements.
Blog Grid
Blog Masonry
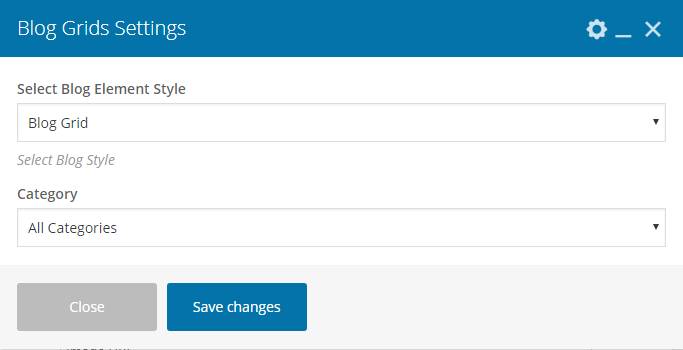
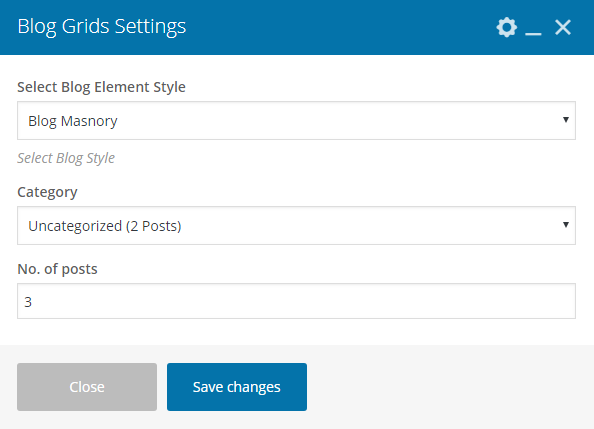
All Available Options (Fields)
There are following options available in the Blog Grids element.
- Select Blog Element Style (Blog Grid, Blog Masonry)
- Category
Backend View
We have filled in all the details below to achieve the result you see in the above screenshot.
Blog Grid
Blog Masonry
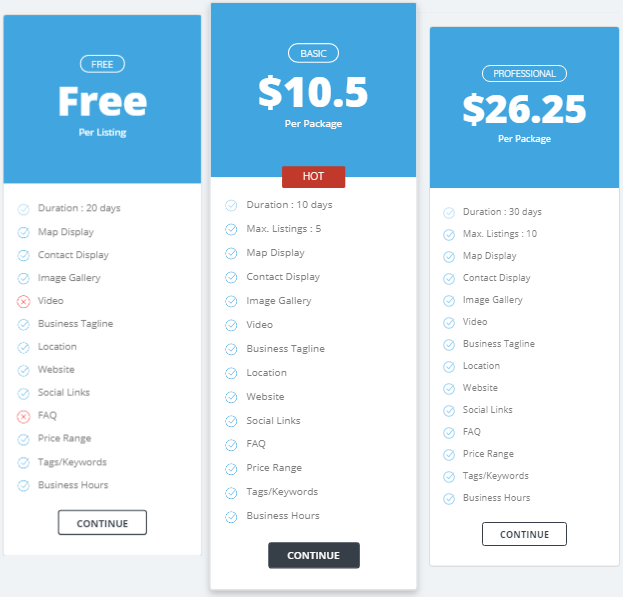
This element will display pricing plans in two different styles. List of all available pricing plans will be displayed automatically one by one as per your settings as Horizontal or Vertical view.
Frontend View
This is how it looks once you fill out all the details in the Visual Composer elements.
Horizontal
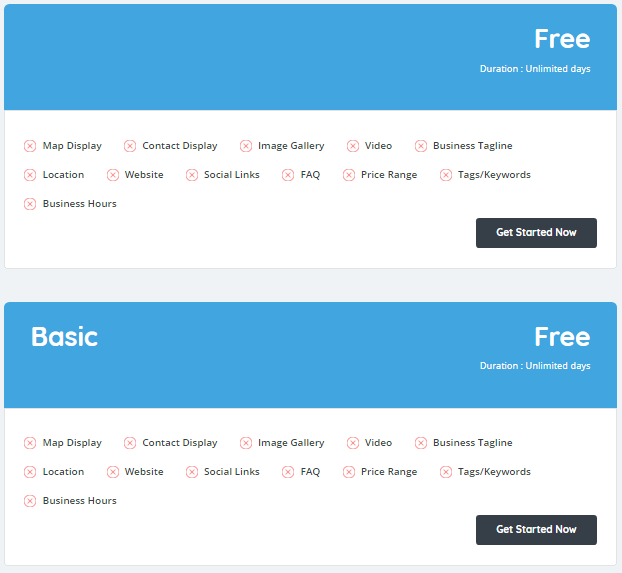
Vertical
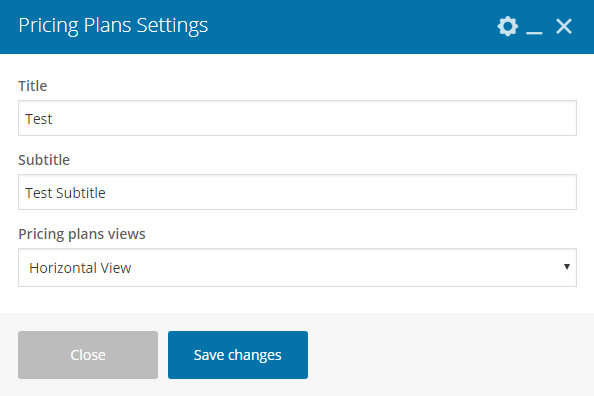
All Available Options (Fields)
There are following options available in the Pricing Plans element.
- Title
- Subtitle
- Pricing plans views (Horizontal View, Vertical View)
Backend View
We have filled in all the details below to achieve the result you see in the above screenshot.
Horizontal
Vertical

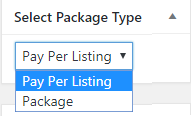
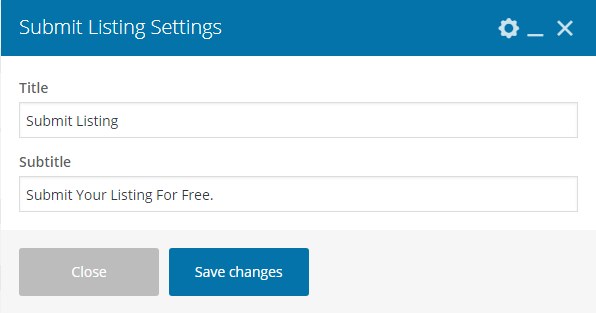
This element is used to insert Submit Listing page.
Frontend View
All Available Options (Fields)
There are following options available in the Submit Listing element.
Backend View
We have filled in all the details below to achieve the result you see in the above screenshot.
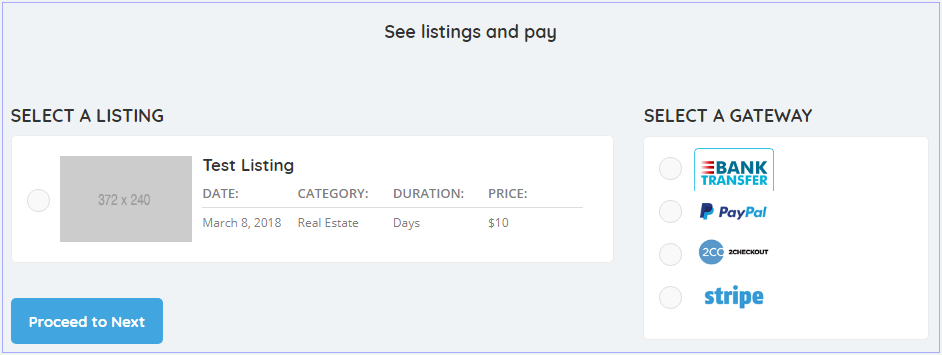
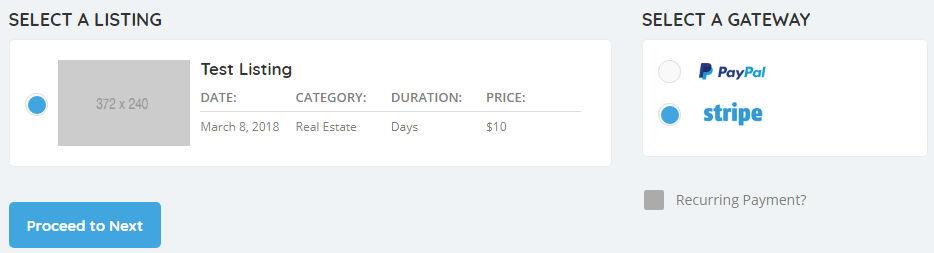
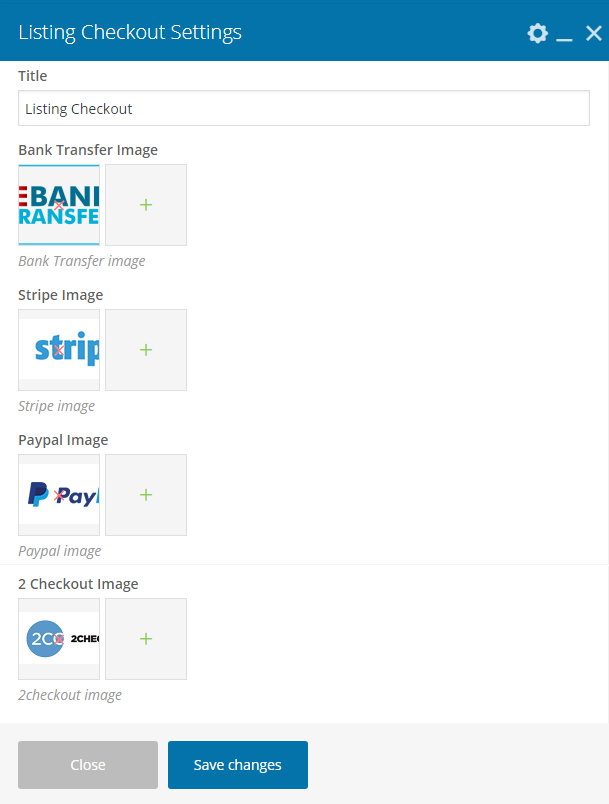
This is a checkout element and used to display checkout page.
Frontend View
This is how it looks once you fill out all the details in the Visual Composer elements.
All Available Options (Fields)
There are following options available in the Listing Checkout element.
- Title
- Bank Transfer Image
- Stripe Image
- Paypal Image
- 2 Checkout Image
Backend View
We have filled in all the details below to achieve the result you see in the above screenshot.
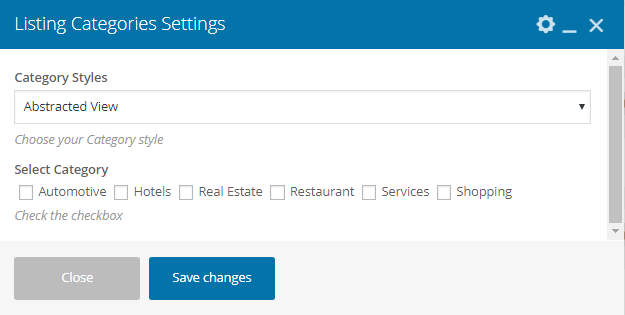
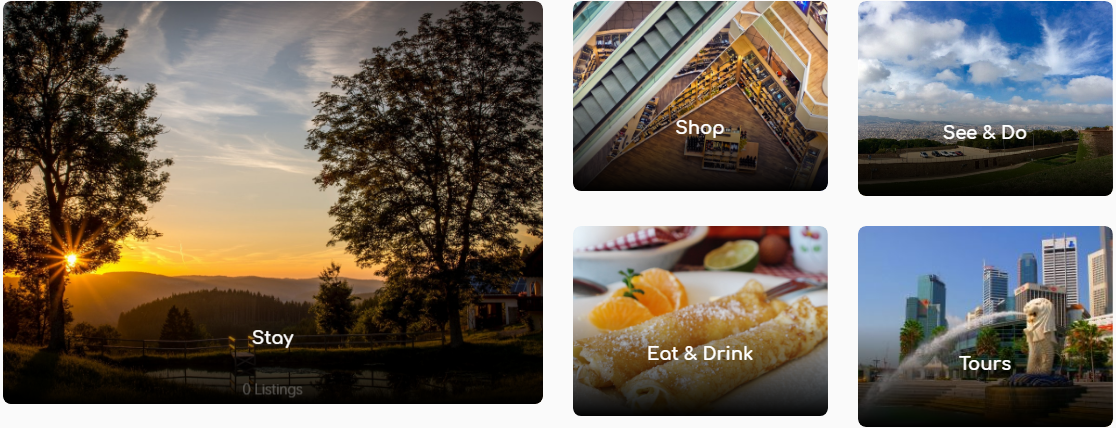
This element is used to display listings as Abstracted, Boxed or Grid view on the homepage. You can choose which category will be visible on the homepage or not.
Frontend View
This is how it looks once you fill out all the details in the Visual Composer elements.
Abstracted View

Boxed View

Abstracted & Boxed View
All Available Options (Fields)
There are following options available in the Listing Checkout element.
- Category Styles (Abstracted View, Boxed View, Grid View)
- Select Category (All available saved categories will be visible as multi checkbox list under this menu)
Backend View
We have filled in all the details below to achieve the result you see in the above screenshot.