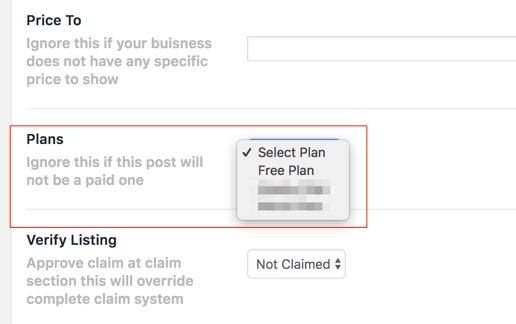
When adding or editing a listing from backend you won’t have an option to select a pricing plan. The good news is that the option is there but it’s hidden so only who needs it and understands the consequences of changing this setting must enable it.
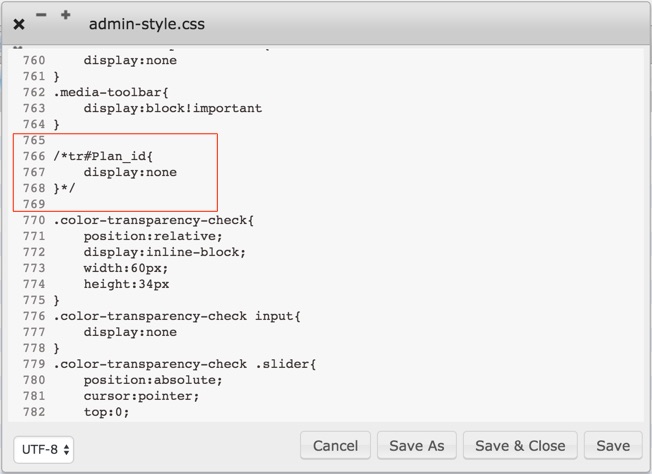
STEP 1: Go to wp-content\themes\listingpro\assets\css\admin-style.css
STEP 2: Scroll down to line 765
STEP 3: Hide or remove the following css.
tr#Plan_id {display:none}
To temporarily enable this feature simply add /* before and */ at the end. See below for example.
/* tr#Plan_id {display:none} */
STEP 4: Verify the pricing plan option is visible in the backend when you edit any listing.
Ad campaign allows listing owners to generate more leads and promote their business listings. In addition to Paid Listing and Paid Claim, this is another channel to generate revenue for the site admin. Ads campaign can be run based on the price, duration, available placements along with other options.
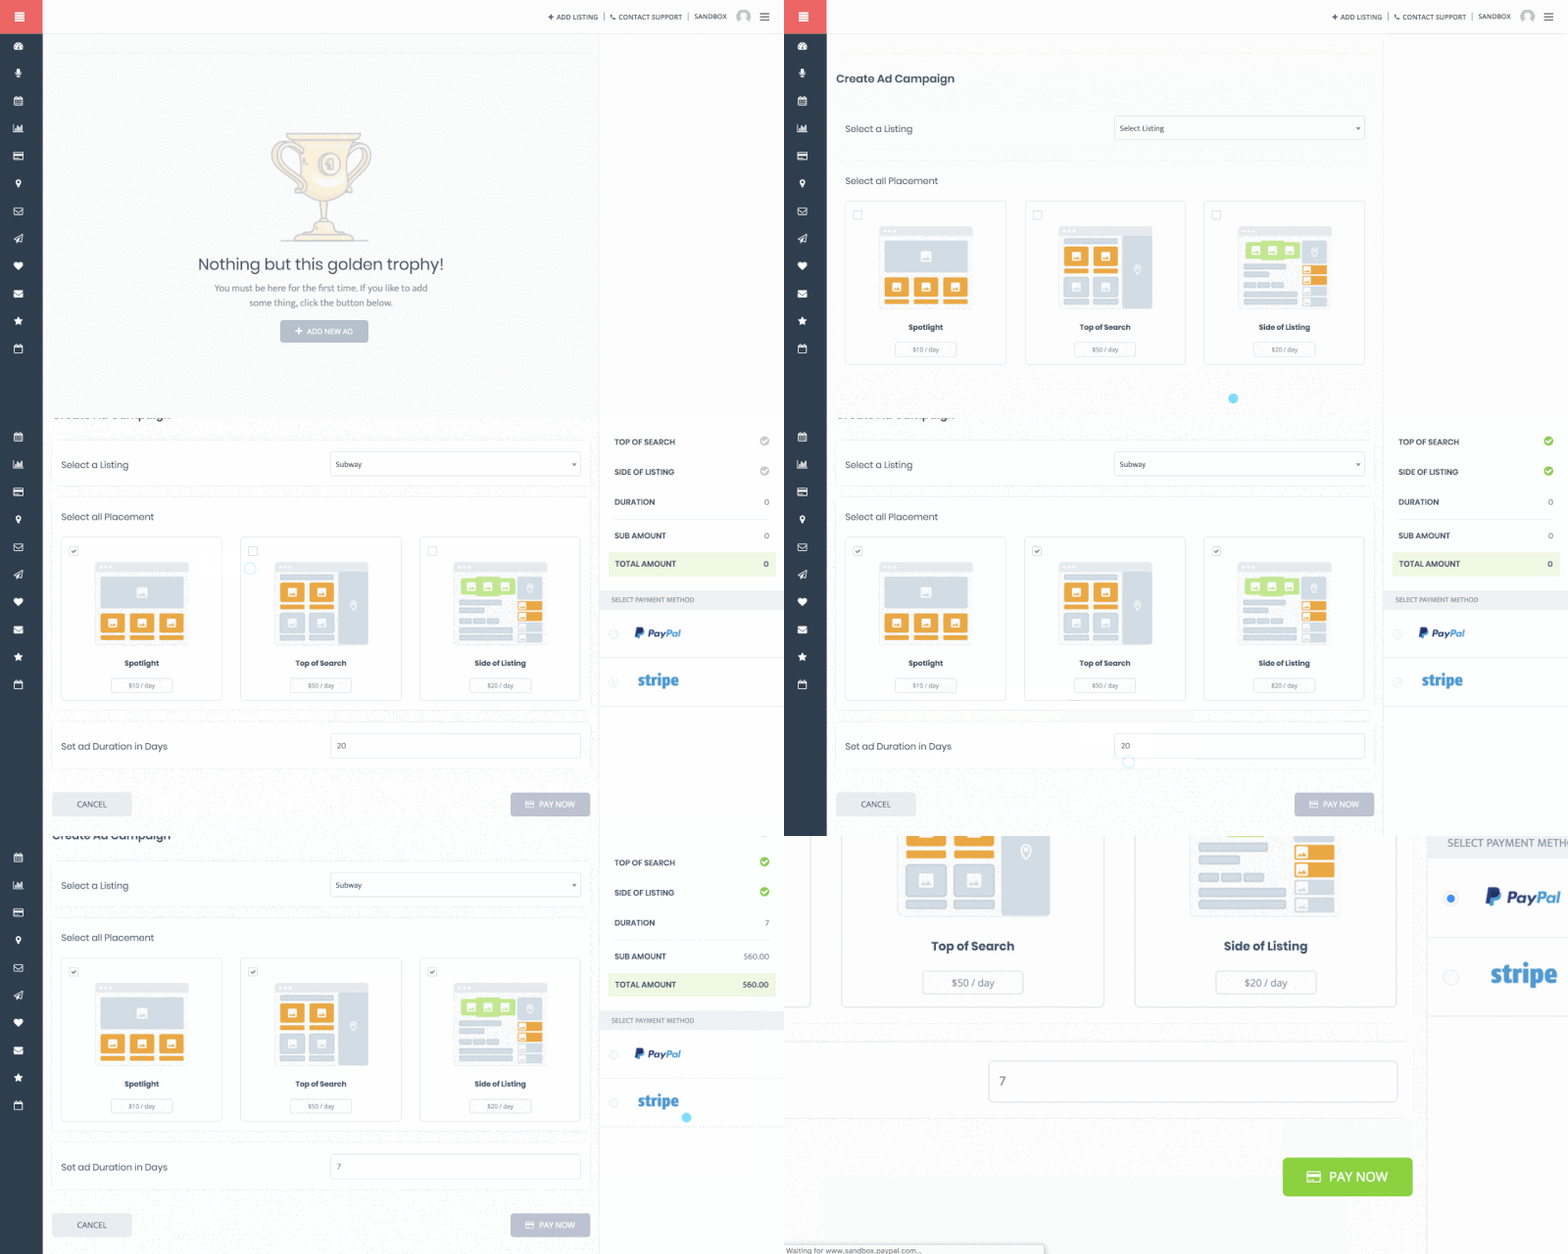
STEP 1: Go to User Dashboard > Ad CampaignsWatch this quick animated gif or the full video above.
STEP 2: Click + Add New AD
STEP 3: Click Let’s Get Started on the pop-up.
STEP 4: Click Select Listing drop-down, and find a your published listing.
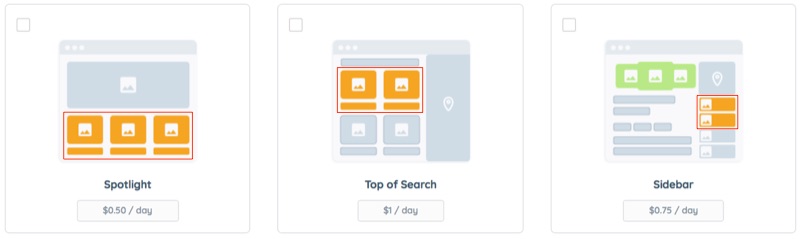
STEP 5:Choose from THREE (3) Ad placement options: Spotlight, Top of Search and Sidebar.
Orange spots indicate where the listing Ads will be displayed.
In this example Pay Per Day campaign type is shown. You may offer users one of the TWO (2) Ad campaign options: Pay Per ClickPPC or Pay Per DayPPD
For Ad Placement and Ad Campaign settings go to WP Admin > Theme Options > Ads Options.
Spotlight Ads are handled by WPBakery custom element. Can be inserted on almost any page using
Top of Search Ads Automatically displays on top of the organic search result in a set of TWO (maximum) ads at a time and are distributed evenly.
Top of Search Ads are Targeted-Ads. The Targeted Ads are designed for users searching for a specific category, tag (keyword), or feature in a specific location. For example, If John is searching for Photographers in San Jose CA, then your ads will appear on top of organic results only if you happen to be offering Photography service in San Jose.
Sidebar Ads are handled form Widgets and can be displayed on the Listing details page and Archive (search result) page.
To display Sidebar Ads, go to WP Admin > Appearance > Widgets
For Listing Details page drag ListingPro – Ads Listing widget to Listing Details Sidebar
For Listing Archive page drag ListingPro – Ads Listing widget to Listing Archive Sidebar
STEP 6: Set the campaign duration in days. (Example: Enter just 7 for 1 Week)
All users must review the Ad summary carefully before processing the payments. To make any changes (stop, cancel, request refund) to an active ad campaign listing owner have to contact the site admin. This is not an automatic process.
STEP 7: Select a payment method.
To configure a payment option (Example: PayPal, Stripe or Bank Wire) go to WP Admin > Theme Options > Payment Settings.
STEP 8: Click Pay Now
If any payment gateway is not selected, Pay Now button will remain inactive.
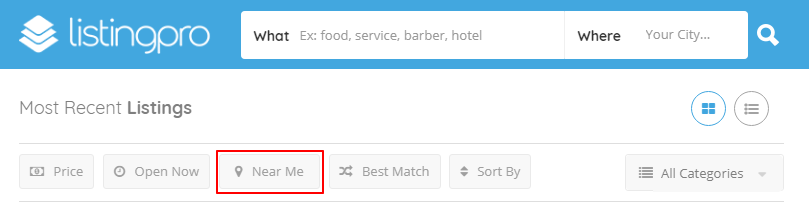
Near Me is a search filter which is available in the search filter page. Near Me Works with GEO IP location and get the nearest locations dynamically based on the current location.
How to Enable Near Me
By default, Near Me filter option is disabled. To activate see steps below:
Step 1: Go to Theme Options > Search Filter Options
Step 2: Find the Near Me option and click on Enabled
Step 2: Click Save Changes
Near Me Options
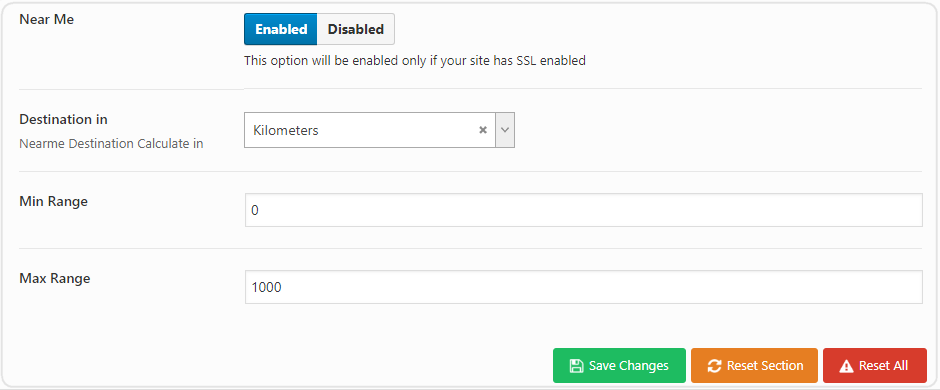
In the Near Me options page there are 4 options available to configure.
Near me
This option is available to enable or disable Near Me option. Once enabled Near Me filter will be displayed in the search filter page. If you disable the toggle Near me will be hidden from the search filter page.
Destination In
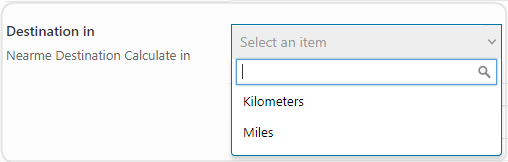
Under the Destination In option, there are two options available. (Kilometers/Miles). You can set your preferred method how you want to filter search results. If you want to allow listing filters by Kilometers then choose Kilometers. If you want to allow listing filters by Miles then choose Miles.
Min Range
You can set the minimum range (Numerical Value) for the Min Range field as a minimum filter range. For example, if you set 5 with Destination In (Kilometers) then visitors will be only able to filter listings starting from 5 kilometers to Max range.
Max Range
You can set the maximum range (Numerical Value) for the Max Range field as a maximum filter range. For example, if you set 1000 with Destination In (Kilometers) then visitors will be only able to filter listings up to 1000 kilometers range.
How Does Near Me Work on the Frontend
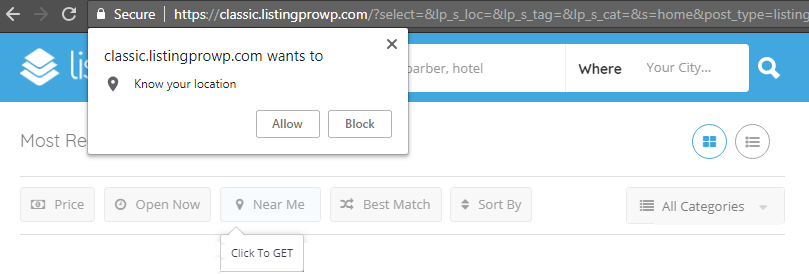
When you click on the Near Me option in the frontend it will ask your location. Click to allow for analyzing your location. After allowing location you can easily filter listings based in the minimum and maximum range (As per the configuration defined in the backend).
ATTENTION
To fully work with Near me and Nearby, it’s necessary that your directory is already running with SSL enabled and all URL paths were converted to HTTPS. For more details, please read the related article below.
NOTE: Search with Zipcode is now supported with Google API (Watch This Video)
ListingPro search is the most advanced and dynamic built-in search system on the directory market today, yet it is the most simple-to-use as it removes the out-dated complexities in the traditional directories by keeping the search fields to simply two fields (example: WHAT and WHERE).
ListingPro’s IntelliSense based search is the next-generation archive search system giving instant live suggestions for keywords, categories, listing names, and even in combinations (tags in category). The Location search is region-based (town, city, or state). A region can be added manually or automated with Google Maps API.
In addition, when a user searches for something it can also take them to an archived page with all the listings containing the most relevant data according to their search, giving them the best possible results. The advanced search algorithm is designed from ground-up to dramatically change the behavior based on the way the directory admin has configured the settings in Theme Options (Exact or Broad keywords match).
For example, the search can be either static, where if the user type in a keyword “car”, only the listing that has the word car in it will show, or have your search more dynamic were if user type in the word car they can get listings that also have words such as auto, automobile, workshop, etc.
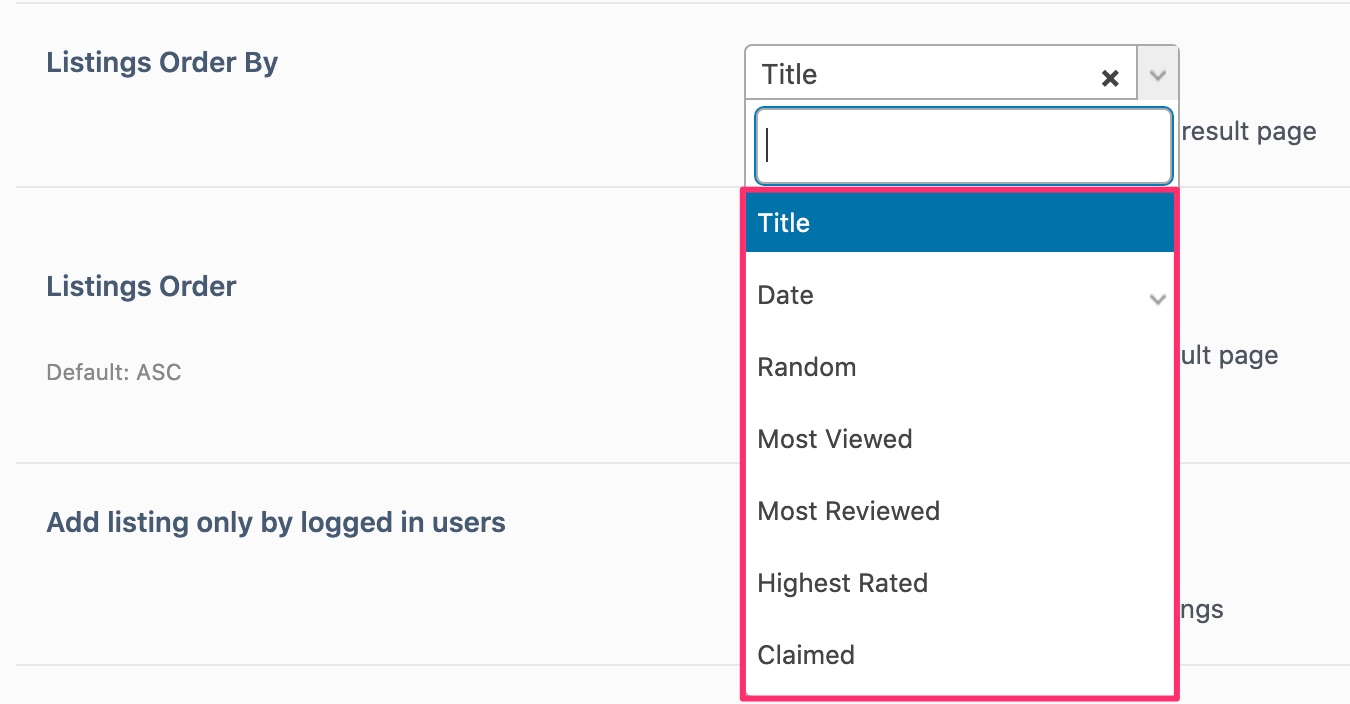
The admin can set the search result order from theme options. Currently, there are seven different order types:
STEP 4: Go to ThemeOptions > General and find the option named ”Custom CSS” STEP 5: Paste the CSS code inside of the ”Custom CSS”. STEP 6: Click Save Changes.
Hiding Join Now Button
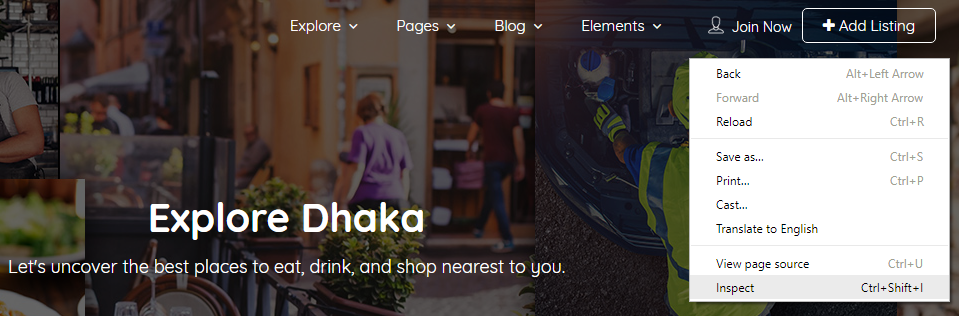
STEP 1: Open the homepage of your website. STEP 2: Click on Inspect (in Google Chrome Browser) to extract the source elements of your homepage.
STEP 3: Find the CSS class of the ”Join Now” button.
The code will look like the below:
.lp-join-now {
visibility: hidden;
}
STEP 4: Go to ThemeOptions > General and find the option named ”Custom CSS” STEP 5: Paste the CSS code inside of the ”Custom CSS”. STEP 6: Click Save Changes.
Disabling User Registration
NOTE: If you disable user registration then only admin can add users from the backend. And registrations will be disabled from the frontend.
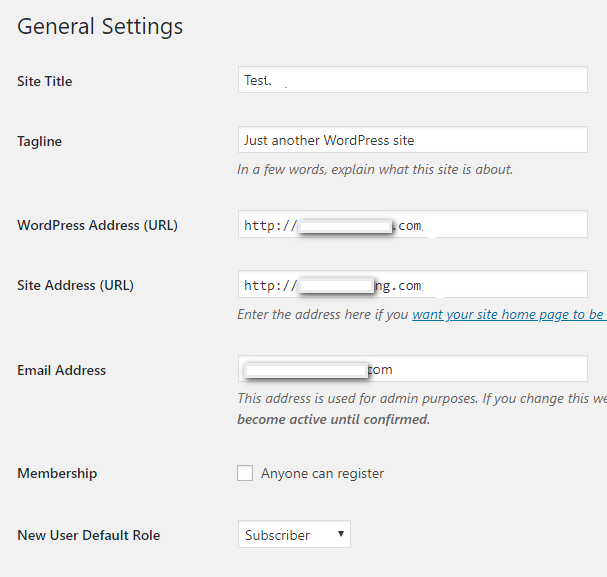
STEP 1: Go to WordPress Dashboard > Appearence > Settings
STEP 2: Find the following option named “Anyone can register” and remove the checkbox tick mark.
The General Data Protection Regulation (GDPR) (EU) 2016/679 is a regulation in EU law on data protection and privacy for all individuals within the European Union and the European Economic Area. It’s applicable to manage and protect individuals’ rights regarding the information, usage, collection, and storage etc of their personal data. To know more please visit Wikipedia
GDPR is coming into effect from May 25, 2018. So we updated ListingPro with GDPR Agreement along with necessary terms of service and privacy settings. To comply with GDPR regulation please follow this steps:
Below procedures covers the following key points:
FOR ADMIN: Privacy Settings FOR LISTING OWNER: Profile Management
FOR ADMIN: Privacy Settings
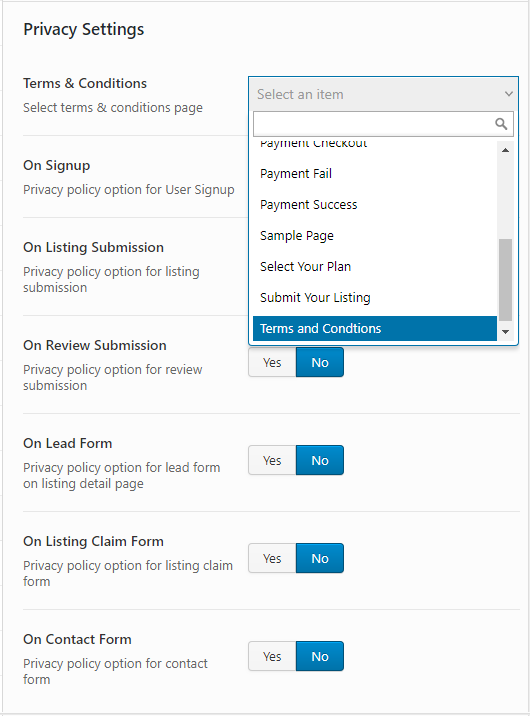
STEP 1: Go to Theme Options > Privacy Settings
STEP 2: Click the dropdown from Terms & Conditions option and select your website’s Terms and Conditions page.
NOTE: At first, you have to create a Terms & Conditions page for your site where you will clearly include all terms, data protection, security, privacy and service terms, cookie policy etc information as per the regulation of GDPR. To create a page please go to Dashboard > Pages > Add New
The following options are available to enable/disable display the terms & conditions page within the site.
On Sign Up
Once enabled privacy option checkbox will be available in the SIgn Up page. On Listing Submission
Once enabled privacy option checkbox will be available in the Listing Submission page. On Review Submission
Once enabled privacy option checkbox will be available in the Review Submission page. On Lead Form
Once enabled privacy option checkbox will be available in the Lead Form page. On Listing Claim Form
Once enabled privacy option checkbox will be available in the Claim Listing Form page. On Contact Form
Once enabled privacy option checkbox will be available in the Contact Form page.
FOR LISTING OWNER: Profile Management
Now every Listing Owner have rights to change/edit information of their profile from the user dashboard. Also, user can download the profile in pdf format. Or, any user can delete their profile anytime.
a) Download Profile Data
STEP 1: To download profile data go to Frontend User Dashboard > My Profile
STEP 2: Scroll down to the bottom left corner and click on Download Profile button.
b) Account Deletion
STEP 1: To delete any profile go to Frontend User Dashboard > My Profile
STEP 2: Scroll down to the right corner and click on Delete Account button.