We get this a lot and we know how important it’s for our users that they don’t feel they are without help when their support expired, so here are some options you may consider. Option 1: Join Weekly Live Webinar Every Saturday we are hosting a technical Q&A session open to anyone to join and ask any question regarding how to build a directory with ListingPro, how things work, share ideas, give feedback, and even get constructive feedback for what you are building. Option 2: Join ListingPro’s Official Facebook Community The first thing is it’s absolutely FREE! By joining our official Facebook Community with our 1000+ members you can post your questions and get help from 100s of active members who love to help. Option 3: Report a bug First, make sure you have the latest version of ListingPro running by visiting our update logs page. Then if you think the bug is in the latest version then you may report it by filling out the following form. Option 4: Renew support When you purchase ListingPro you get 6 months of Free Support. You do have an option to get extended support for an additional 6 months for a discounted price so you are good for 12 months. This sounds all good but once the support expired people come and ask us why should I renew the support license. We highly recommend you to renew the support license if you would like to get help directly from our expert support team.
Please do not submit feature requests or improvements.
What IP-Address APIs are supported for Geolocation
The following two APIs for GEO IP is supported.
geolocation-db.com
ip-api.com
Also, see How to enable GPS
Pricing & Discount Policy
What is your standard price for a single license?
ListingPro is exclusively available on Envato for a fixed price of $69.
Can I get a discount on a single license purchase?
You can get discount only when there is a discount campaign going on. Once the deal expires we are unable to offer the discount until the next deal is live nor we can give discounts coupons.
Can I get a discount on a multiple license purchase?
Yes, you can contact us regarding this and we will try our best to give you the best deal.
When is your next discount offer planned?
We may choose to run a self-promotional discount campaign anytime or participate in a campaign with Envato to give a discount. But we do not announce the discount ahead of time.
Do you offer any discount for a non-profit organization?
If you are a non-profit organization you can purchase the theme at a regular price and you must install it on your non-profit organization domain (preferably a .org domain and send us the details including the link to your non-profit org domain with active ListingPro installation and we may consider your application. You can get up to 75% in rebate. Submit your details here.
How to redirect users to the dashboard after login?
In order for you to redirect users to dashboard after login, please edit the following file:
Go to: wp-content\themes\listingpro\include\login-register.php
Please open the file and add the following code in the place highlighted in the screenshot below:
$dashURL = $listingpro_options['listing-author'];

How to change pricing plan from backend?
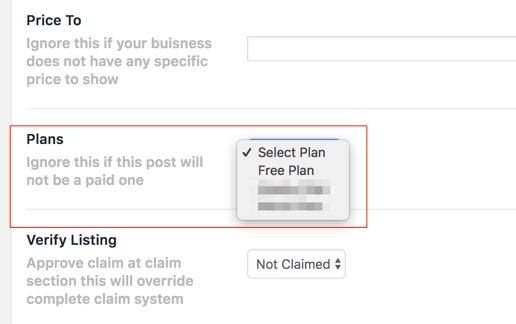
When adding or editing a listing from backend you won’t have an option to select a pricing plan. The good news is that the option is there but it’s hidden so only who needs it and understands the consequences of changing this setting must enable it.
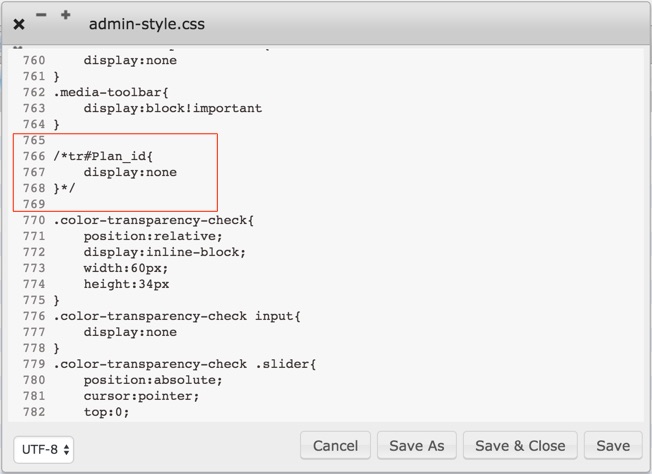
STEP 1: Go to wp-content\themes\listingpro\assets\css\admin-style.css
STEP 2: Scroll down to line 765
STEP 3: Hide or remove the following css.
tr#Plan_id {display:none}
To temporarily enable this feature simply add /* before and */ at the end. See below for example.
/* tr#Plan_id {display:none} */

STEP 4: Verify the pricing plan option is visible in the backend when you edit any listing.

How to start an Ad Campaign
Ad campaign allows listing owners to generate more leads and promote their business listings. In addition to Paid Listing and Paid Claim, this is another channel to generate revenue for the site admin. Ads campaign can be run based on the price, duration, available placements along with other options.
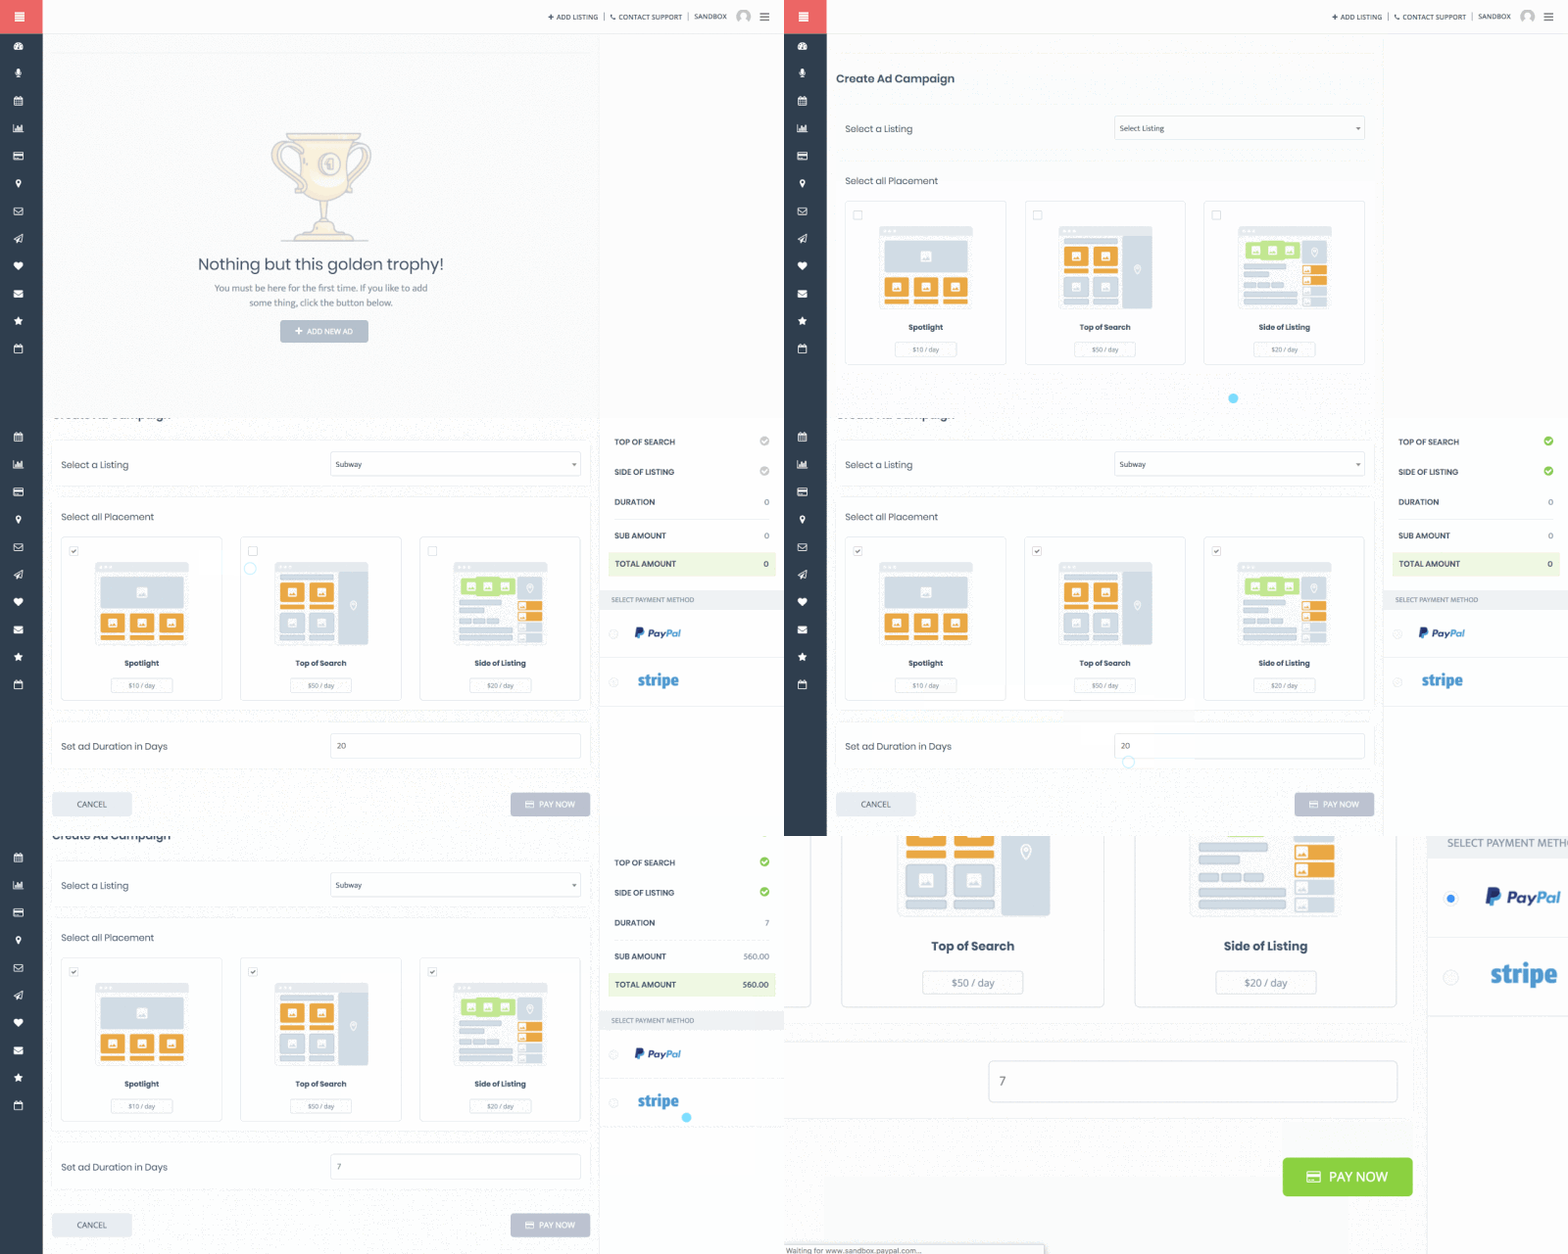
STEP 1: Go to User Dashboard > Ad Campaigns

STEP 2: Click + Add New AD
STEP 3: Click Let’s Get Started on the pop-up.
STEP 4: Click Select Listing drop-down, and find a your published listing.
STEP 5: Choose from THREE (3) Ad placement options: Spotlight, Top of Search and Sidebar.

- Spotlight Ads are handled by WPBakery custom element. Can be inserted on almost any page using
- Top of Search Ads Automatically displays on top of the organic search result in a set of TWO (maximum) ads at a time and are distributed evenly.
For example, If John is searching for Photographers in San Jose CA, then your ads will appear on top of organic results only if you happen to be offering Photography service in San Jose.
- Sidebar Ads are handled form Widgets and can be displayed on the Listing details page and Archive (search result) page.
- To display Sidebar Ads, go to WP Admin > Appearance > Widgets
- For Listing Details page drag ListingPro – Ads Listing widget to Listing Details Sidebar
- For Listing Archive page drag ListingPro – Ads Listing widget to Listing Archive Sidebar
- To display Sidebar Ads, go to WP Admin > Appearance > Widgets
STEP 6: Set the campaign duration in days. (Example: Enter just 7 for 1 Week)
STEP 7: Select a payment method.
STEP 8: Click Pay Now
